28
CUSTOMER/OPERATOR SERVICE
Manual 0-2577
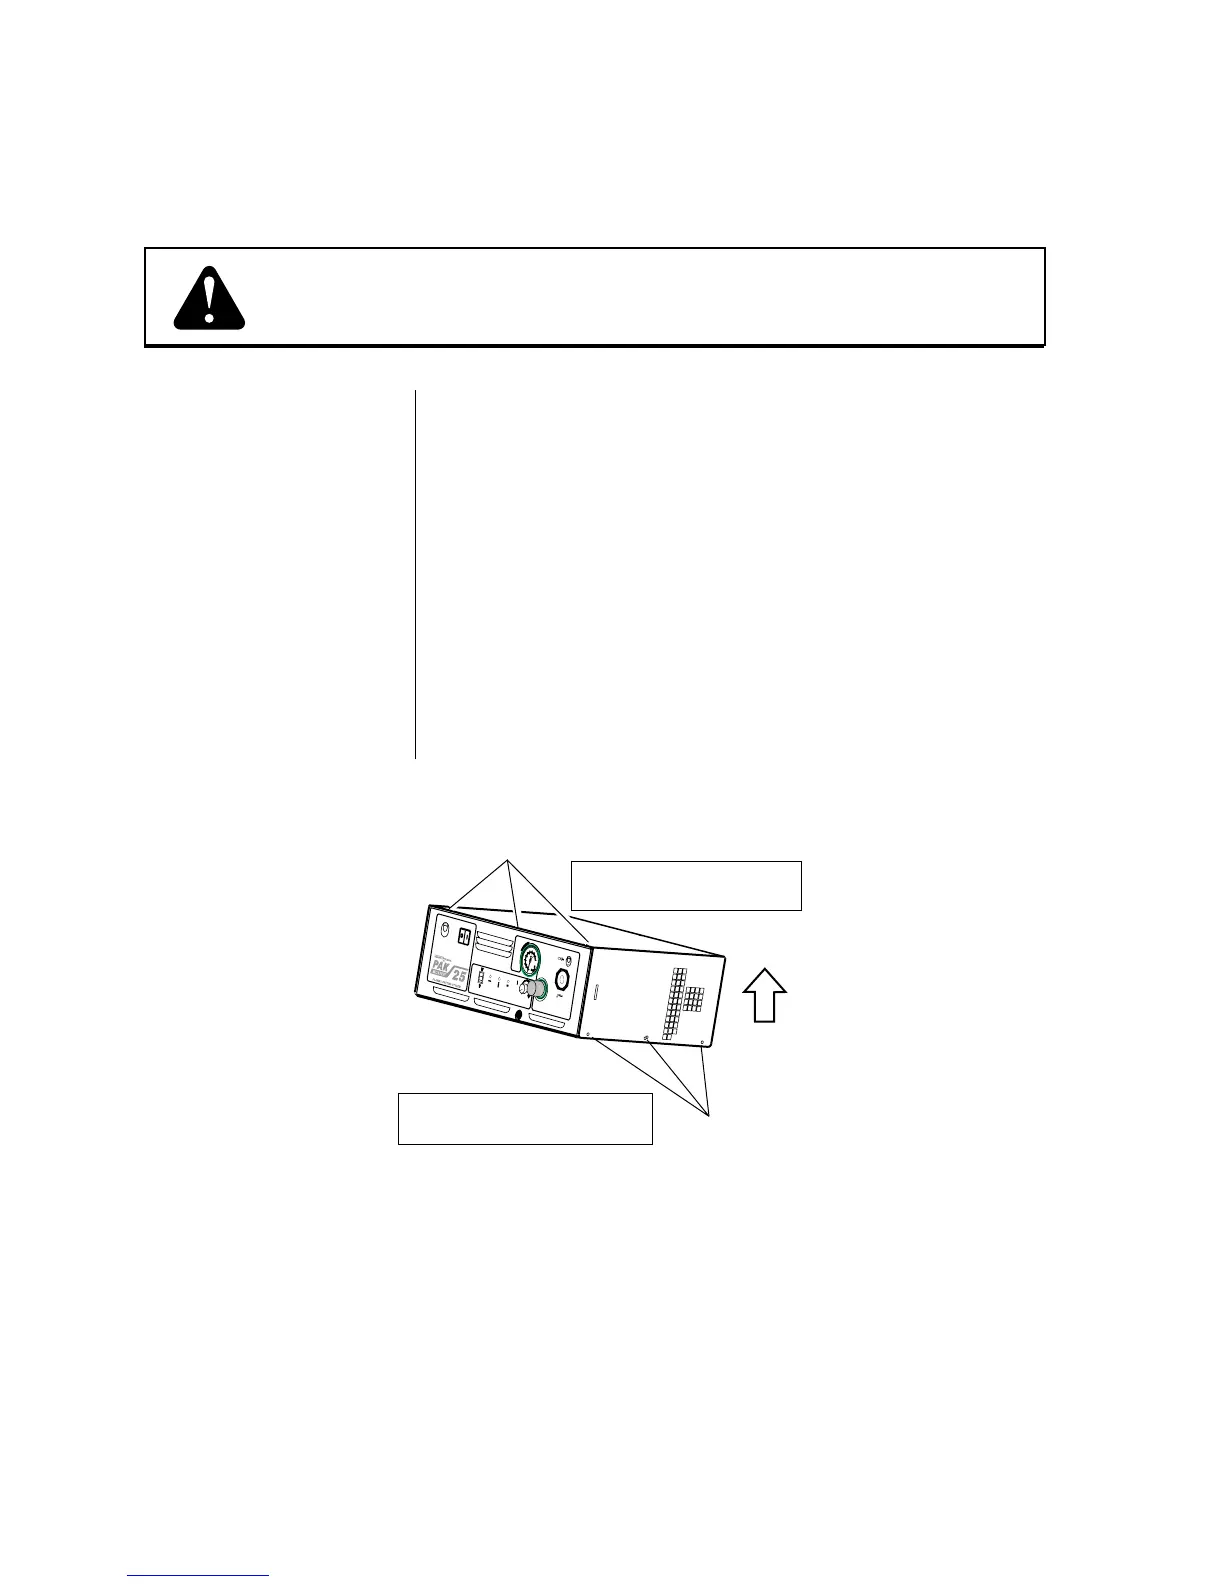
4.8 REPLACING TORCH AND LEADS
Disconnect primary power to the system before disassembling
the torch, leads, or power supply.
Refer to Figure 4-G and:
1. Swing the handle into the forward position before removing
any hardware.
2. Remove the six screws on the top of the unit and six screws
on the sides of the unit.
Do not remove the two screws holding the handle to the case or
the single screw on the rear panel.
3. Slide the cover straight up and off the power supply. Pivot
the cover over the torch lead, work lead, and power cord and
rest the cover in front of the power supply.
Make certain not to strain the ground wire connection to the
cover of the power supply.
WARNING
Open Power Supply
Enclosure
NOTE
NOTE
Figure 4-G Opening Power Supply for Torch Leads Replacement
6 Screws
On Top Of Unit
6 Screws
(3 Per Side)
Do Not Remove
Single Screw At Rear Panel
Lift Cover
A
C
P
O
W
E
R
I
N
P
U
T
P
O
W
E
R
P
R
E
S
S
U
R
E
T
O
R
C
H
W
O
R
K
O
P
E
R
A
T
IN
G
P
R
E
S
S
U
R
E
5
0
P
S
I
(3
.
4
B
A
R
)
C
U
R
R
E
N
T
R
U
N
S
E
T
A
C
G
A
S
D
C
1
2
2
0
Made in the USA
R
R
A-01296
Do Not Remove Handle Screw
(Handle Not Shown)