24
CUSTOMER/OPERATOR SERVICE
Manual 0-2577
4.7 SERVICING TORCH HEAD COMPONENTS
WARNING
WARNING
Tools Required
Removing Torch Head
Disconnect primary power to the system before disassembling
the torch, leads, or power supply.
NEVER touch any internal torch parts while the AC indicator
light on the front panel of the control module is lit.
(1) No. 1 Phillips Head Screwdriver
(2) 1/4 in Open End Wrenches
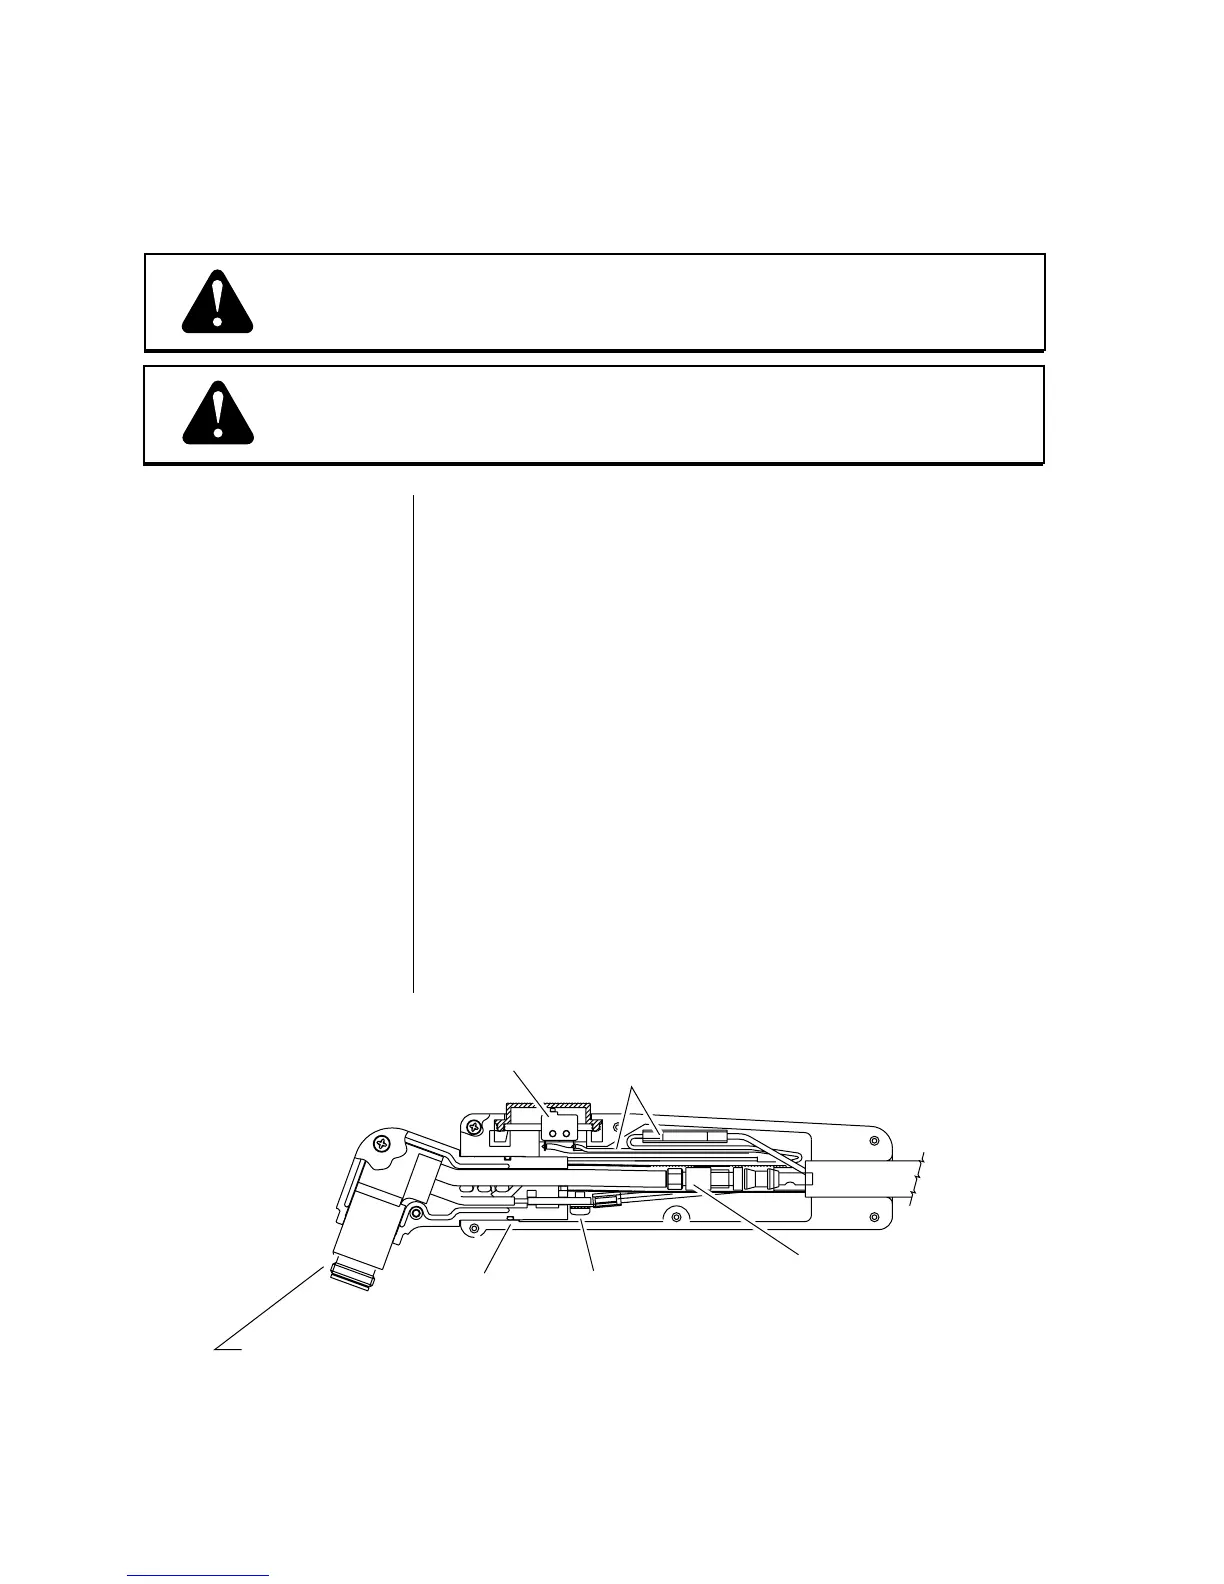
Refer to Figure 4-D and:
1. Remove the six screws from the torch handle assembly. Pull
the cover off the handle to expose the leads and torch
switch/PIP connections.
Refer to Figure 4-E and:
2. Disconnect the negative/plasma and pilot lead connection at
the torch head.
3. Slip off the rear O-Ring, remove the two screws from the
torch head housing, and seperate the halves. Remove the
torch head from the housing.
4. Carefully remove the torch switch and switch button from
the handle. Make sure the two small springs stay in place on
the switch button. Do not disturb the PIP wiring in the torch
head housing.
Figure 4-D PCH-25 Torch Head Assembly in Handle
Remove consumables from front end
and remove screws to allow disassembly
Negative/Plasma
Lead Connection
Torch Handle
O-Ring
Pilot Lead Connection
PIP/Torch Switch
Connections
Torch Switch
A-00781