3-10
AXLE ASSEMBLY 3.5
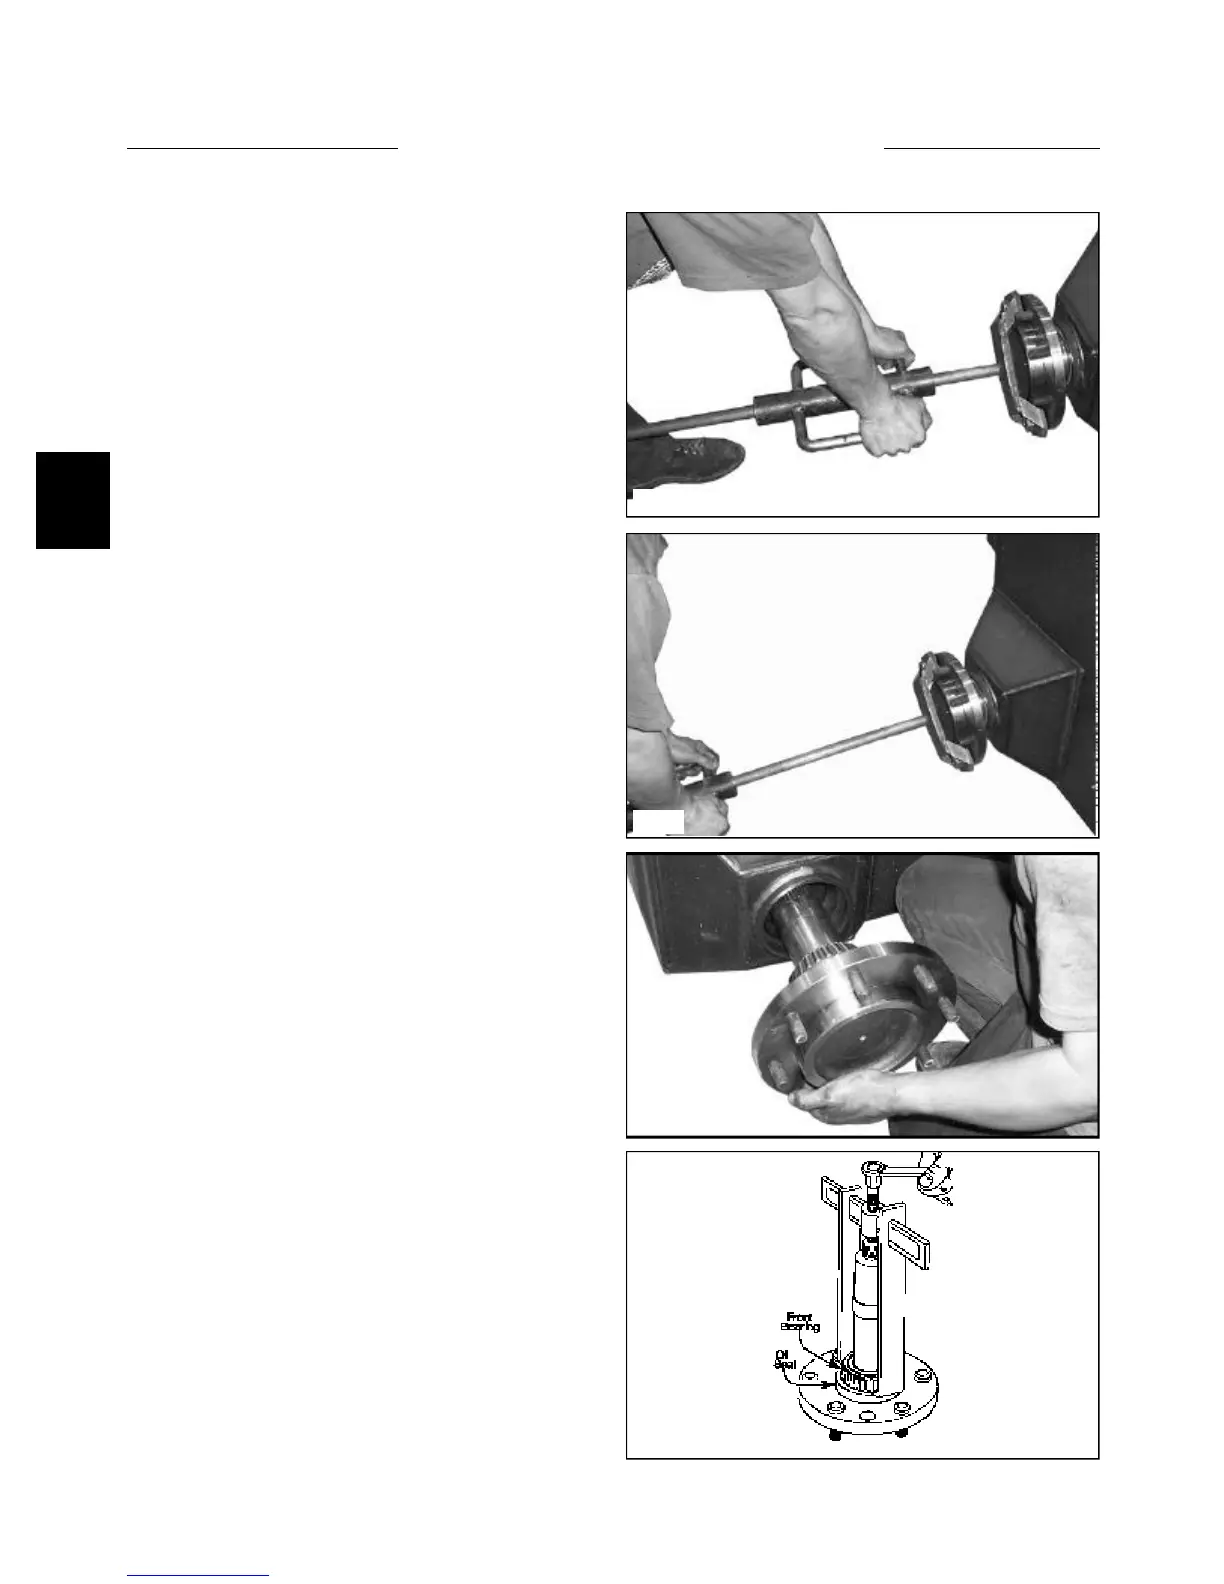
14 Attach a special axle puller tool, Thomas P/N
957372, to the axle flange wheel studs using the wheel
nuts that are on the loader. (fig. C3807)
15 Using the slide hammer action of the special puller,
remove the axle. The rear bearing and axle sprocket will
remain in the final drive housing.
16 Remove the axle sprocket and bearing from the final
drive housing through the inspection cover area.
C3807
C3669
C221
17 Using a bearing puller, remove the bearing still
pressed in place on the axle. (fig. C3842, C3669)
18 Remove and discard the axle oil seal.
1 Inspect the seal surface area for scaring, pitting or
nicks. Minor scratches may be removed using fine emery
cloth. Replace the axle if worn excessively.
2 Inspect the axle threads for damage. Replace axle if
the threads are non serviceable.
3 Inspect axle spline for wear and replace if necces-
sary.
4 Replace any axle studs as required (page 3-13)
5 Inspect the axle sprocket for abnormal tooth wear
and inspect sprocket spline for wear. Replace the sprocket
if necessary.
6 Inspect the bearing races in the final drive housing.
Replace them if necessary using a brass drift punch and
hammer. Cooling the replacement races in a freezer will
aid in using this procedure.
7 Replace the bearings if new races are installed or if
they are pitted or damaged.
Inspection
C3842