5-15
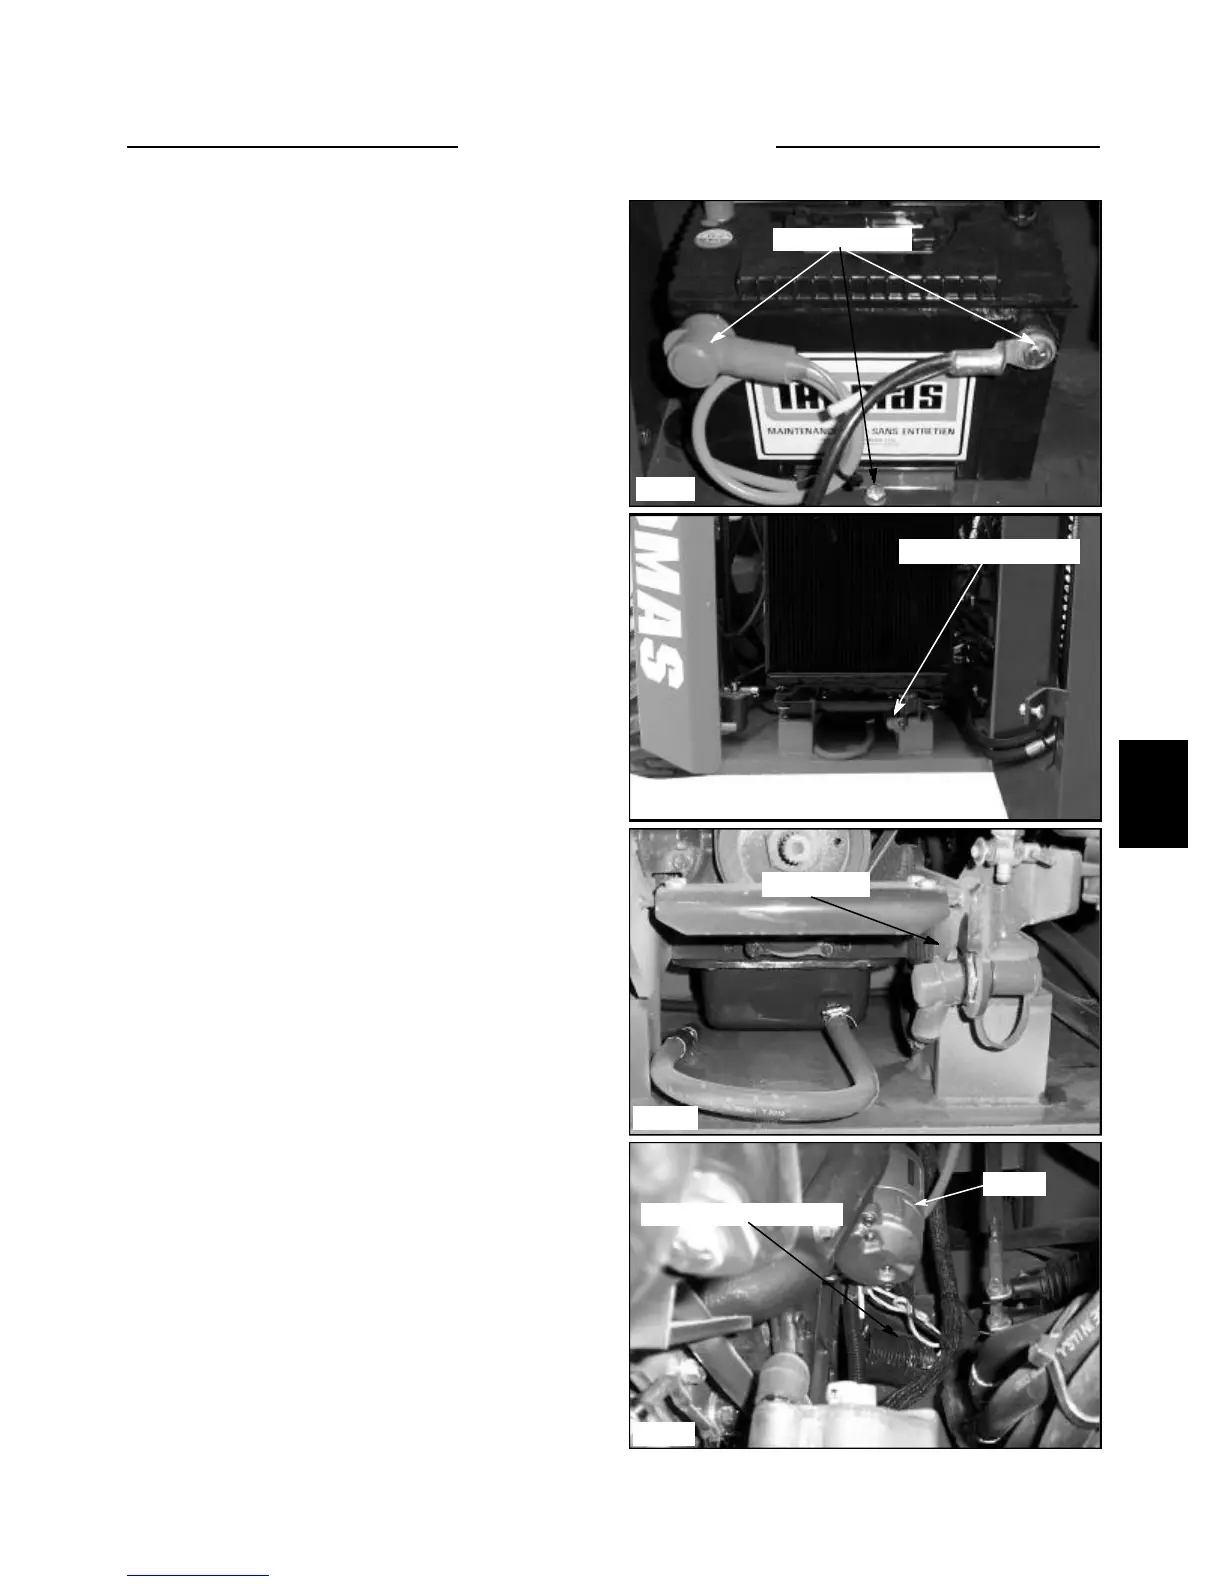
BATTERY 5.6
Removal and Inspection
C3585
C3586
C3633
C3587
10 Inspect the battery case for cracks that may allow
electrolyte to leak into the environment.
Inspect the batteries on a regular basis for damage such as
cracks or a broken case.
Inspect the battery cables for tightness and corrosion.
Remove any corrosion and coat the terminals with a
dielectric grease.
Check the battery hold downs to be sure they are properly
retaining the battery in the compartment. (fig. C3585)
Boosting
Circuit Breaker
Check and clean
In the event the loader has failed to start and requires
boosting, a boosting lug or post is located in the engine
compartment. (fig. C3586)
1 Open the rear door and raise the engine compartment
cover.
2 Remove the red rubber protective cover from the
boosting lug. (fig. C1029)
3 The ignition must be in the off position.
4 Connect the positive cable from the 12 volt boosting
supply to the boosting lug on the loader.
5 Connect the negative ground cable to the boosting
supply first, and then to a clean ground on the loader
engine. Keep the cables away from any moving parts.
6 Start the engine.
7 Remove the negative ground cable from the engine
first and then the boosting supply. Remove the positive
cable from the boosting lug.
The circuit breaker is located in the engine harness, right
hand side of engine. (fig. C3587) The circuit breaker is
covered by loom and is not immediately visible to the
eye.
1 Disconnect the battery grounds before testing or
replacing the circuit breaker.
2 Strip the loom covering back to access the circuit
breaker.
3 Remove the 2 nuts retaining the wires to the circuit
breaker.
4 Using an ohmmeter, connect a lead to each of the
stud terminals and take a reading.
Low resistance is normal.
High resistance means the circuit breaker is defective and
must be replaced.
Boosting lug location
Boosting lug
Circuit breaker location
Starter