3-2
Chapter 3
INSTALLATION AND SETTING PROCEDURES (HARDWARE)
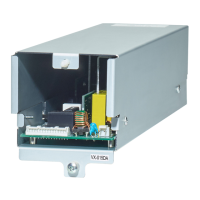
1. VX-015DA, VX-030DA, AND VX-050DA DIGITAL POWER AMPLIFIER MODULE
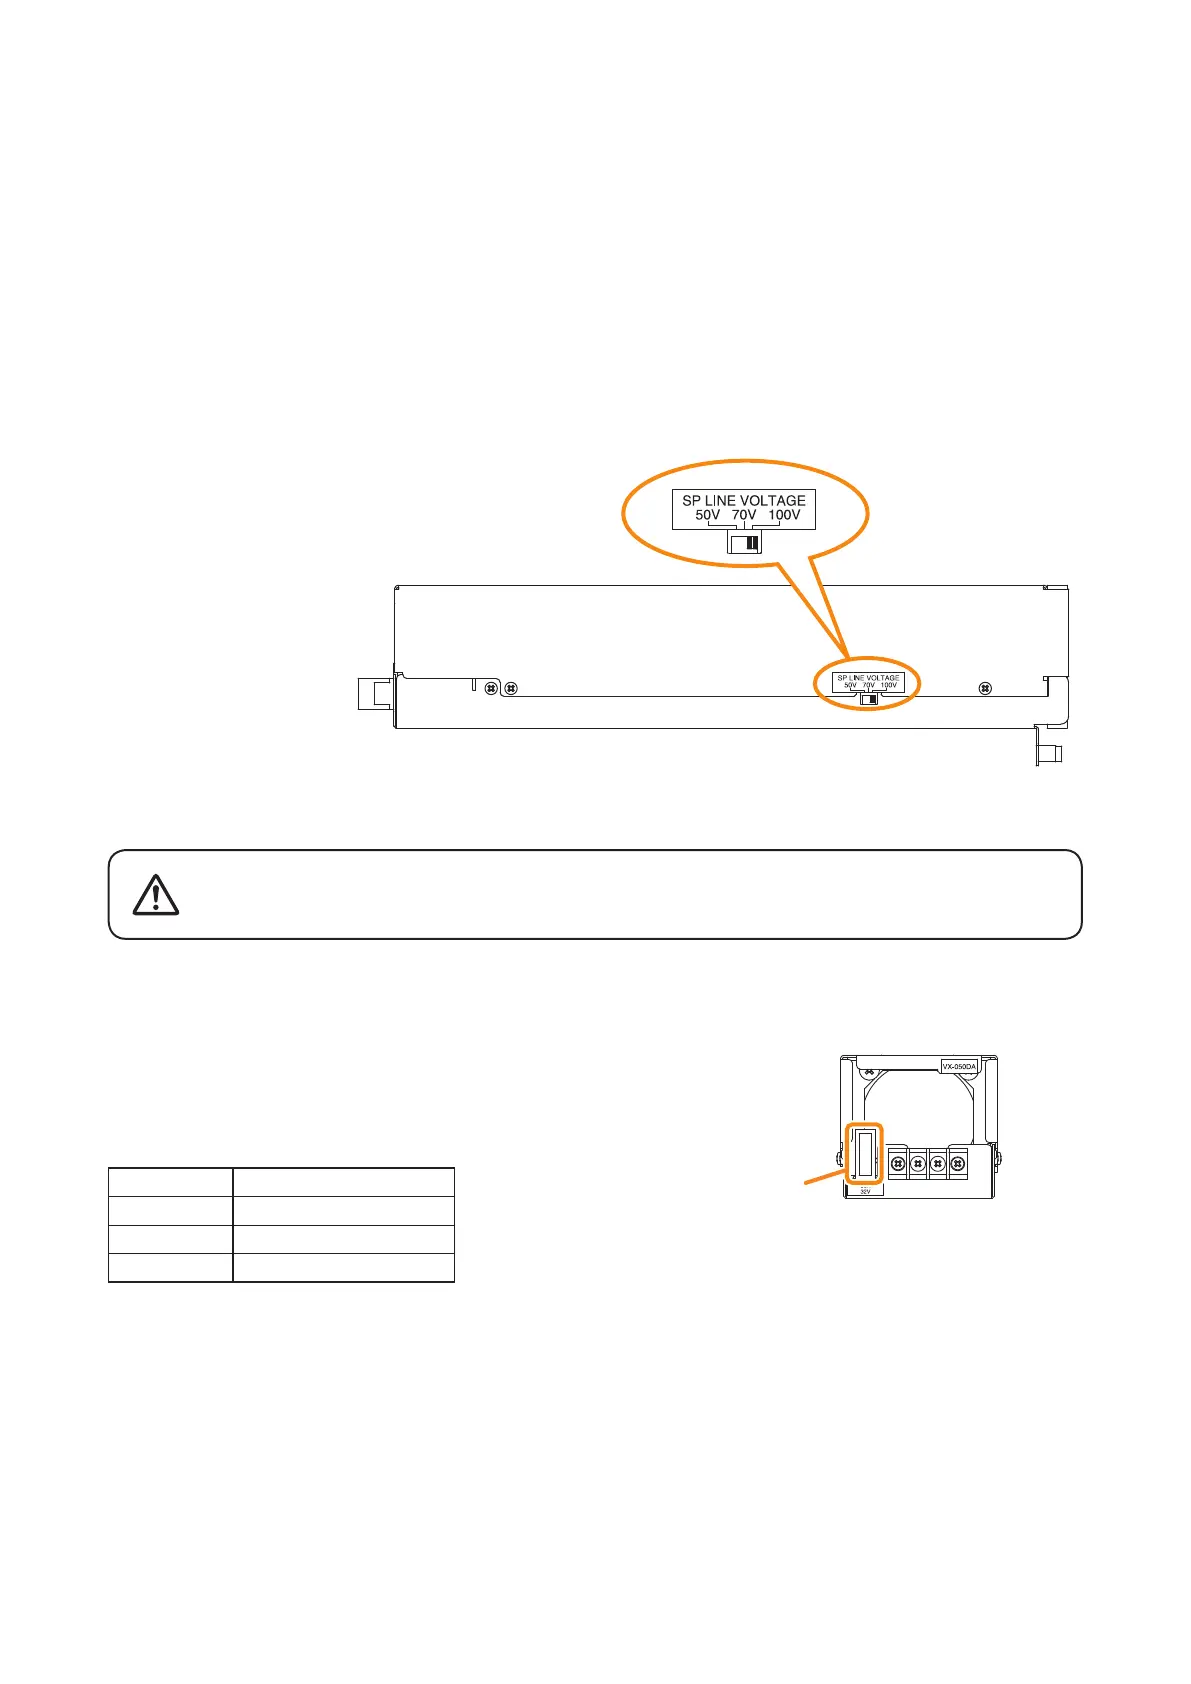
1.1. Changing the Speaker Line Voltage
Though the speaker line voltage of the VX-015DA, VX-030DA, and VX-050DA is factory-preset to 100 V, you
can change it to 50 V or 70 V with the output voltage selection switch on the power amplier's side.
Note
The speaker line failure detection functions are designed to perform on a 100-volt line of speaker.
For the methods using a 70- or 50-volt line, please consult your TOA dealer.
1.2. Replacing the Blade Fuse
When the blade fuse blew, replace it with new one following the procedures below.
Step : Replace the blade fuse on the rear panel.
Tip
You can replace the fuse with the amplier module installed in the VX-3000F.
[Capacity]
Model No. Capacity
VX-015DA Blade-Type Fuse 10 A
VX-030DA Blade-Type Fuse 20 A
VX-050DA Blade-Type Fuse 30 A
VX-015DA/030DA/050DA side
Output voltage selection switch
Fuse
VX-015DA/030DA/050DA rear
Be sure to switch off the amplifier's power when replacing the fuse.
Inserting or removing the fuse with the amplifier's power on may cause
personal injury.
WARNING