3-43
Chapter 3
INSTALLATION AND SETTING PROCEDURES (HARDWARE)
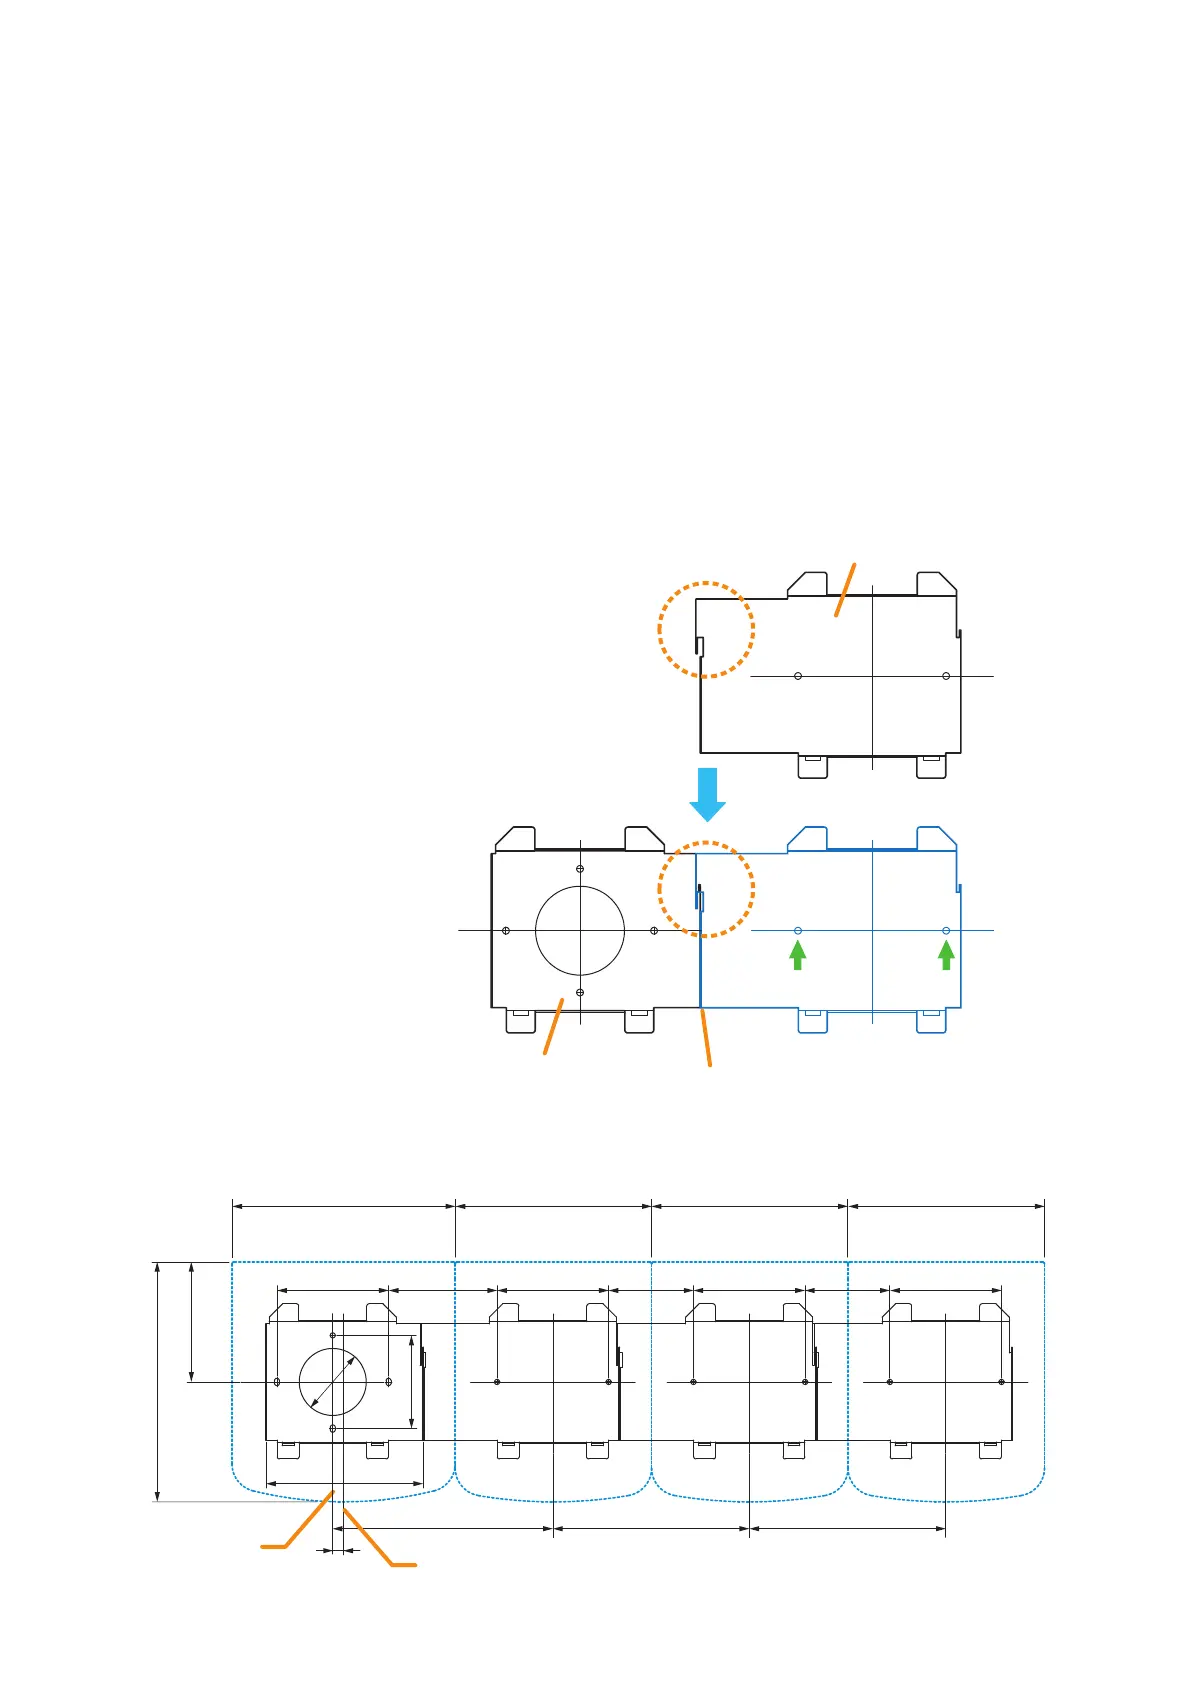
6.13. Installing the RM-320F on a Wall (RM-200SF only)
The RM-320F is designed for on-wall installation.
When adding an RM-320F Remote Microphone Extension to expand the RM-200SF, use the RM-320F's
Extension cable and included Linkage Bracket to link the 2 microphones.
Up to 4 RM-320Fs can be connected to an RM-200SF.
[Mounting hardware]
To mount the RM-320F on the wall, the following parts are required.
Wall mount bracket unit .............................................................. 1 (supplied with the RM-320F)
Wall mounting screws
4 x 25 tapping screw for wooden wall .................................... 2 (supplied with the RM-320F)
Step 1. Install the wall mount bracket unit supplied with the RM-200SF on the wall. (See p. 3-40 and p. 3-41,
Steps 1 and 2.)
Step 2. Place the RM-320F's bracket so that it ts in
the RM-200SF's bracket as shown below. Then,
x the RM-320F's bracket to the wall with the
supplied 2 tapping screws.
Slide the RM-320F’s bracket
to link at this joint.
Align both
bracket edges.
Wall mount bracket for the RM-320F
Wall mount bracket unit
for the RM-200SF
(secured to the wall)
Use 2 mounting holes indicated by
arrows to secure the bracket.
[Positional dimensions of the RM-200SF and RM-320F]
200
100
141.2
100 76 100 76 10097.2
215
107.6
83.5
ø60
176
176197.2
Center line of the RM-200SF
Center line of
the bracket unit
9.7
176
[RM-200SF] [RM-320F]
176
[RM-320F]
176
[RM-320F]