3-13
Chapter 3
INSTALLATION AND SETTING PROCEDURES (HARDWARE)
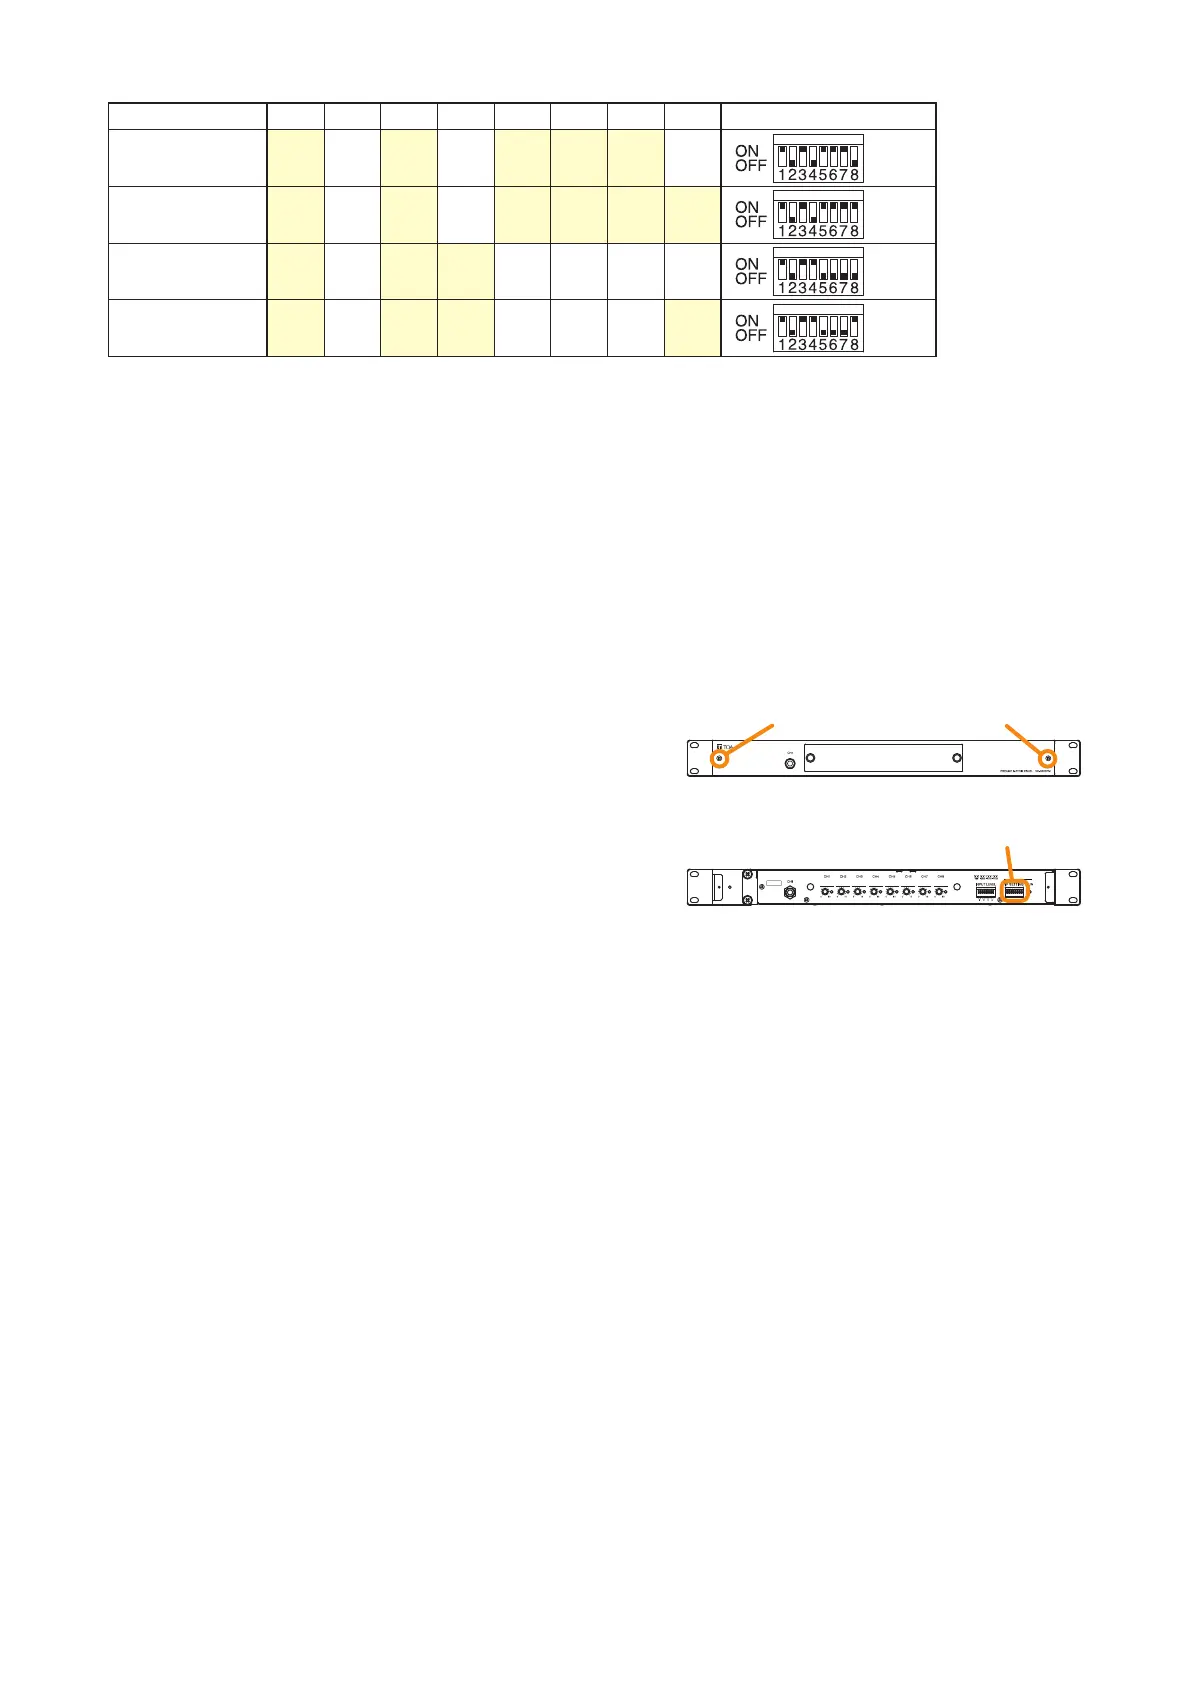
IP address SW1 SW2 SW3 SW4 SW5 SW6 SW7 SW8 IP address setting switch
192.168.14.97 ON OFF ON OFF ON ON ON OFF
192.168.14.98 ON OFF ON OFF ON ON ON ON
192.168.14.99 ON OFF ON ON OFF OFF OFF OFF
192.168.14.100 ON OFF ON ON OFF OFF OFF ON
[IP address setting]
To set the VX-3000PM's IP address, change the IP address setting switch conguration with the following
procedures.
Notes
• Placing Switch 1 in the OFF position disables the settings performed using Switches 2 through 8.
In this case, the IP address uploaded by the VX-3000 Setting Software becomes valid.
• The IP address setting switch allows the IP address to be set only in the range of "192.168.14.51" to
"192.168.14.100". If you wish to set IP address out of this range, set it using the VX-3000 Setting Software.
(See the separate Setting Software Instructions, "UNIT DETECTION AND NETWORK SETTINGS.")
Step 1. Detach the front panel.
Loosen 2 front panel xing screws to detach the
front panel.
Step 2. Place Switch 1 of the IP address setting switch in
the ON position, then Switches 2 through 8 in the
positions corresponding to the desired IP address.
Step 3. Replace the front panel.
Secure it using 2 xing screws for front panel.
Step 4. (Only when the IP address has been reset after power-on) Reactivate the VX-3000PM.
Stop supplying the power to the VX-3000PM, then supply the power again. Otherwise, reactivate the
unit using the VX-3000 Setting Software. (See the separate Setting Software Instructions, "Restarting
VX-3000 Unit.")
Fixing screws for front panel
VX-3000PM front
IP address setting switch
VX-3000PM front (front panel detached)