47
PREPARATIONS
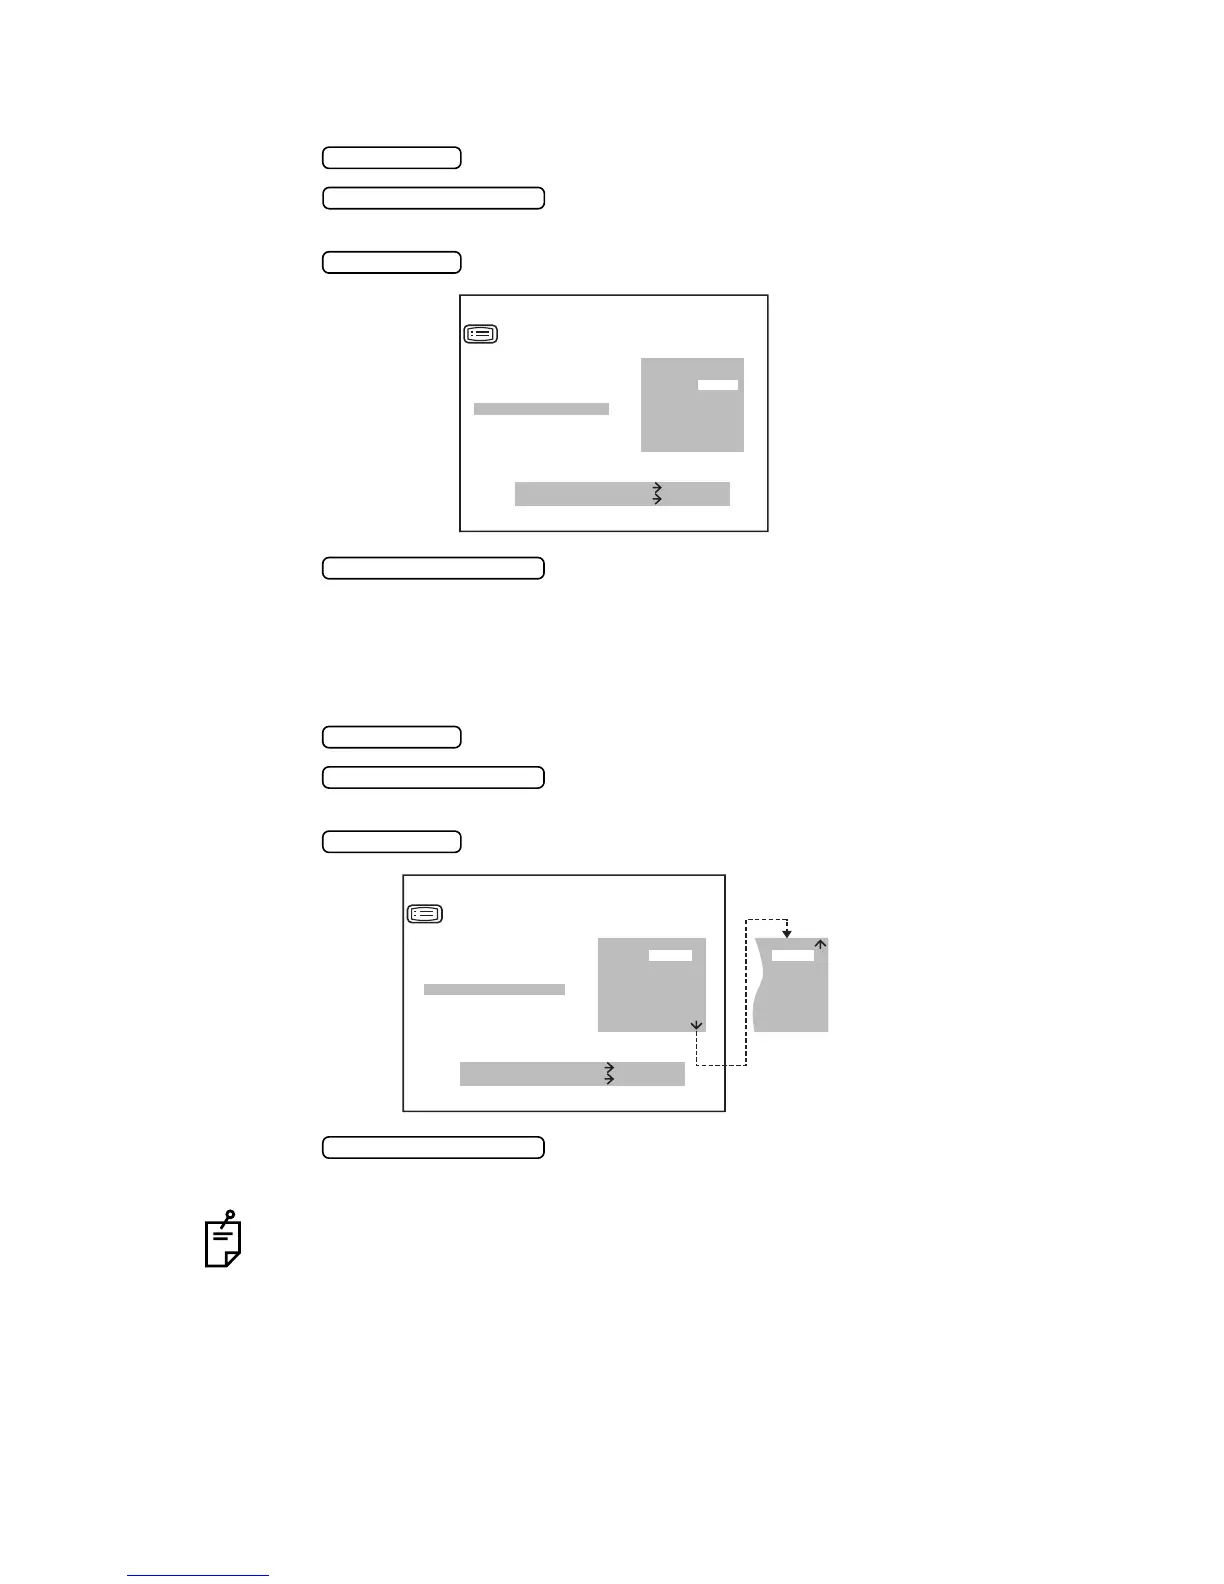
SETTING OUTPUT DATA
The RS232C output can be set. Before shipment, it is set to “NO” (no output).
1 Press the of the control panel and get the “SETTING MENU SCREEN”.
2 Press the and invert “OUTPUT DATA”.
“YES” and “NO” are displayed on the right.
3 Press the and invert “YES” for RS232C output.
4 Press the ,and the cursor moves to the next item(ADD).
SETTING ADD
By choosing an age, an ordinary additional power (ADD) can be selected for the age. Before
shipment, it is set to “NO” (no setting).
1 Press the of the control panel and get the “SETTING MENU SCREEN”.
2 Press the and invert “ADD”.
The age bracket is displayed with the set bracket inverted on the right.
3 Press the and invert the desired age bracket.
4 Press the ,and the cursor moves to the next item(DATE/TIME).
For “ADD”setting, set “ADD MODE” to “YES” in the initial set screen.
To set “ADD MODE” to “YES”, see “ADD FACTOR” on page 26.
MENU SWITCH
MEASUREMENT SWITCH
PRINT SWITCH
MEASURE SWITCH ITEM
PRINT SWITCH SELECT
STEP
AXIS STEP
VD
CONT.MEAS.
OUTPUT DATA
YES
NO
SETTING MENU
MEASUREMENT SWITCH
MENU SWITCH
MEASUREMENT SWITCH
PRINT SWITCH
MEASURE SWITCH ITEM
PRINT SWITCH SELECT
AXIS STEP
VD
CONT.MEAS.
OUTPUT DATA
50-54
ADD
45-49
SETTING MENU
NO
40-44
65-69
70-74
55-59
60-64
MEASUREMENT SWITCH