EngineMaintenance
AirCleanerMaintenance
•Checktheaircleanerbodyfordamagewhichcouldcause
anairleak.Replaceifdamaged.Checkthewholeintake
systemforleaks,damageorloosehoseclamps.
•Servicetheaircleanerlteronlywhentheservice
indicatorrequiresitorevery400hours(morefrequently
inextremelydustyordirtyconditions).Changingtheair
lterbeforeitisnecessaryonlyincreasesthechanceof
dirtenteringtheenginewhenthelterisremoved.
•Besurethecoverisseatedcorrectlyandsealswiththe
aircleanerbody.
ServicingtheAirCleaner
ServiceInterval:Beforeeachuseordaily
Every400hours
Checktheaircleanerbodyfordamagewhichcouldpossibly
causeanairleak.Replaceadamagedaircleanerbody.
Servicetheaircleanerlterswhentheaircleanerindicator
(Figure50)showsredorevery400hours(morefrequently
inextremelydustyordirtyconditions).Donotover-service
theairlter.
Besurethatthecoverissealingaroundtheaircleanerbody.
1.Pullthelatchoutwardandrotatetheaircleanercover
counterclockwise.Removethecoverfromthebody
(Figure50).Cleantheinsideoftheaircleanercover.
Figure50
1.Aircleanerindicator3.Aircleanercover
2.Aircleanerlatch
2.Beforeremovingthelter(Figure51),uselow
pressureair(40psi,cleananddry)tohelpremove
largeaccumulationsofdebrispackedbetweenoutside
ofprimarylterandthecanister.Avoidusinghigh
pressureairwhichcouldforcedirtthroughthelter
intotheintakearea.Thiscleaningprocessprevents
debrisfrommigratingintotheintakewhentheprimary
lterisremoved.
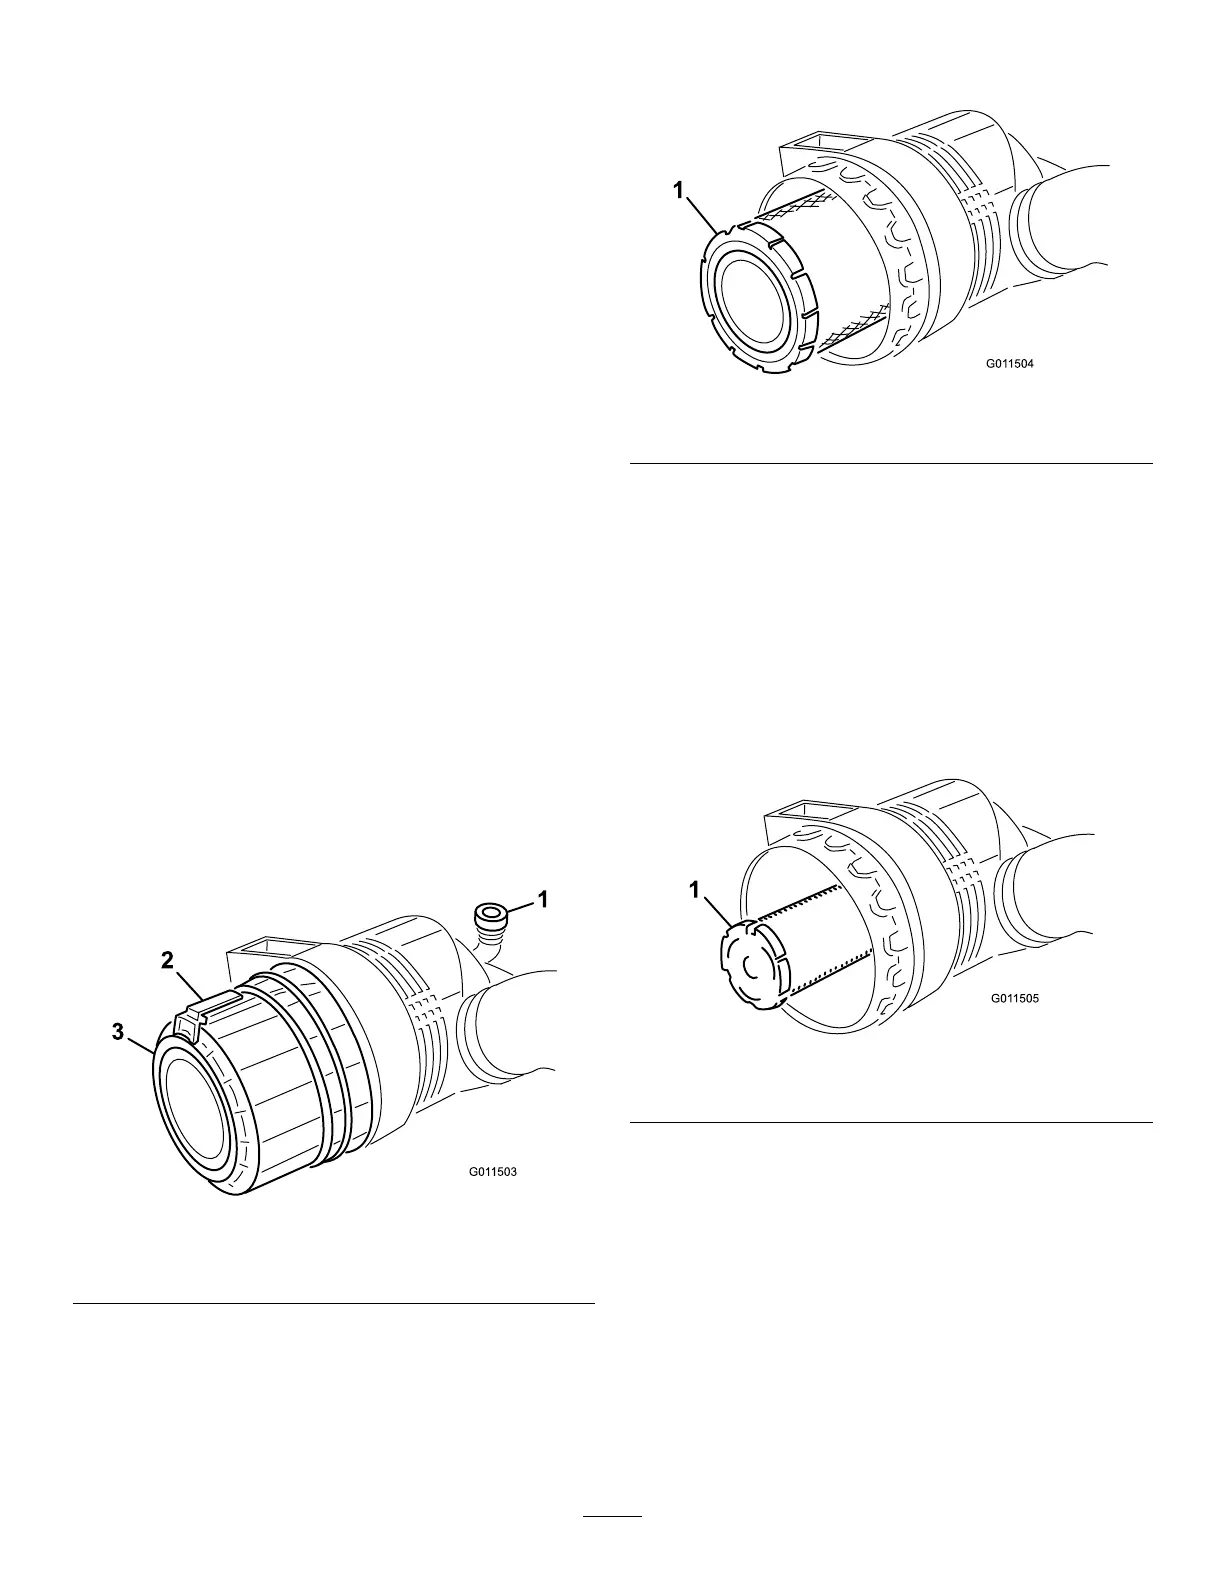
Figure51
1.Aircleanerprimarylter
3.Removeandreplacetheprimarylter.Cleaningofthe
usedelementisnotrecommendedduetothepossibility
ofdamagetotheltermedia.Inspectthenewlterfor
shippingdamage,checkingthesealingendofthelter
andthebody.Donotuseadamagedelement.Insert
thenewlterbyapplyingpressuretotheouterrimof
theelementtoseatitinthecanister.Donotapply
pressuretotheexiblecenterofthelter.
Important:Neverattempttocleanthesafetylter
(Figure52).Replacethesafetylterwithanew
oneaftereverythreeprimarylterservices.
Figure52
1.Aircleanersafetylter
4.Cleanthedirtejectionportlocatedintheremovable
cover.Removetherubberoutletvalvefromthecover,
cleanthecavityandreplacetheoutletvalve.
5.Installthecoverorientingtherubberoutletvalveina
downwardposition-betweenapproximately5:00to
7:00whenviewedfromtheend.
6.Resettheindicator(
Figure50)ifitshowsred.
36