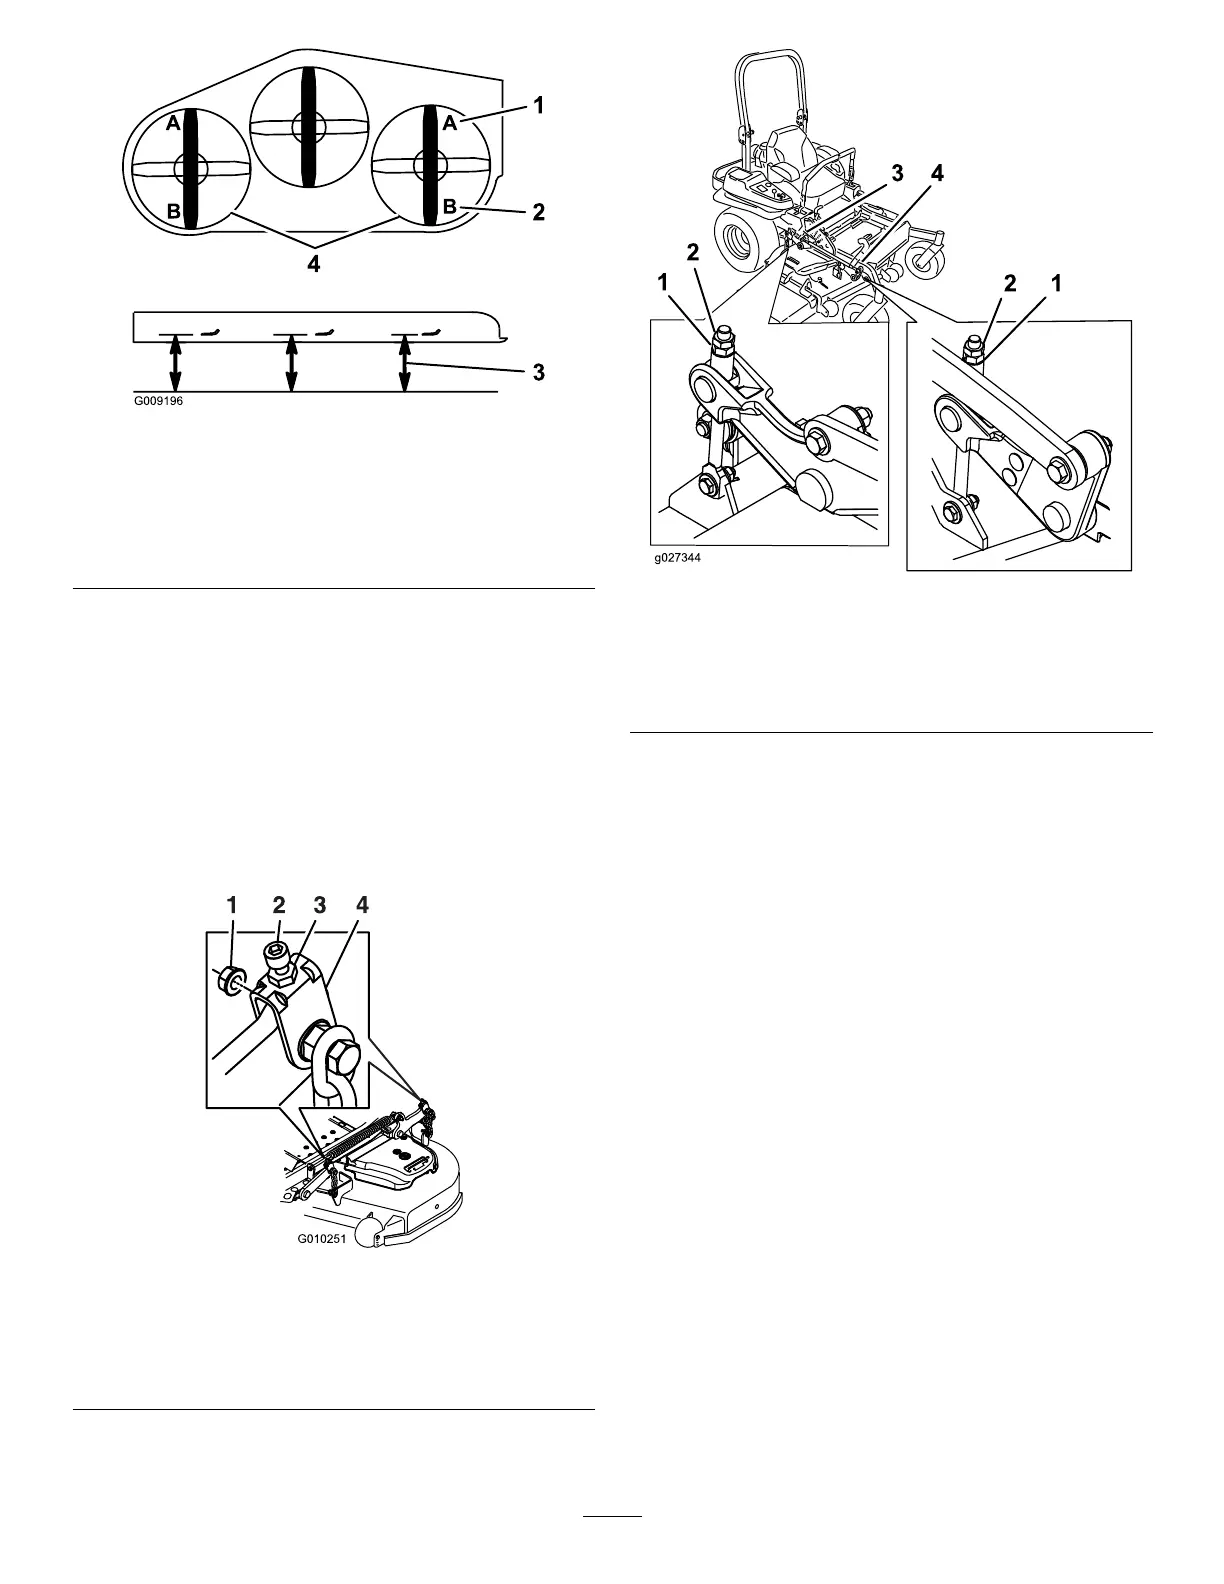
g009196
Figure 124
1. 7.6 cm (3 inch) at position
A is correct
3. Measure here from the
blade tip to the hard
surface
2. 8.3 cm (3-1/4 inch) at
position B is correct
4. Measure at position A and
B on both sides
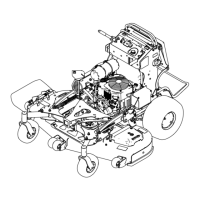
10. Fine-tune the adjustment nut on the front
deck-lift assembly by turning it ( Figure 125 or
Figure 126 ).
Note: T o increase the height, turn the
adjustment nut clockwise; to decrease the
height, turn the nut counterclockwise.
Note: If the front deck links do not have enough
adjustment to achieve accurate cut height, you
can use the single-point adjustment to gain
more adjustment.
g010251
Figure 125
5000 Series Machines
1. Adjustment nut 3. Rear deck adjustment
2. Jam nut 4. Front deck adjustment
g027344
Figure 126
6000 Series Machines
1. Adjustment nut 3. Rear deck adjustment
2. Jam nut 4. Front deck adjustment
1 1. T o adjust the single-point system, loosen the
2 bolts at the bottom of the height-of-cut plate
( Figure 127 ).
Note: For rear-discharge machines, the mower
deck is attached in the back holes at the factory .
Refer to Figure 128 . If needed, use the front
holes for further adjustment when leveling the
mower deck.
80