1.Stoptheengine,waitforallmovingpartstostop,and
removethekey.Engagetheparkingbrake.
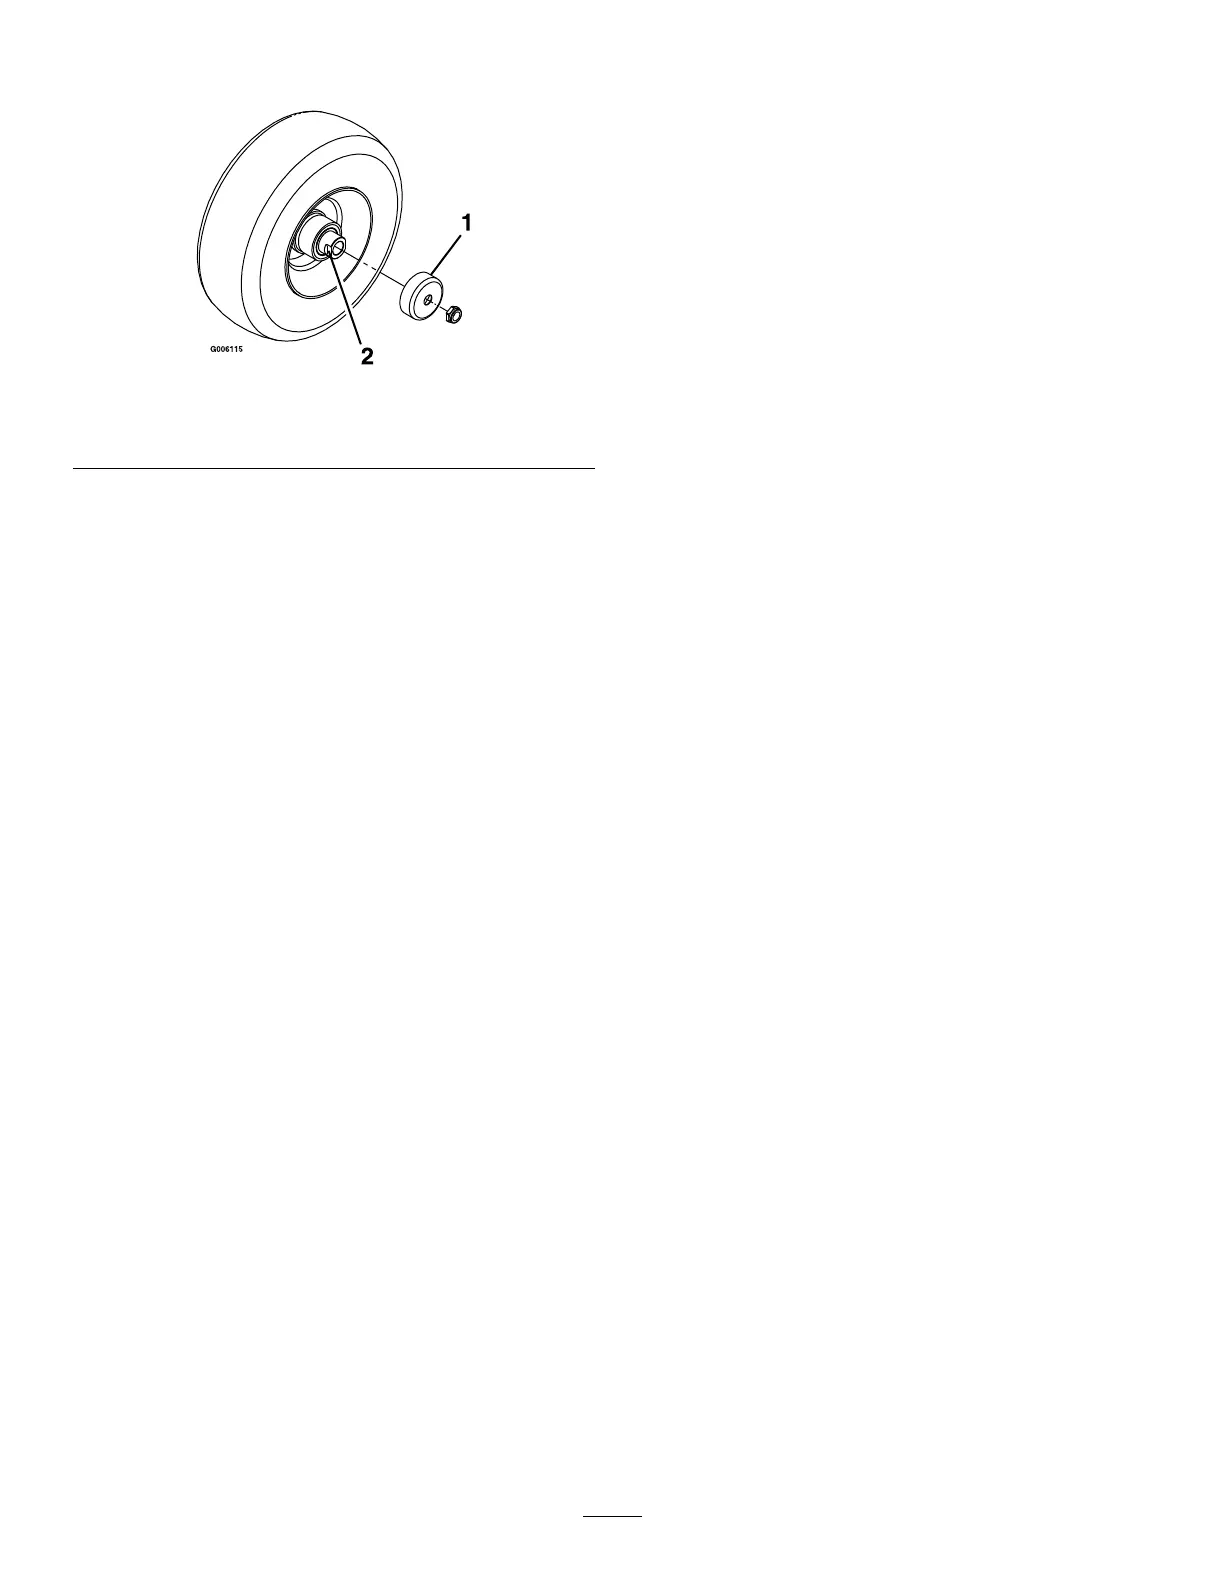
Figure41
1.Sealguard2.Spacernutwithwrench
ats
2.Removethecasterwheelfromthecasterforks.
3.Removethesealguardsfromthewheelhub.
4.Removeoneofthespacernutsfromtheaxleassembly
inthecasterwheel.Notethatthreadlockingadhesive
hasbeenappliedtolockthespacernutstotheaxle.
Removetheaxle(withtheotherspacernutstill
assembledtoit)fromthewheelassembly.
5.Pryoutseals,andinspectbearingsforwearordamage
andreplaceifnecessary.
6.Packthebearingswithageneral-purposegrease.
7.Insertonebearing,onenewsealintothewheel.
Note:Thesealsmustbereplaced.
8.Iftheaxleassemblyhashadbothspacernutsremoved
(orbrokenloose),applyathreadlockingadhesive
toonespacernutandthreadontotheaxlewiththe
wrenchatsfacingoutward.DoNotthreadspacer
nutallofthewayontotheendoftheaxle.Leave
approximately1/8inch(3mm)fromtheoutersurface
ofthespacernuttotheendoftheaxleinsidethenut.
9.Inserttheassemblednutandaxleintothewheelonthe
sideofthewheelwiththenewsealandbearing.
10.Withtheopenendofthewheelfacingup,llthearea
insidethewheelaroundtheaxlefullofgeneral-purpose
grease.
11.Insertthesecondbearingandnewsealintothewheel.
12.Applyathreadlockingadhesivetothe2ndspacernut
andthreadontotheaxlewiththewrenchatsfacing
outward.
13.Torquethenutto75-80in-lb(8-9N-m),loosen,then
re-torqueto20-25in-lb(2-3N-m).Makesureaxle
doesnotextendbeyondeithernut.
14.Reinstallthesealguardsoverthewheelhubandinsert
wheelintocasterfork.Reinstallcasterboltandtighten
nutfully.
Important:Topreventsealandbearingdamage,check
thebearingadjustmentoften.Spinthecastertire.The
tireshouldnotspinfreely(morethan1or2revolutions)
orhaveanysideplay.Ifthewheelspinsfreely,adjust
torqueonspacernutuntilthereisaslightamountof
drag.Reapplythreadlockingadhesive.
31