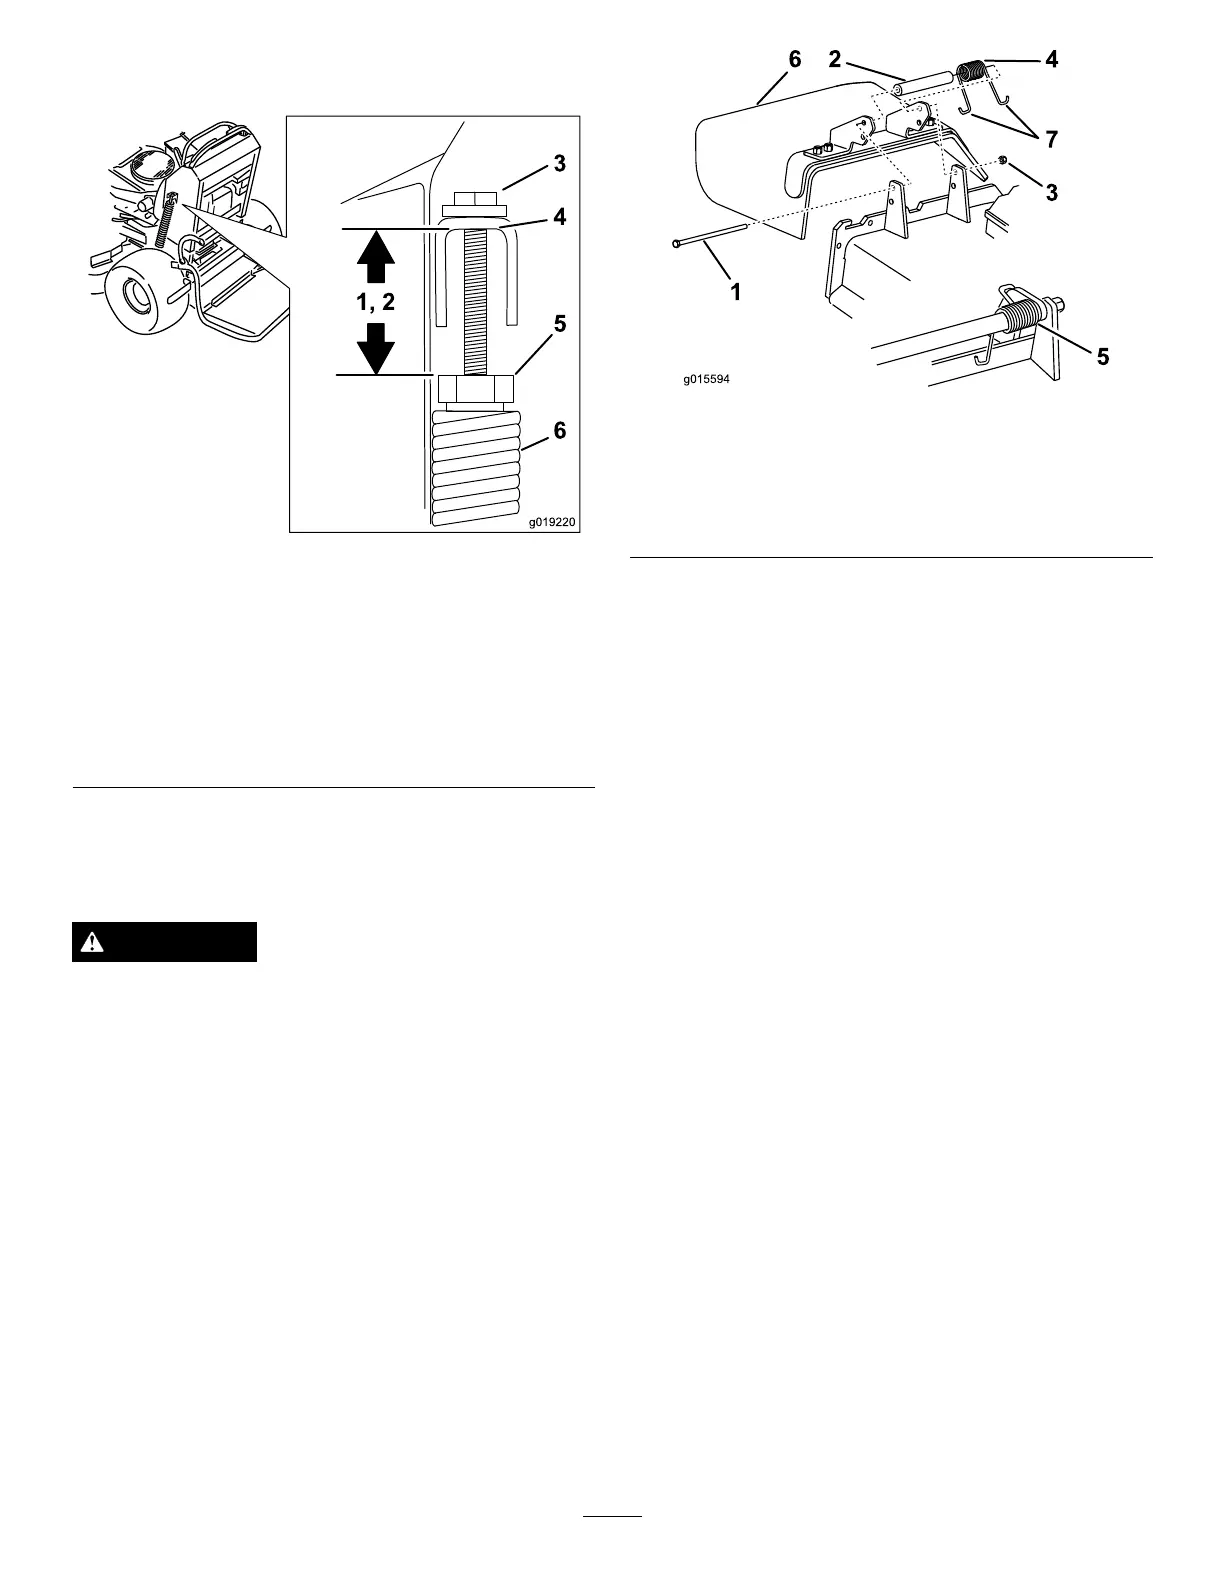
3.Ifneeded,adjustthedistancebyadjustingthebolton
topoftheU-bracket(Figure94).
Figure94
1.Lengthisbetween1.84to
1.96inches(47.0to50.0
mm)for48and52inch
mowerdecks
4.Bottomofthewelded
U-bracket
2.Lengthisbetween1.69to
1.81inches(43.0to46.0
cm)for60inchmower
decks
5.Springnut
3.Adjustmentbolt
6.Deckliftspring
4.Repeatthisprocedurefortheoppositedeckliftspring.
ReplacingtheGrassDeector
WARNING
Anuncovereddischargeopeningcouldallowthe
lawnmowertothrowobjectsintheoperator'sor
bystander'sdirectionandresultinseriousinjury.
Also,contactwiththebladecouldoccur.
Neveroperatethelawnmowerunlessyouinstalla
coverplate,amulchplate,grassdeectororbagger.
1.Removethelocknut,bolt,springandspacerholding
thedeectortothepivotbrackets(
Figure95).Remove
damagedorworngrassdeector.
Figure95
1.Bolt
5.Springinstalled
2.Spacer6.GrassDeector
3.Locknut
7.Jhookendofspring
4.Spring
2.Placespacerandspringontograssdeector.Placeone
Jendofspringbehinddeckedge.
Note:MakesureoneJendofspringisinstalled
behinddeckedgebeforeinstallingtheboltasshown
inFigure95.
3.Installboltandnut.PlaceoneJhookendofspring
aroundgrassdeector(Figure95).
Important:Thegrassdeectormustbeable
torotate.Liftthedeectoruptothefullopen
positionandensurethatitrotatesintothefull
downposition.
58