Workman GTX Electric Page 5 -- 9 Chassis
Adjustments
Adjust Parking Brake
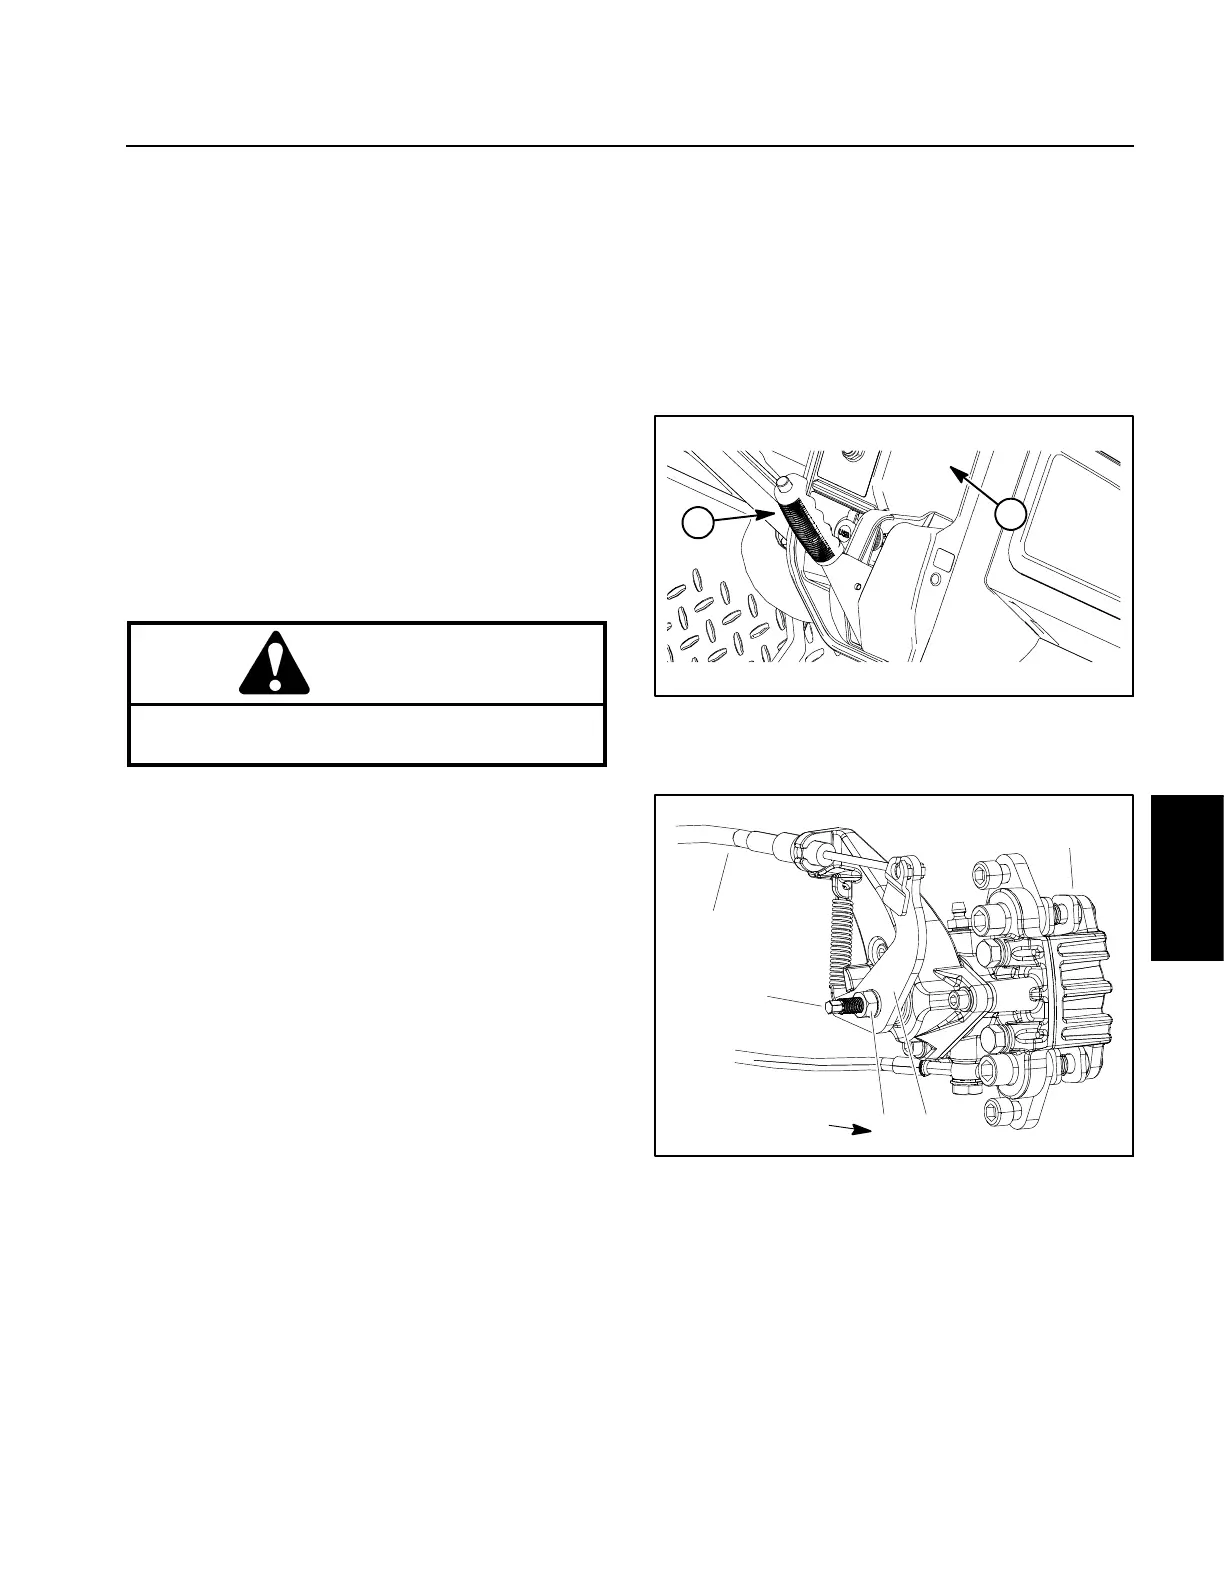
Checking Parking Brake (Fig. 6)
1. Apply parking brake with brake lever on dash.
2. There should be tension felt when applying the park-
ing brake within 4½”to6½”(11.4to16.5cm)mea-
sured from the ’P’ symbol that is molded into the
recessed dash area directly in front of the parking brake
lever.
3. If parking brake lever movement is incorrect, parking
brake adjustment is necessary.
Parking Brake Adjustment (Fig. 7)
1. Make sure that the vehicle is on a level surface and
that the parking brake is NOT applied.
WARNING
Before jacking up the vehicle, review and follow
Jacking Instructions in Chapter 1 -- Safety.
2. Chock front wheels to prevent vehicle movement.
Lift rear wheels off the ground using a jack and support
rear of vehicle with appropriate jack stands beneath the
frame.
3. Starting on one of the rear wheels, locate the parking
brake rod on the inside of the rear brake caliper.
4. Using two (2) wrenches, loosen lock nut on parking
brake rod while holding brake rodtopreventitfromrotat-
ing.
5. Making sure that lock nut stays loose on parking
brake rod, adjust brake rod until rear wheel rotates with
little evidence of brake drag on brake rotor.
6. Hold parking brake rod in place and secure adjust-
ment by tightening lock nut. Torque lo ck nut from 80 to
120 in--lb (9.1 to 13.5 N--m).
7. After securing parking brake adjustment, make sure
that rear wheel still rotates with little evidence of brake
drag.
8. Adjust other rear wheel using steps 4 to 7 above.
9. Check parking brake adjustment as described in
Checking Parking Brake on this page. Make additional
parking brake adjustments if necessary.
10.Lower vehicle to ground after brake adjustment is
complete.
1. Parking brake lever 2. Recessed dash area
Figure 6
2
1
Figure 7
1. Rear brake caliper (RH)
2. Parking brake cable
3. Parking brake rod
4. Lock nut
5. Parking brake lever
2
3
1
4
5
80 to 120 in--lb
(9.1 to 13.5 N--m)
Chassis

 Loading...