Workman GTX ElectricPage 5 -- 36Chassis
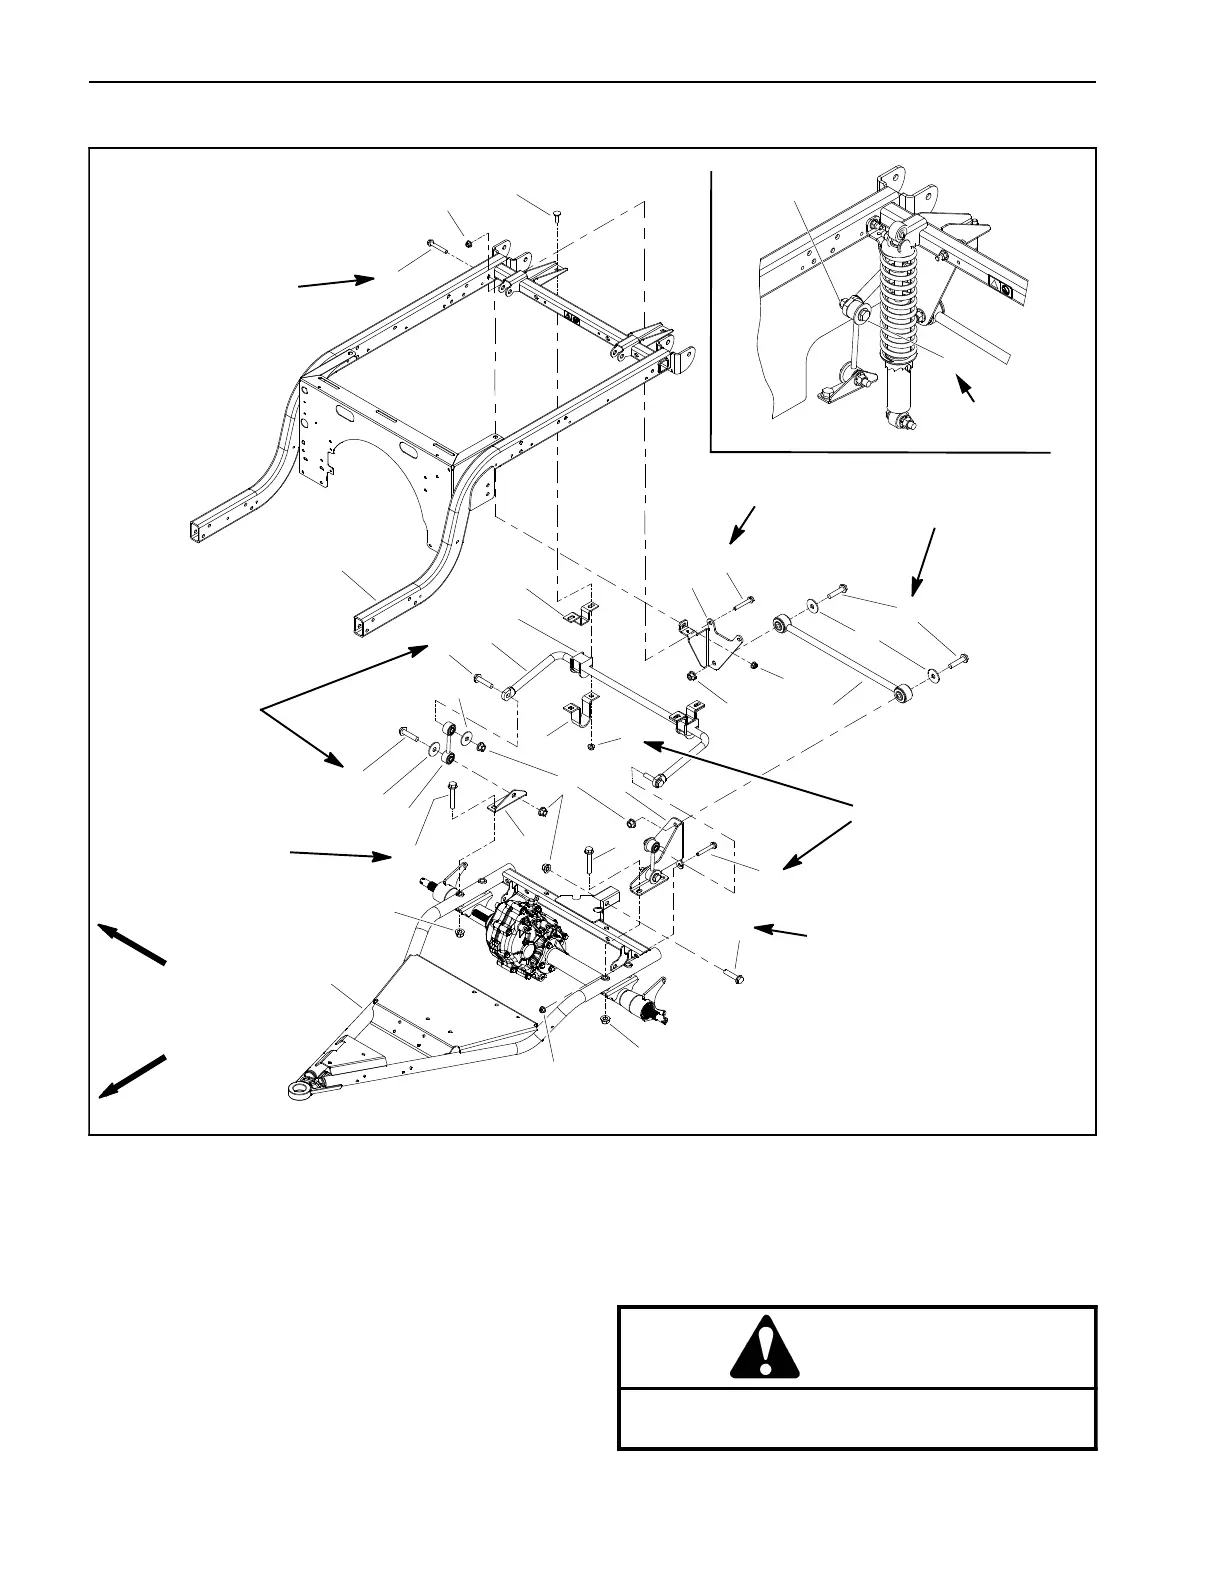
Rear Suspension
Figure 33
. Rear frame
. Stabilizer bar bracket
. Stabilizer bar bracket
. Flange head screw (5 used)
. Flange nut (9 used)
. Flange head screw (6 used)
7. Lock nut (10 used)
8. Panhard rod assembly
9. Thrust washer (6 used)
10. Sway bar link bracket
11. Flange head screw (4 used)
12. Carriage bolt (4 used)
13. Sway bar bracket (2 used)
14. Sway bar clamp (2 used)
15. Rubber bushing (2 used)
16. Anti--sway bar
17. Sway bar link (2 used)
18. Swing arm
FRONT
RIGHT
27 to 33 ft−
lb
(37to44N
−
m)
2
3
6
8
9
10
11
13
1
5
7
12
14
15
16
17
4
5
7
4
5
6
6
7
4
6
7
5
7
11
9
6
9
27 to 33 ft
−
lb
(37to44N
−
m)
77 to 95 ft
−
lb
(104 to 128 N
−
m)
77 to 95 ft
−
lb
(104 to 128 N
−
m)
77 to 95 ft
−
lb
(104 to 128 N
−
m)
Lifted
suspension
models
77 to 95 ft
− lb
77 to 95 ft
− lb
(104 to 128 N--m)
(104 to 128 N
−
m)
27 to 33 ft
−
lb
(37 to 44 N
−
m)
18
Disassembly (Fig. 31)
1. Park vehicle on a level surface, turn key switch OFF,
apply parking brake and remove key from the key
switch.
2. Raise and support cargo bed for access to rear sus-
pension components from above.
WARNING
Before jacking up the vehicle, review and follow
Jacking Instructions in Chapter 1 -- Safety.

 Loading...