Workman GTX ElectricPage 5 -- 34Chassis
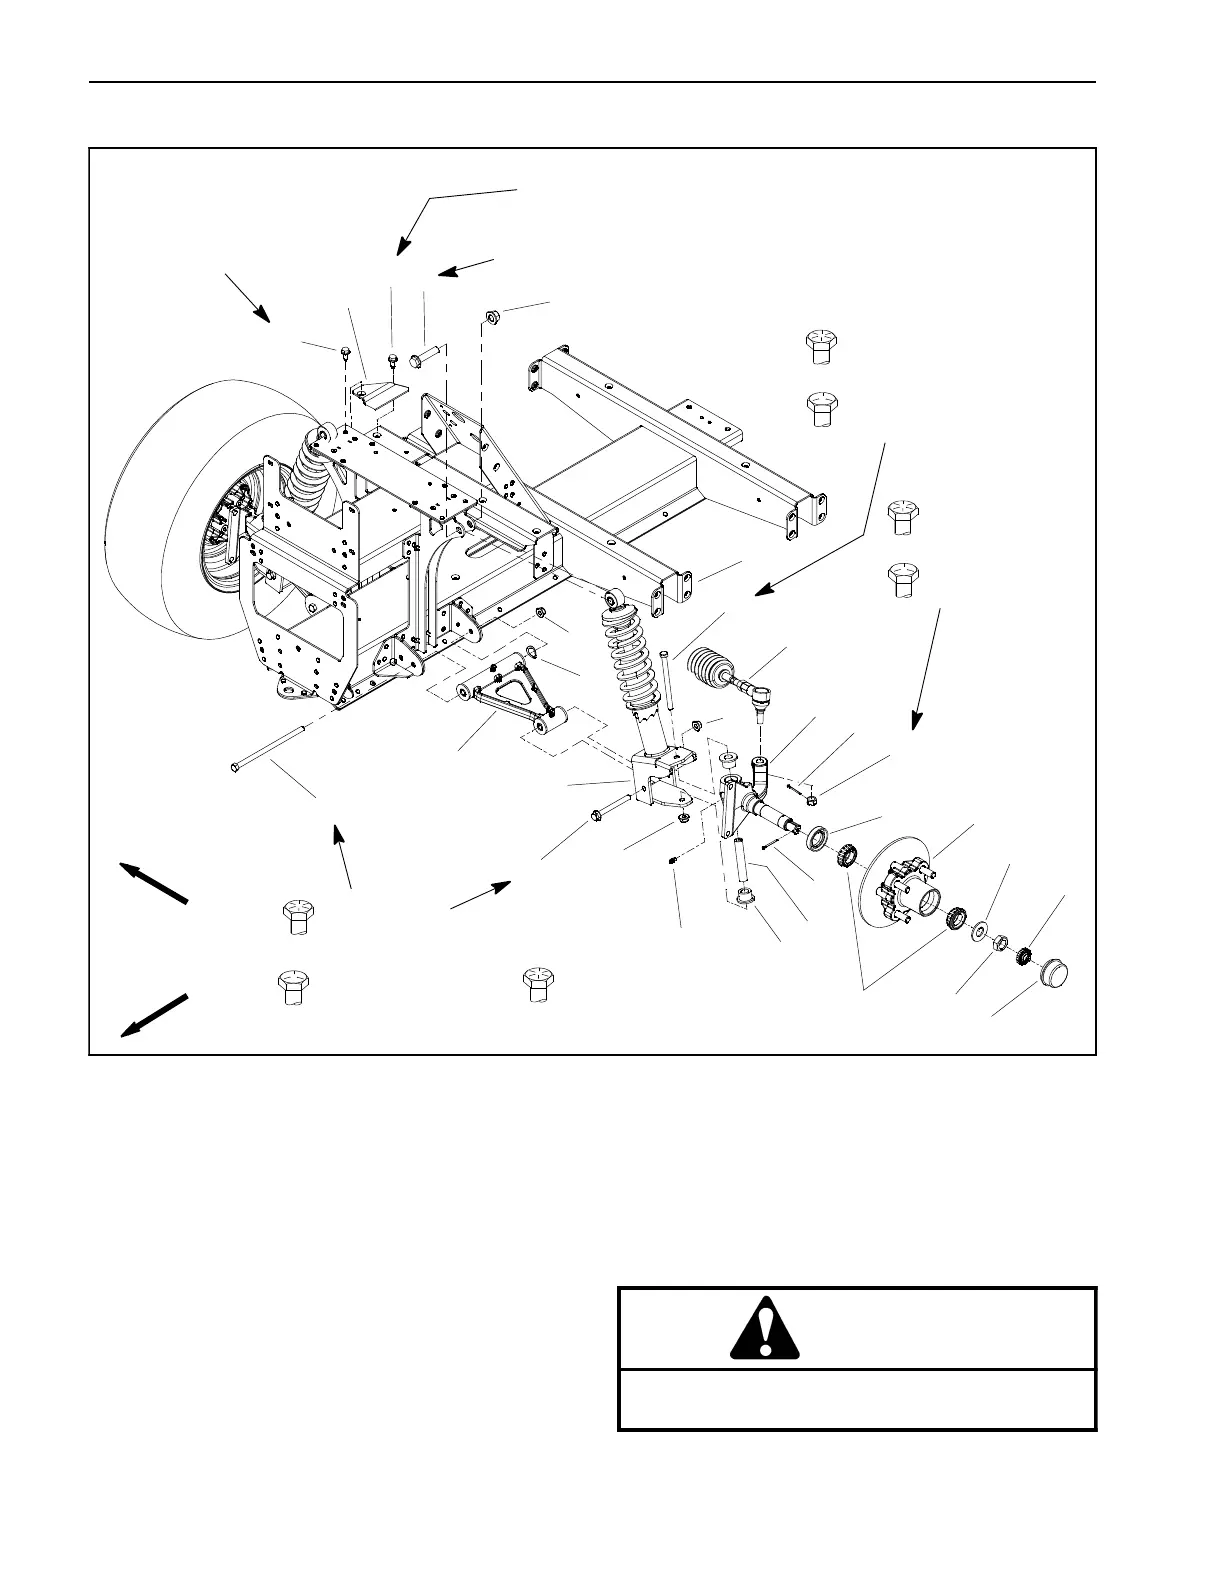
Front Suspension
Figure 31
1. Dust cap
2. Retainer
3. Jam nut
4. Tab washer
5. Bearing (2 used)
6. Wheel hub & rotor assembly
7. Oil seal
8. Cotter pin
9. Spindle (LH shown)
10. Flange bushing (2 used per spindle)
11. Kingpin sleeve
12. Grease fitting
13. Cap screw
14. Flange nut (3 used per side)
15. Flange head screw
16. Suspension strut assembly (2 used)
17. Flange head screw
18. Lock nut
19. A--arm assembly (2 used)
20. Bowed washer
21. Cap screw
22. Reinforcement tower
23. Washer head screw (2 used)
24. Front frame
25. Steering rack assembly
26. Cotter pin
27. Slotted hex nut
FRONT
RIGHT
2
3
6
8
9
11
13
1
5
7
12
14
15
16
17
18
19
20
4
21
23
24
25
26
10
14
14
22
27 to 33 ft--lb
(37 to 44 N--m)
80 to 90 ft--lb
(109 to 122 N--m)
200 to 230 in--lb
(23 to 25 N--m)
200 to 230 in--lb
(23to25N--m)
23
27
45 to 55 ft--lb
(61 to 75 N--m)
Grade 8
Grade 5
27 to 33 ft--lb
(37 to 44 N--m)
45 to 55 ft--lb
(61 to 75 N--m)
27 to 33 ft--lb
45 to 55 ft--lb
(61to75N--m)
(37to44N--m)
Disassembly (Fig. 31)
1. Park vehicle on a level surface, turn key switch OFF,
apply parking brake and remove key from the key
switch.
2. Raise hood to allow access to suspension compo-
nents from above.
WARNING
Before jacking up the vehicle, review and follow
Jacking Instructions in Chapter 1 -- Safety.

 Loading...