e-STUDIO2330C/2820C/2830C/3520C/3530C/4520C © 2008 TOSHIBA TEC CORPORATION All rights reserved
1-13
<Hint> The transfer voltage increases as the set value is increased. It is usually desirable that the set
value be decreased to obtain a clearly highlighted area.
After performing the adjustment, print and check the image quality.
If further image quality adjustment is necessary, go to step (3).
(2) If the image on the high-density area looks grained on plain paper other than the TOSHIBA-recommended
one is used, select “recycled paper” as a paper type.
* To select the paper type, refer to the Operator’s Manual for Copying Guide.
• If fine adjustment of image quality in the recycled paper mode is required in accordance with the paper
type, follow the steps from (a) to (b) below.
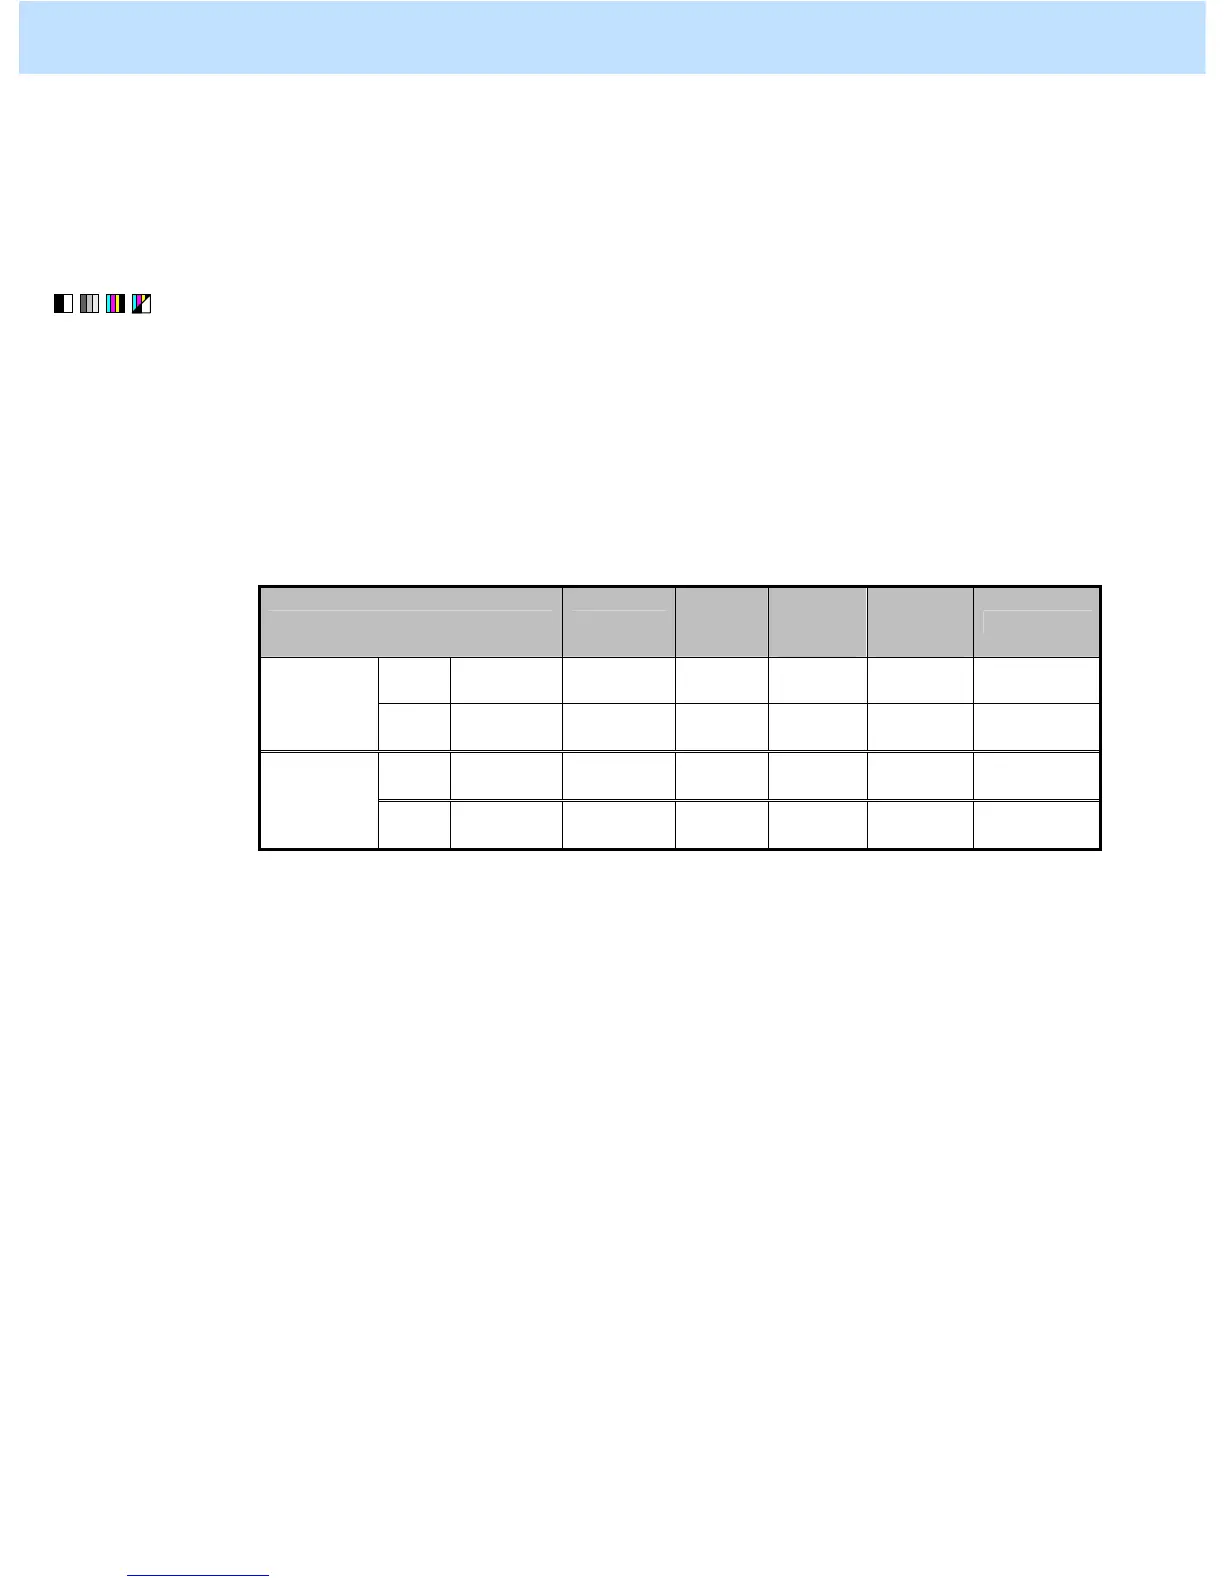
(a) Enter the adjustment mode [05]. Change the value of the codes [2934] to [2937] to adjust (2nd)
transfer bias output. (In this step the transfer roller bias offset voltage is adjusted to print the high-
density area or the halftone area of the image most clearly.)
Paper type [05] code
Subco
de
Recom
mended
value
Accepta
ble value
range
Default
Front
Recycled
paper
05-2934 7 2 to 8 0 to 10 5
Full color
Back
Recycled
paper
05-2935 7 2 to 8 0 to 10 5
Front
Recycled
paper
05-2936 7 2 to 8 0 to 10 5
Black
Back
Recycled
paper
05-2937 7 2 to 8 0 to 10 5
* “Front” refers to the printed side in the simplex mode or the side that is delivered facing
downwards in the duplex mode.
”Back” refers to the printed side that is delivered facing upwards in the duplex mode.
• After adjusting the transfer roller bias output, perform automatic calibration.
* Refer to step (2) in “1.1 To Obtain a Darker Image”.
<Hint> The larger the setting value is, the more the transfer voltage increases. It is usually
recommended that the set value be increased when you print on thick paper or paper with
asperities on its surface. On the other hand, the set value should be decreased when you print on
thin paper.
After setting the value, print and check the image quality.
If further image quality adjustment is necessary, go to step (b).
1. General Adjustments – Copying, Printing and e-Filing (Output from Box)

 Loading...