© 2005 - 2007 TOSHIBA TEC CORPORATION All rights reserved e-STUDIO520/523/600/603/720/723/850/853
ADJUSTMENT
3 - 43
3
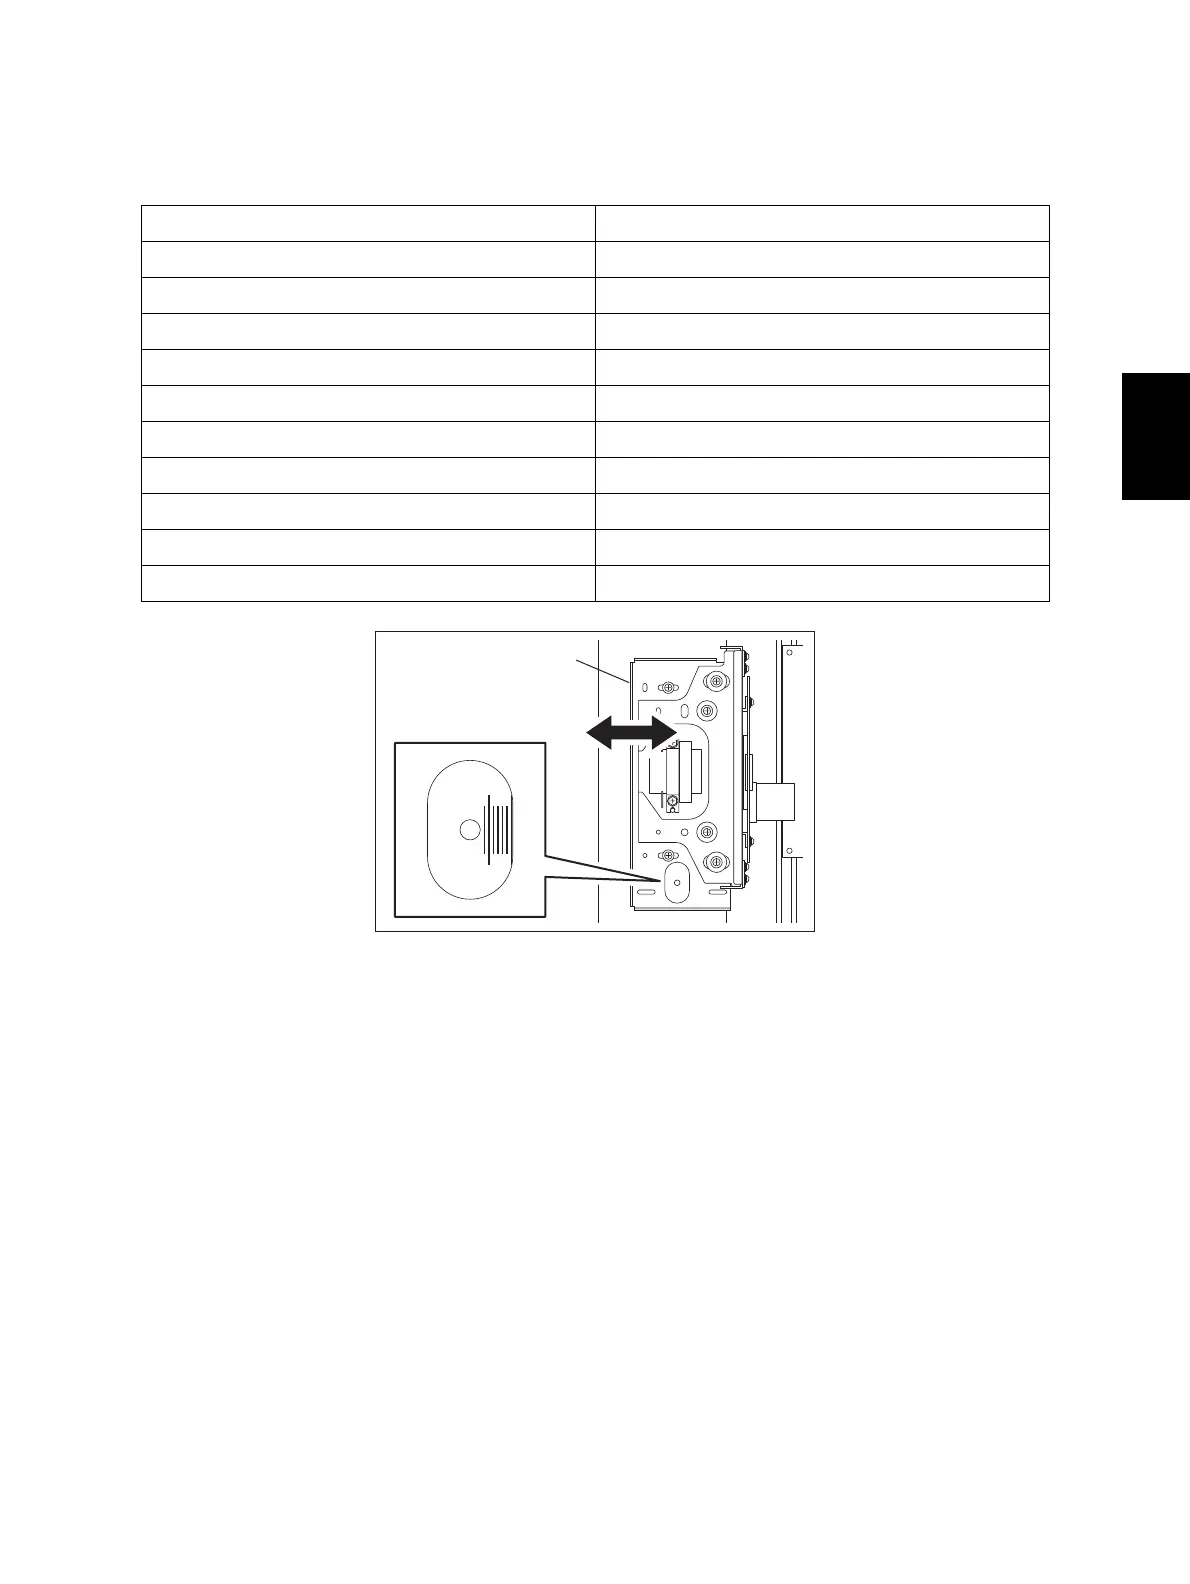
(3) Slide the lens unit to the right or left direction using the marks on the lens base as a guide. (Slide
right when the copied ruler is magnified and slide left when the copied ruler is demagnified.)
The following table shows how the reproduction ratio difference between the copied ruler and
actual ruler corresponds to the movement amount of the lens unit.
Fig. 3-37
Note: Note:
Fine adjustment can be made in the “Reproduction ratio of primary scanning direction (printer)”.
on the copied ruler and actual ruler match.
(4) Tighten 4 screws fixing the lens unit.
(5) Attach the lens cover and original glass. Make a copy to confirm the reproduction ratio.
(6) Repeat the procedure 1 to 5 until the marks on the copied ruler and actual ruler match.
Reproduction-ratio error Movement amount of unit
0.1% 0.5 mm
0.2% 0.9 mm
0.3% 1.4 mm
0.4% 1.8 mm
0.5% 2.3 mm
0.6% 2.7 mm
0.7% 3.2 mm
0.8% 3.6 mm
0.9% 4.1 mm
1.0% 4.5 mm
Lens unit

 Loading...


