Configuring DHCP Service DHCP Server Configuration
User Guide 437
Option 60 (Optional) Specify the Option 60 for device identification. Mostly it is used for
the scenarios that the APs (Access Points) apply for different IP addresses from
different servers according to the needs.
If an AP requests Option 60, the server will respond a packet containing the
Option 60 configured here. And then the AP will compare the received Option 60
with its own. If they are the same, the AP will accept the IP address assigned by
the server. Otherwise, the assigned IP address will not be accepted.
Option 138 (Optional) Specify the Option 138, which should be configured as the
management IP address of an AC (Access Control) device. If the APs in the local
network request this option, the server will respond a packet containing this
option to inform the APs of the AC’s IP address.
2) In the Ping Time Config section, configure Ping Packets and Ping Timeout for ping
tests. Click Apply.
Ping Packets Enter the number of ping packets the server can broadcast to test whether the IP
address is occupied. The valid values are from 1 to 10, and the default is 1.
When the switch is configured as a DHCP server to dynamically assign IP
addresses to clients, the switch will deploy ping tests to avoid IP address conflicts
resulted from assigning IP addresses repeatedly.
Ping Timeout Specify the timeout period for ping tests in milliseconds. It ranges from 100 to
10000 ms, and the default is 100 ms.
The DHCP server broadcasts an ICMP Echo Request (ping packet) to test whether
an IP address is occupied or not. If there is no response within the timeout period,
the server will broadcast the ping packet again. If the number of ping packets
reaches the specified number without response, the server will assign the IP
address. Otherwise, the server will record the IP address as a conflicted one and
assign another IP address to the client.
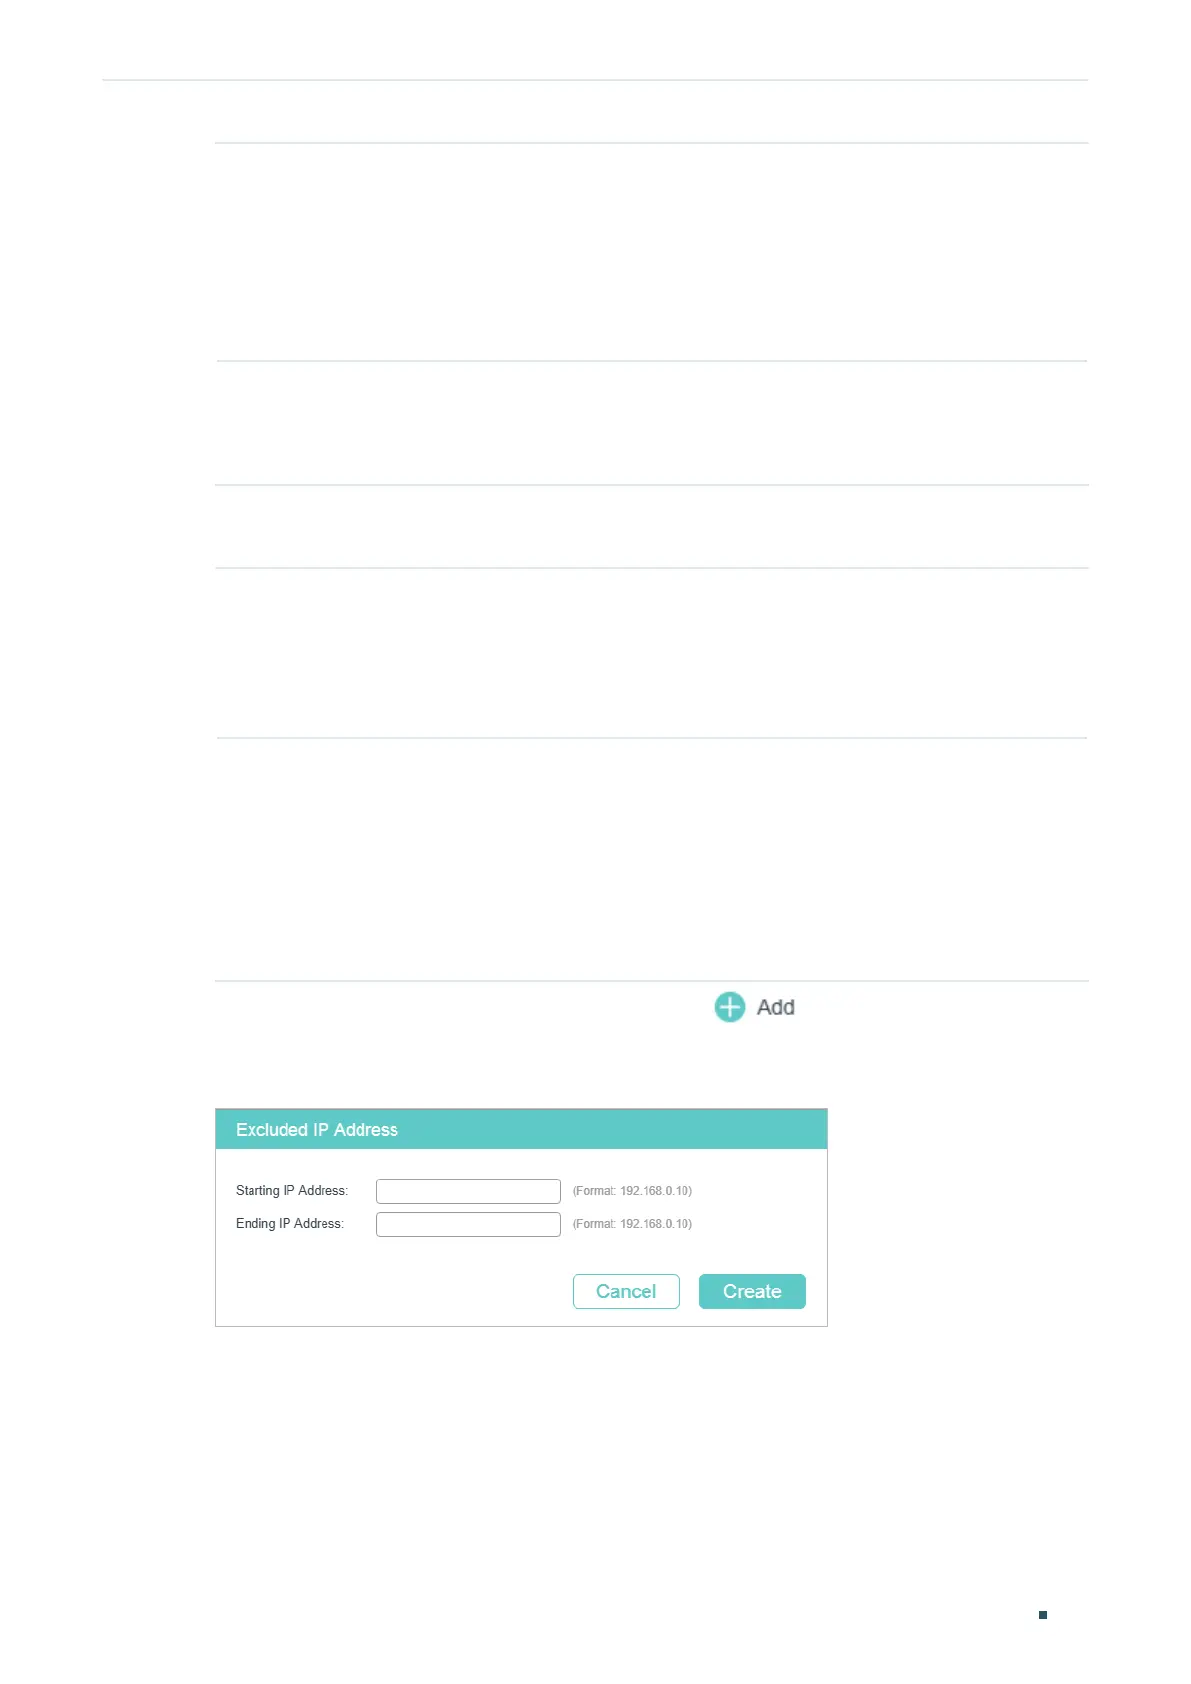
3) In the Excluded IP Address Config section, click to load the following page to
specify the IP addresses that should not be assigned to the clients.
Figure 2-2 Configure Excluded IP Address
Enter the Starting IP Address and Ending IP Address to specify the range of reserved IP
addresses. Click Create.
 Loading...