Hygiene Equipment
Designed for People
TR 2000/3000/9650
Shower trolleys and Mobile Bath Lift System
Hygiene Equipment
Designed for People
TR 3000 (2007-) - Change the plastic cover and sledge
Assembling
7. Connect the wires to the switches in the new plastic cover.
8. Mount the drive belt to the sledge (5). Check so the belt is
not twisted.
9. Control that the adhesive tape holds the sliding washers
and shims in place.
10. Lift the stretcher (still three men) with sledge and push
the sledge so far over the column that the lower
washers are in place. Push the sledge further down so
the top washers are in place all the way down. Remove all
adhesive tape.
11. Mount the grub screw (2).
12. Make a nal test by going up and down with the stretcher.
13. Mount the square lid on top of the sledge. Put the
mattress and pillow back on the stretcher.
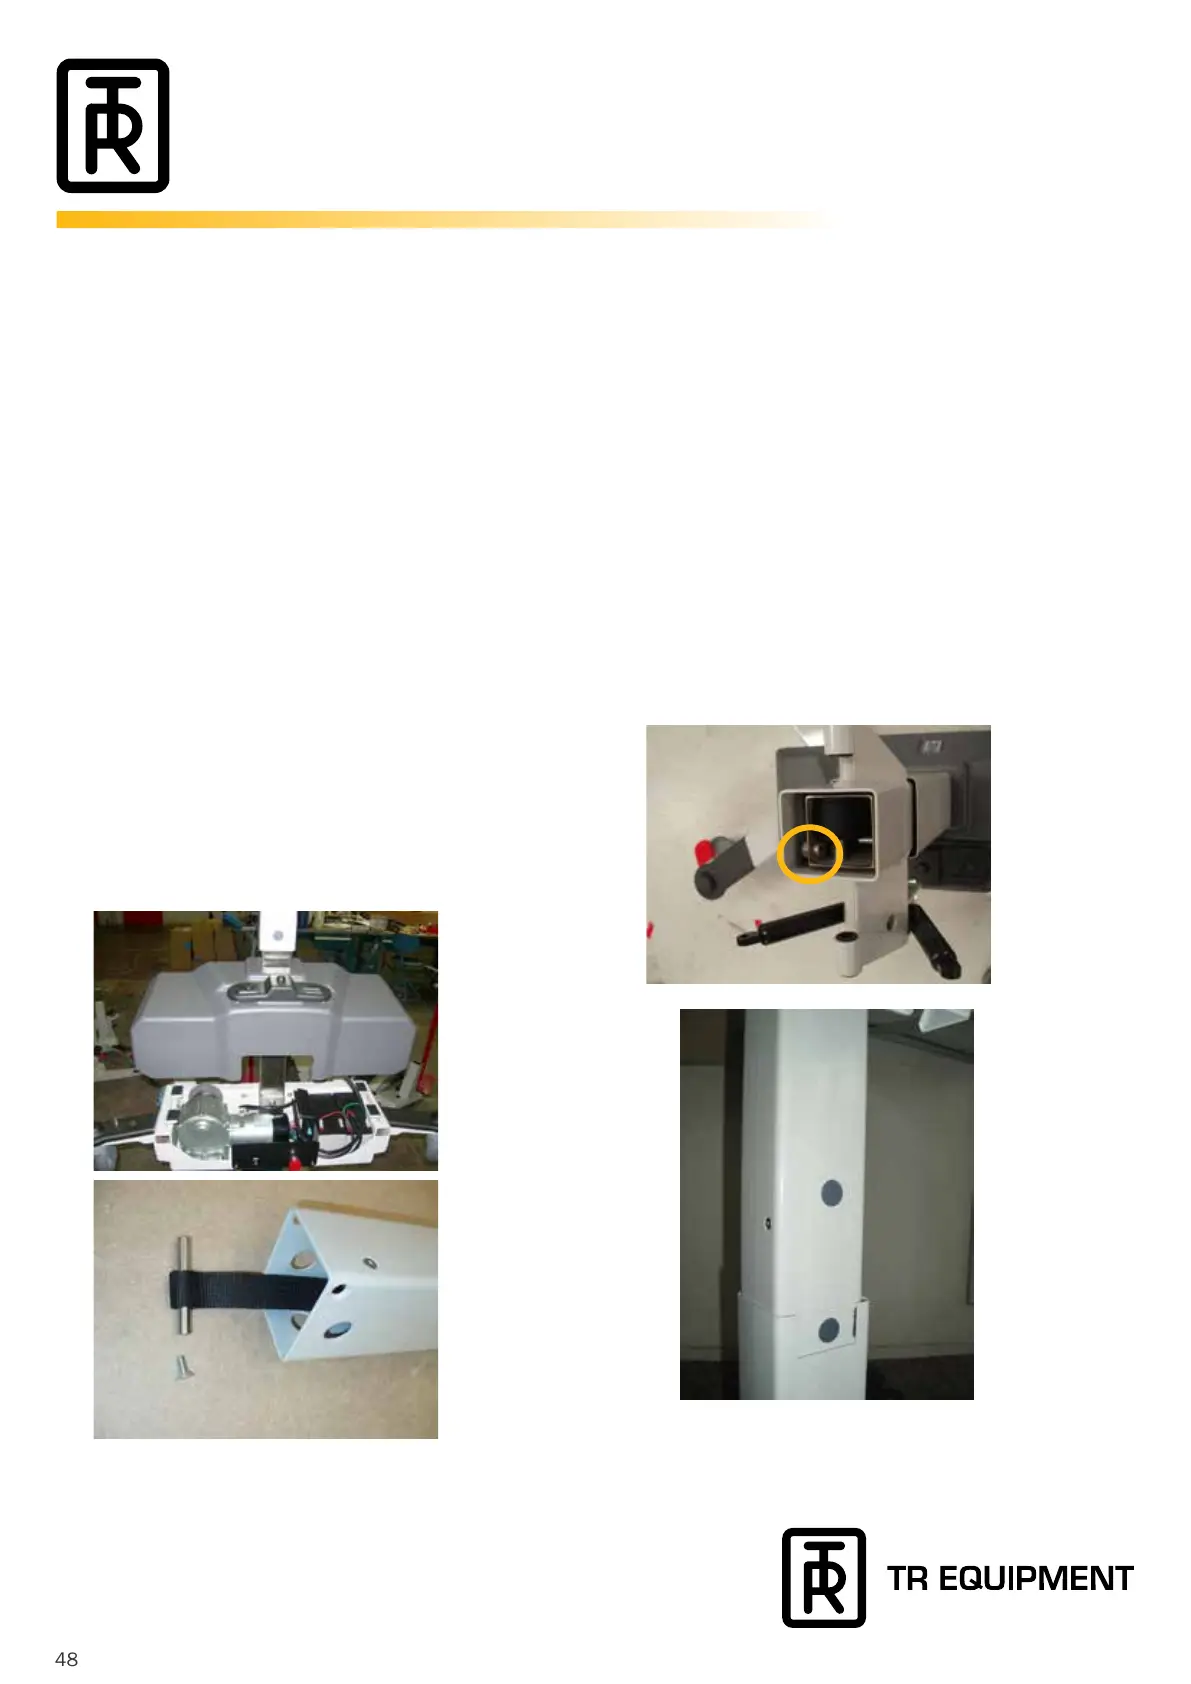
Removing
1. Lower the stretcher to its lowest position by pressing
the down pad and remove the pillow and mattress. Lift
the white shelf and remove the square lid on top of the
column.
2. Release the sledge stop screw, see picture, inside the
column.
Remove the stretcher and sledge in three phases:
3. Two persons needed for lifting the stretcher about
100 mm/4 inches. A third man has to put adhesive tape
around the sledge to keep the top sliding washers and the
shims in place (to make it easier later on when
assembling).
4. Lift the stretcher some more and put adhesive tape on
the lower plastic washers.
5. Lift the stretcher and remove the screw holding the drive
belt bolt, see picture, on the sledge. Lift off the stretcher
completely and place it on the oor beside the chassis.
6. Lift the plastic cover some and disconnect the wires to
the switches for up/down pedal, underside the cover. Lift
off the cover and change it (maybe you need to remove
and assemble the pedal and switches to the new cover).