14
Installation
Vector needs two things to be
able to collect distance data:
1. A magnet placed on the
spinning part of the wheel.
2. A speed sensor, placed on
the non-moving part of the
wheel.
The magnet spins around
tripping the sensor switch
each time--data collected lets
Vector calculate distance and
time.
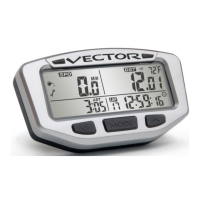
The magnet gets installed on the brake rotor because it spins with
the wheel. The provided magnetic bolt can simply replace a stock
rotor bolt (see above
picture). If that doesn’t
work, glue the spare magnet
in a hole on the brake rotor.
(JB Weld or a similar slow-
cure epoxy works well.)
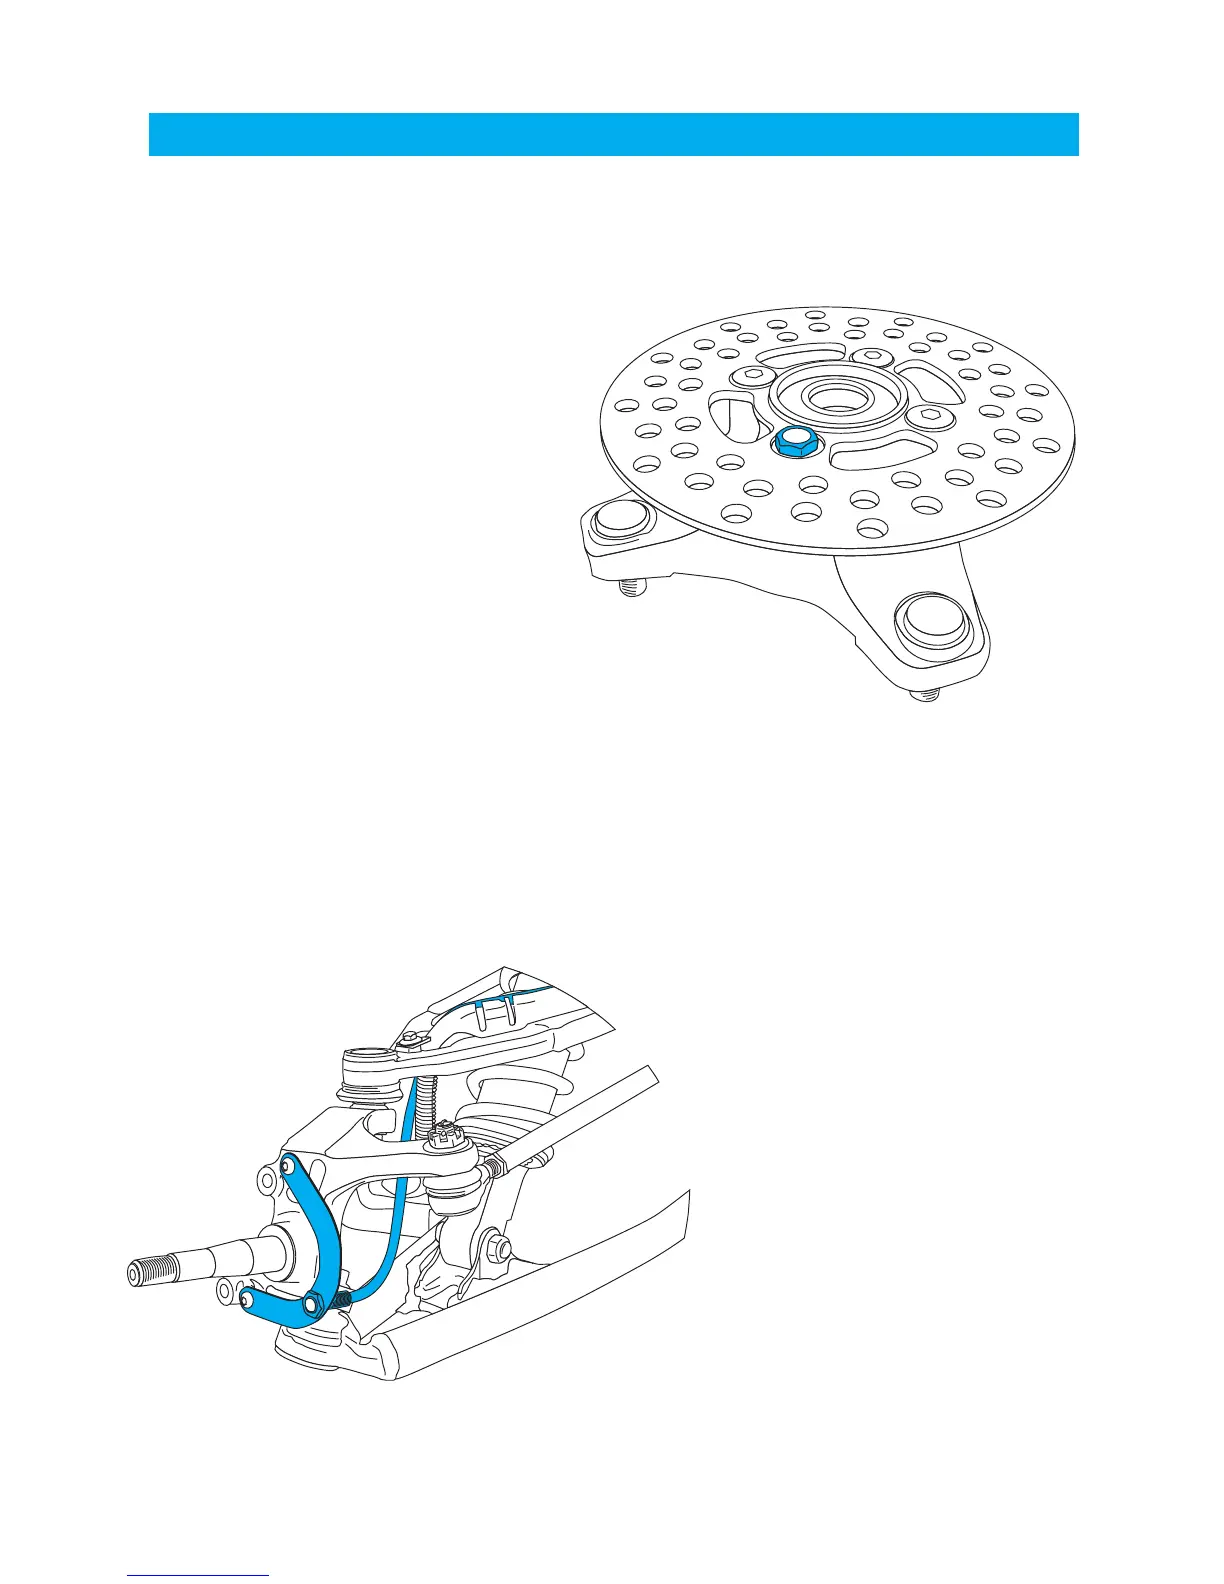
After the magnet is in, the
sensor is placed on a non-
spinning part the wheel.
The sensor typically is
placed on either the
provided C-bracket or the
ATV metal rotor shield.
ATV Sensor/Magnet Installation:
C-Bracket Installation-ATV Left Axle
Magnetic Bolt Installation
ATV Rotor