“LIVELINK INSTALL” APP / ROOM ADMINISTRATION / ROOM SETUP: ASSIGNMENT Page 37 / 77
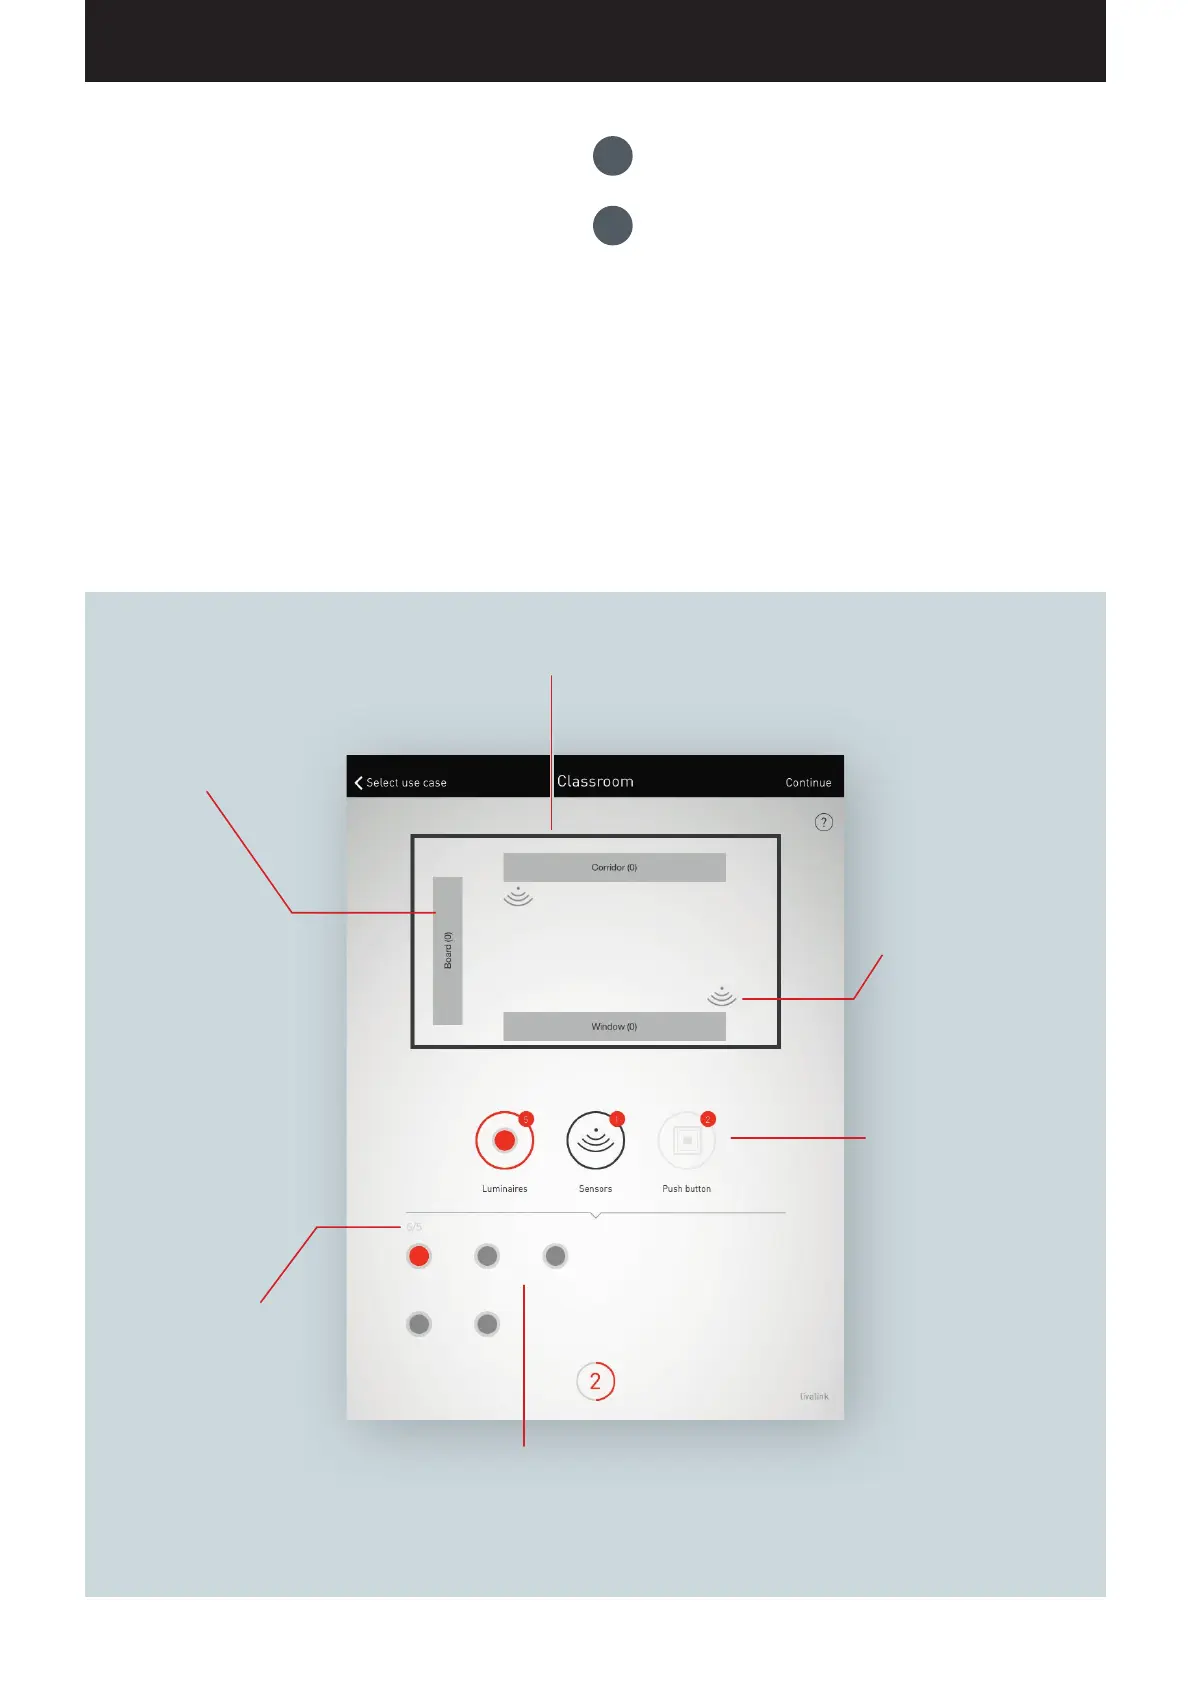
The room schematic shows all luminaire
groups and sensor locations.
Predefined luminaire
groups are included in each
room. The available lumi-
naires can be assigned via
drag and drop. The number
at the right edge indicates
how many luminaires are in
the group.
Predefined sensor The availa-
ble sensors can be assigned
via drag and drop.
Subsequent to a long tap,
additional functions can be
reached.
Switching between the
assignment of luminaires and
sensors. The respective active
are is shown in red.
Additionally, the number of
push-button couplers (plus
push-button on the control
device) available is displayed
for informational purposes.
The push-button assignment
is performed in a later step
Symbolic depiction of the available lumi-
naires and/or sensors. As soon as a device is
selected, it is displayed in colour and can then
be assigned.
Overview of the luminaires
and/or sensors already as-
signed in comparison to those
available.
1.
Group assignment of luminaires
2.
Sensor assignment
ROOM SETUP: ASSIGNMENT
In this view, the luminaires and sensors are assigned.
The individual luminaires and sensors can be identified and
assigned
to the luminaire groups and/or sensor locations.
A simplified schematic serves for orientation in the room and
provides for a comfortable assignment of the devices this way. The
number and positions of the luminaire groups and sensors origi
-
nate from the Use Case. The schematic cannot be modified but can
be utilised in a custom fashion. As such, not all luminaire groups
and sensor locations have to be utilised, for example.