16 ELECTRICAL SYSTEM
TujH
ALTERNATOR
Removal
1.
Remove the seat and disconnect the batte
ry
,
negative (black) lead first.
2.
Remove the belly panel and left hand fairing (if
fitted).
3.
Drain the coolant from the crankcase as
described in the Cooling System section.
4.
Detach the water pump hose at its connection to
the crankcase.
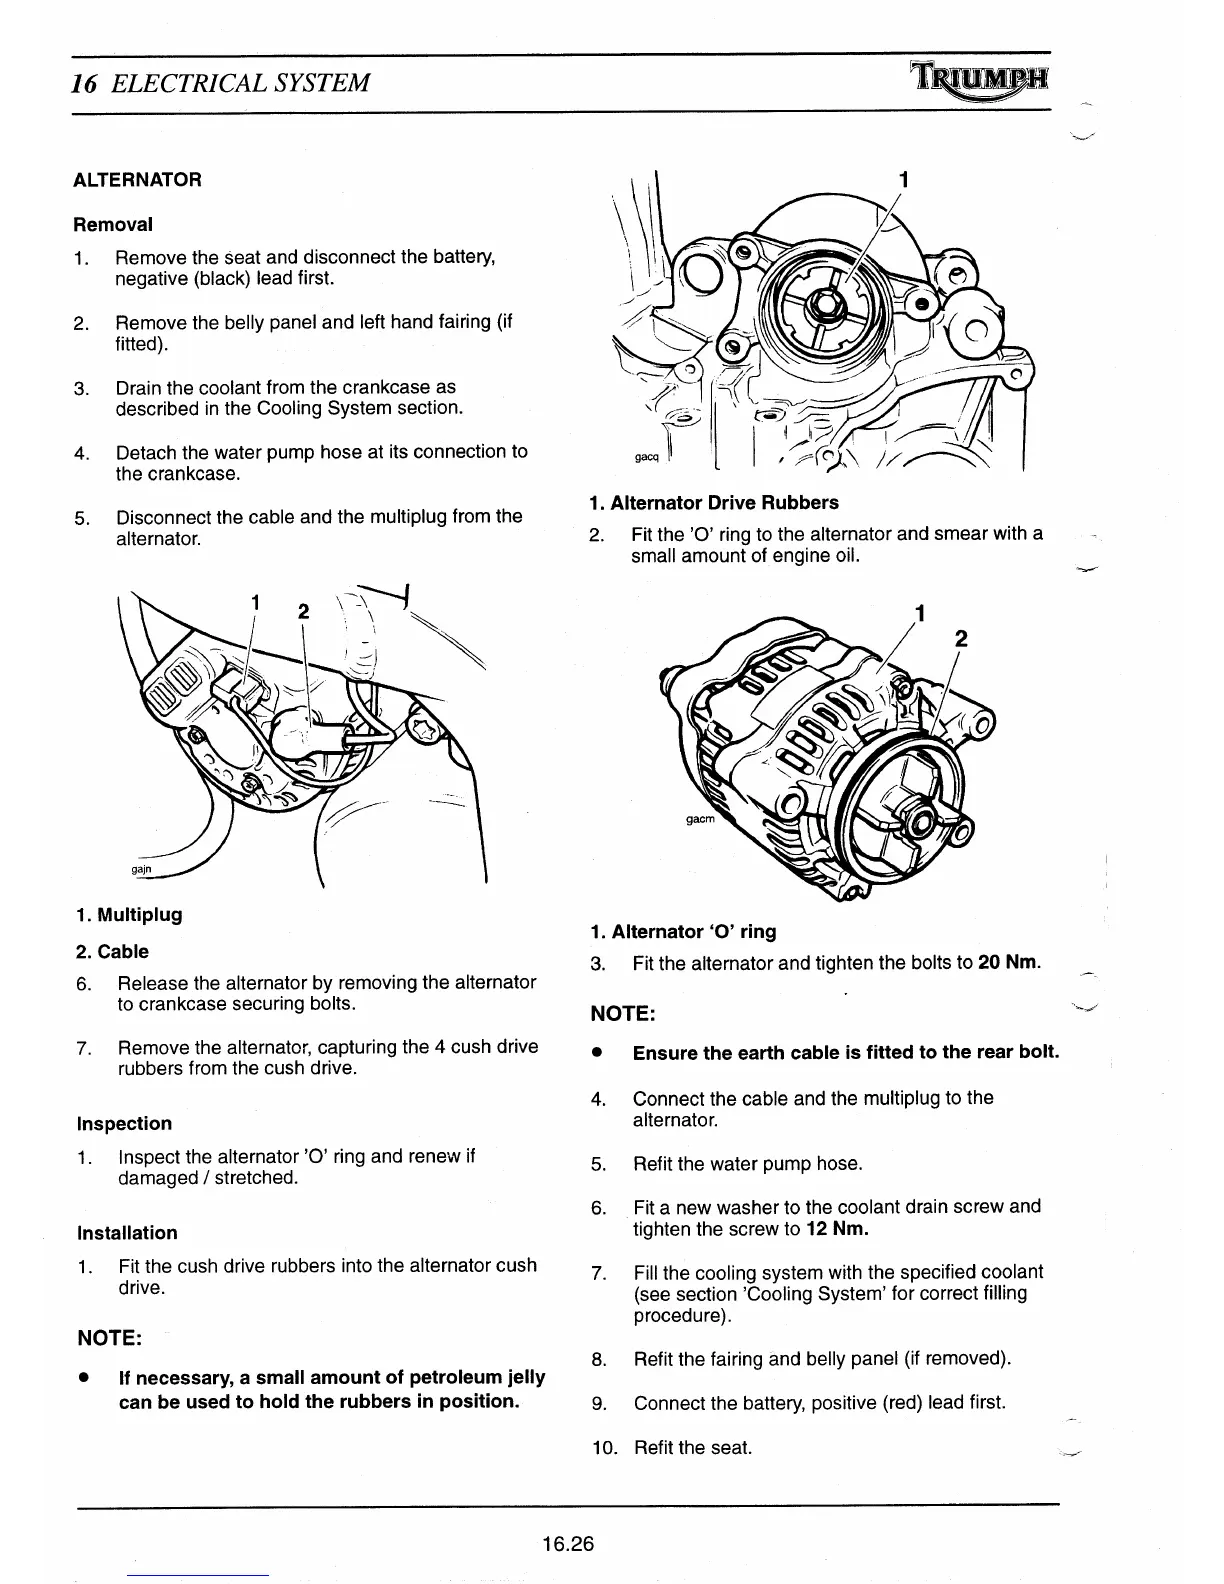
5.
Disconnect the cable and the multiplug from the
alternator.
gacq
I
I
^ ^.
/
7
1.
Alternator Drive Rubbers
2.
Fit the
'
0'
ring to the alternator and smear with a
small amount of engine oil.
1.
Multiplug
2.
Cable
6.
Release the alternator by removing the alternator
to crankcase securing bolts.
7.
Remove the alternator, capturing the 4 cush drive
rubbers from the cush drive.
Inspection
1.
Inspect the alternator'O' ring and renew if
damaged / stretched.
Installation
1.
Fit the cush drive rubbers into the alternator cush
drive.
NOTE:
•
If necessary, a small amount of petroleum jelly
can be used to hold the rubbers in position.
1. Alternator `O' ring
3.
Fit the alternator and tighten the bolts to 20 Nm.
NOTE:
•
Ensure the earth cable is fitted to the rear bolt.
4.
Connect the cable and the multiplug to the
alternator.
5.
Refit the water pump hose.
6.
Fit a new washer to the coolant drain screw and
tighten the screw to 12 Nm.
7.
Fill the cooling system with the specified coolant
(see section 'Cooling System' for correct filling
procedure).
8.
Refit the fairing and belly panel (if removed).
9.
Connect the batte
ry
, positive (red) lead first.
10.
Refit the seat.
16.26
 Loading...