5 BALANCERS
T
MPH
9.
Refill the engine with the correct grade engine oil
10.
Reconnect the battery, positive (red) lead first
Balancer Plug Fitting
1.
Thoroughly remove all traces of oil/grease and the
previous bonding medium from the plug bores
ensuring that no debris or swarf enter the
crankcase.
2.
Select new plugs and ensure that they are also free
from all traces of oil/grease before proceeding.
3.
Using a syringe, apply a bead of Scotchgrip 847
(1236) to the front edge of each plug as shown
below. The adhesive is available from Triumph
under part number T3450301. The adhesive must
cover the complete circumference of the plug.
NOTE:
•
Ensure that the adhesive container is sealed
correctly when not in use. This will prevent
evaporation of the solvent which could
adversely affect bonding efficiency.
•
If used correctly, the quantity of sealer
supplied will be sufficient for approximately
100 engines.
4.
Fit the plugs to the crankcase immediately after
application of the adhesive. Ensure that the plugs
are square to the crankcase and insert by applying a
constant pressure with the palm of the hand.
5.
Allow the adhesive to cure for at least one hour
before starting the engine.
Balancer Shaft Removal
NOTE:
•
To remove the balancer, the engine must be
removed from the frame and the two halves of
the crankcase separated to allow removal of
the cranksha
ft
. For details of engine removal,
crankcase separation and crankshaft removal,
see the crankcase/crankshaft/piston and
connecting rod section.
•
Two balancer designs have been used. Early
models were fitted with a large bearing
retaining bolt at the left hand end and the
balancer assembly end float was controlled by
retaining brackets. On later models, the end
float is controlled by circlips and the left hand
bearing is retained by a circlip.
1.
Invert the upper crankcase ensuring that its weight
is adequately supported.
2.
Mark the balancer cap positions to ensure that they
are refitted in their original orientation and positions
in the crankcase.
CAUTION: The crankcase and balancer
'
bearing caps are align bored during
manufacture. Refitting the balancer bearing caps
incorrectly may cause the shaft to seize or the caps
to break resulting in severe engine damage.
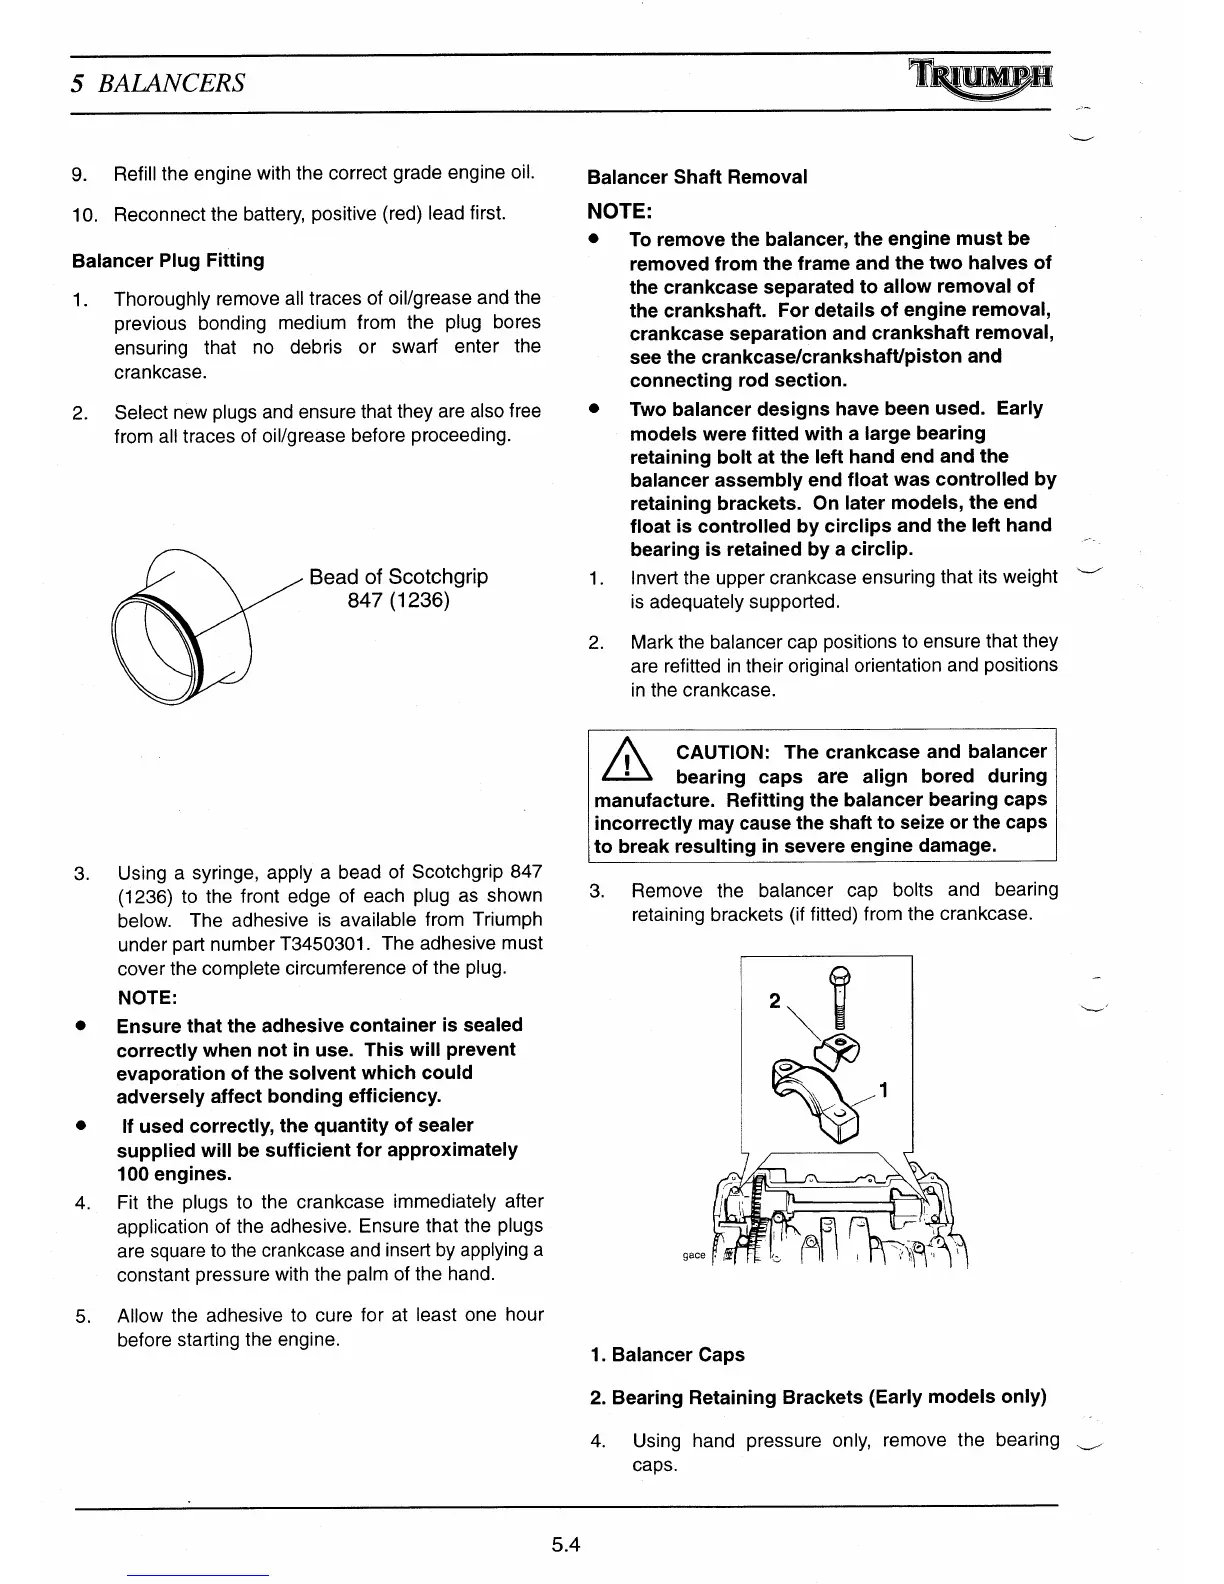
3.
Remove the balancer cap bolts and bearing
retaining brackets (if fitted) from the crankcase.
I
J
^^
gace
^
1.
Balancer Caps
2.
Bearing Retaining Brackets (Early models only)
4.
Using hand pressure only, remove the bearing
caps.
Bead of Scotchgrip
847 (1236)
5.4