EziWeigh5i, EziWeigh6i, EziWeigh7i, WOW2, DAS WOW2
Issue 2, 7/2017 30
Removing a connector
1 Remove the indicator case back. See page 24.
2 Remove the two screws securing the connector and dust cap.
3 Disconnect the FPC and remove the connector. See Using flexible printed circuits (FPCs) on page
22.
Fitting a new connector
1 Check that the case is clean where the connector o-ring meets the case and that all plastic swarf
is removed.
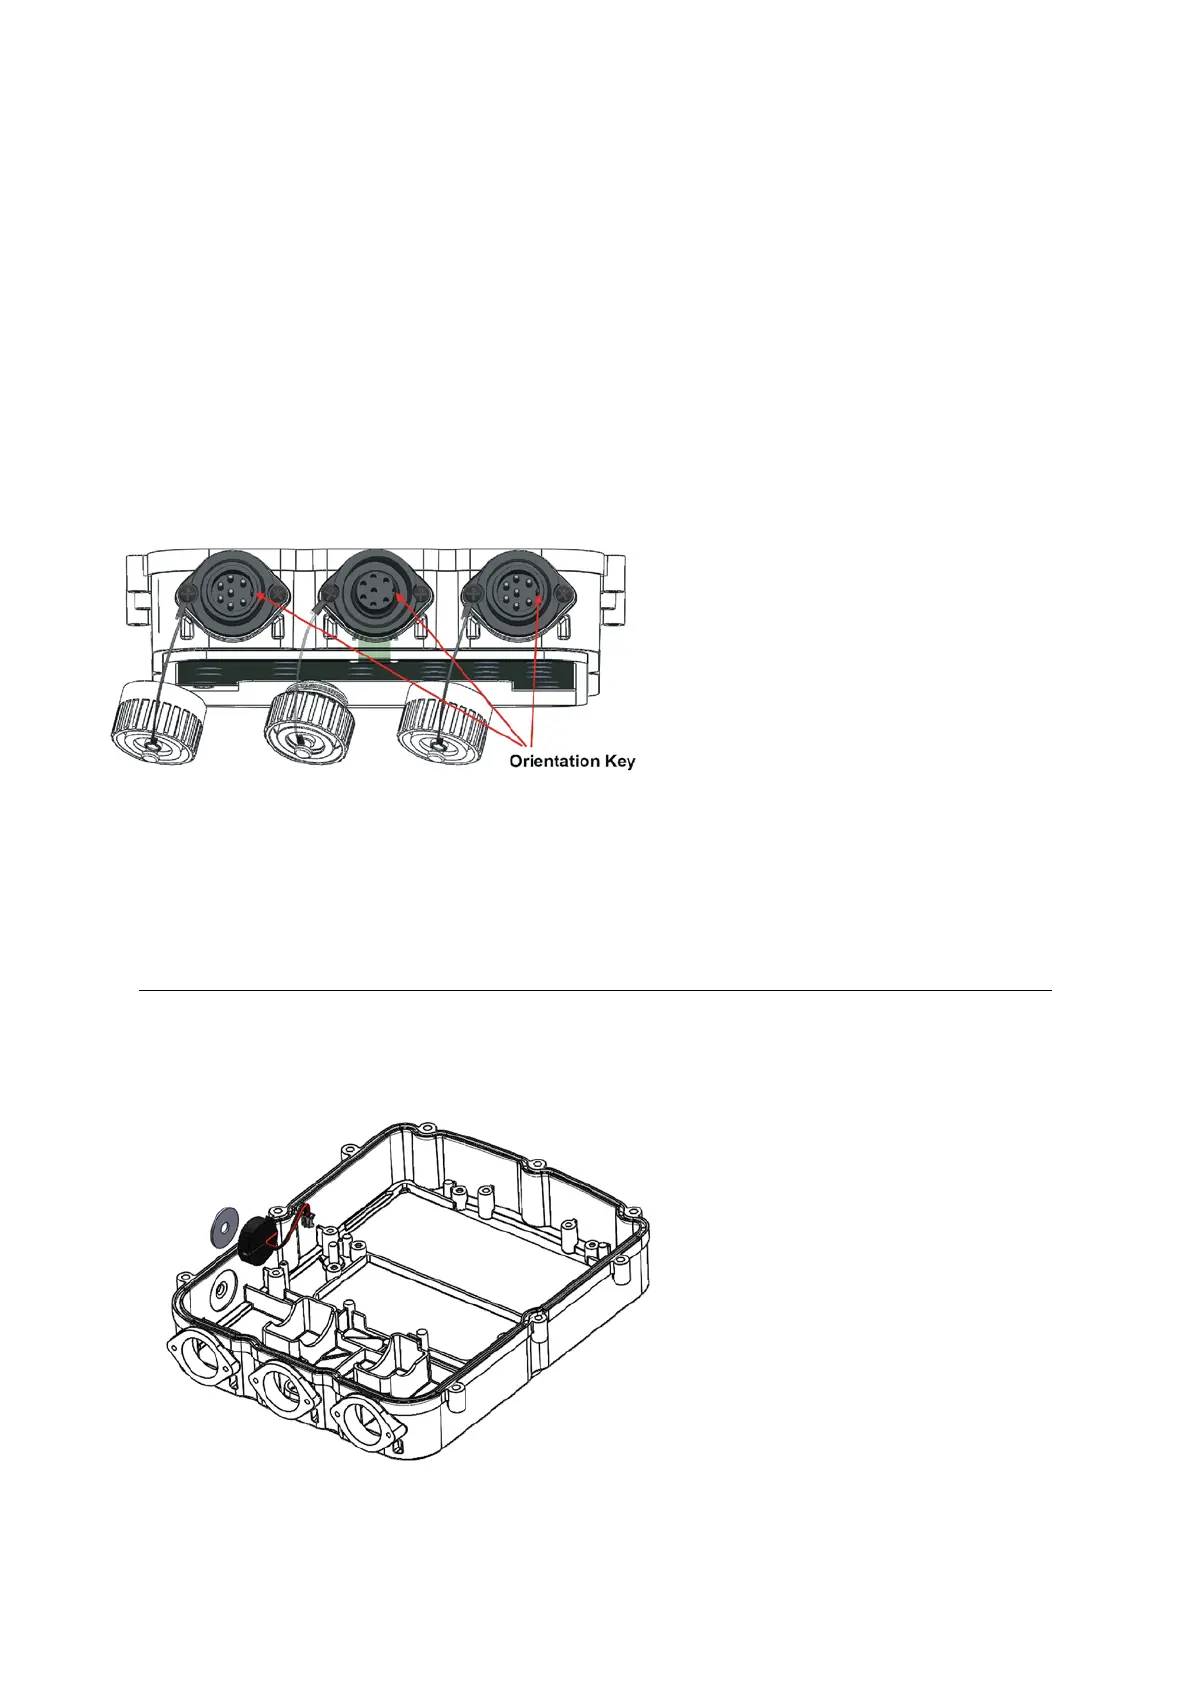
2 Thread the FPC through the hole in the case and position the new connector. Ensure that the
orientation key inside the C16 connector is pointing in the same direction as the other connectors
– see Figure 12: Connector key orientation.
12:
Connector key
orientation.
3 Refit the two screws, ensuring that the dust cap is refitted at the same time.
4 Tighten screws using a torque-limited screwdriver set to 0.5 Nm (4 lbf-in), or hand screwdriver.
5 Insert the FPC into the FPC connector.
6 Refit the case back. See page 24.
Replacing the piezo speaker
1 Disconnect the old speaker and separate it from the side of the front case.
2 Remove the label backing and affix the new speaker to the side of the front case.
3 Connect the speaker loom to the PCA (Piezo Speaker is marked on the PCA).
 Loading...