EziWeigh5i, EziWeigh6i, EziWeigh7i, WOW2, DAS WOW2
Issue 2, 7/2017 33
Replacing the LCD
The procedure for replacing the seven segment LCD and the dot matrix LCD is the same.
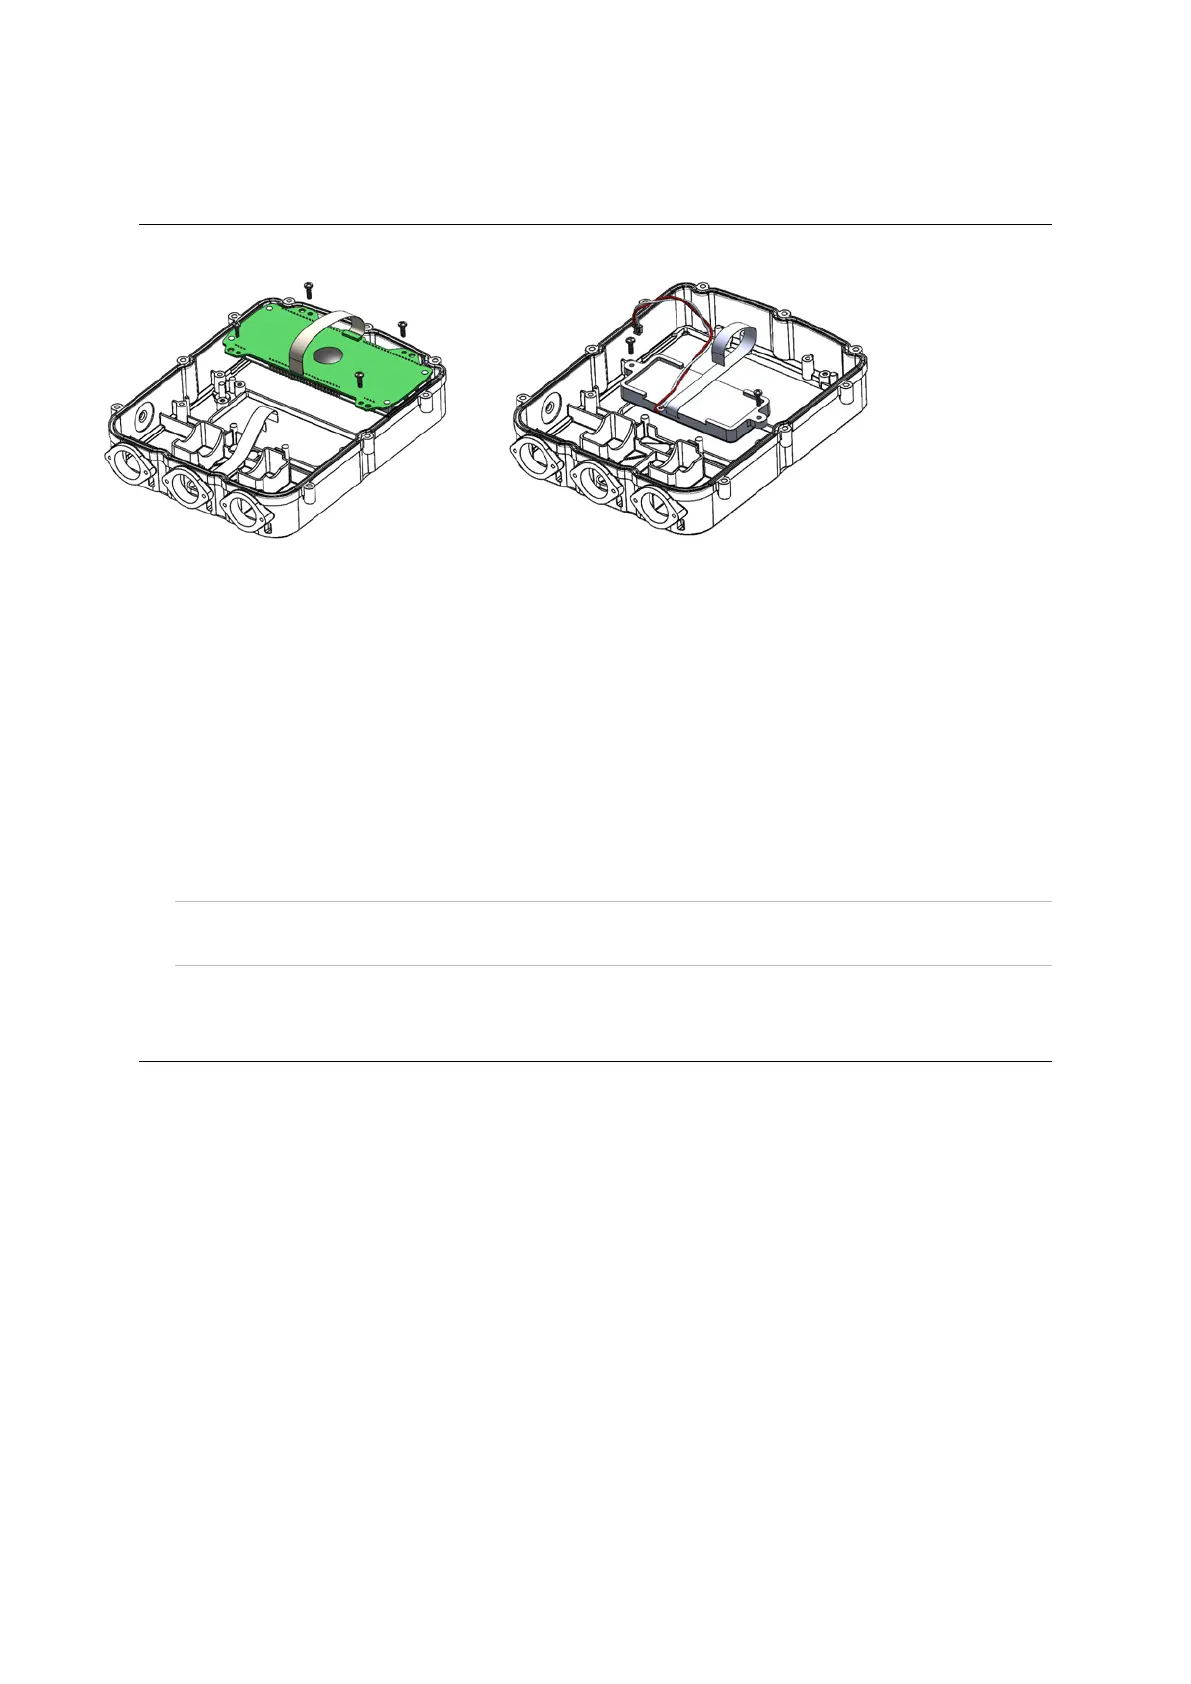
15:
LCD locations
and fixing
screws.
1 Remove the case back. See page 24.
2 Remove the PCA. See page 31.
3 Undo the screws securing the LCD (four screws for the top seven segment LCD or two screws for
the dot matrix LCD). Remove the LCD, ensuing that all plastic swarf is removed.
4 Position the new LCD. Ensure that no specs of dust or debris or finger prints are trapped between
the LCD and the case window (gently blowing with compressed air aerosol may be useful for this).
5 Refit the screws to fasten the LCD to the case front. Use a torque limited screwdriver set to
0.5 Nm (4 lbf-in).
6 Refit the PCA. See page 32.
7 Reassemble the indicator.
Note: Ensure that the PCA and the case back are correctly installed. See Refitting the PCA
on
page 32 and To refit the case back on page 24.
8 Check LCD operation.
Updating the firmware
See the technical bulletin Updating the firmware.
 Loading...