EziWeigh5i, EziWeigh6i, EziWeigh7i, WOW2, DAS WOW2
Issue 2, 7/2017 24
Removing and refitting the case back
To remove the case back
1 (EziWeigh6i and EziWeigh7i only) Remove the rubber corner bumpers by peeling them off,
starting at the front.
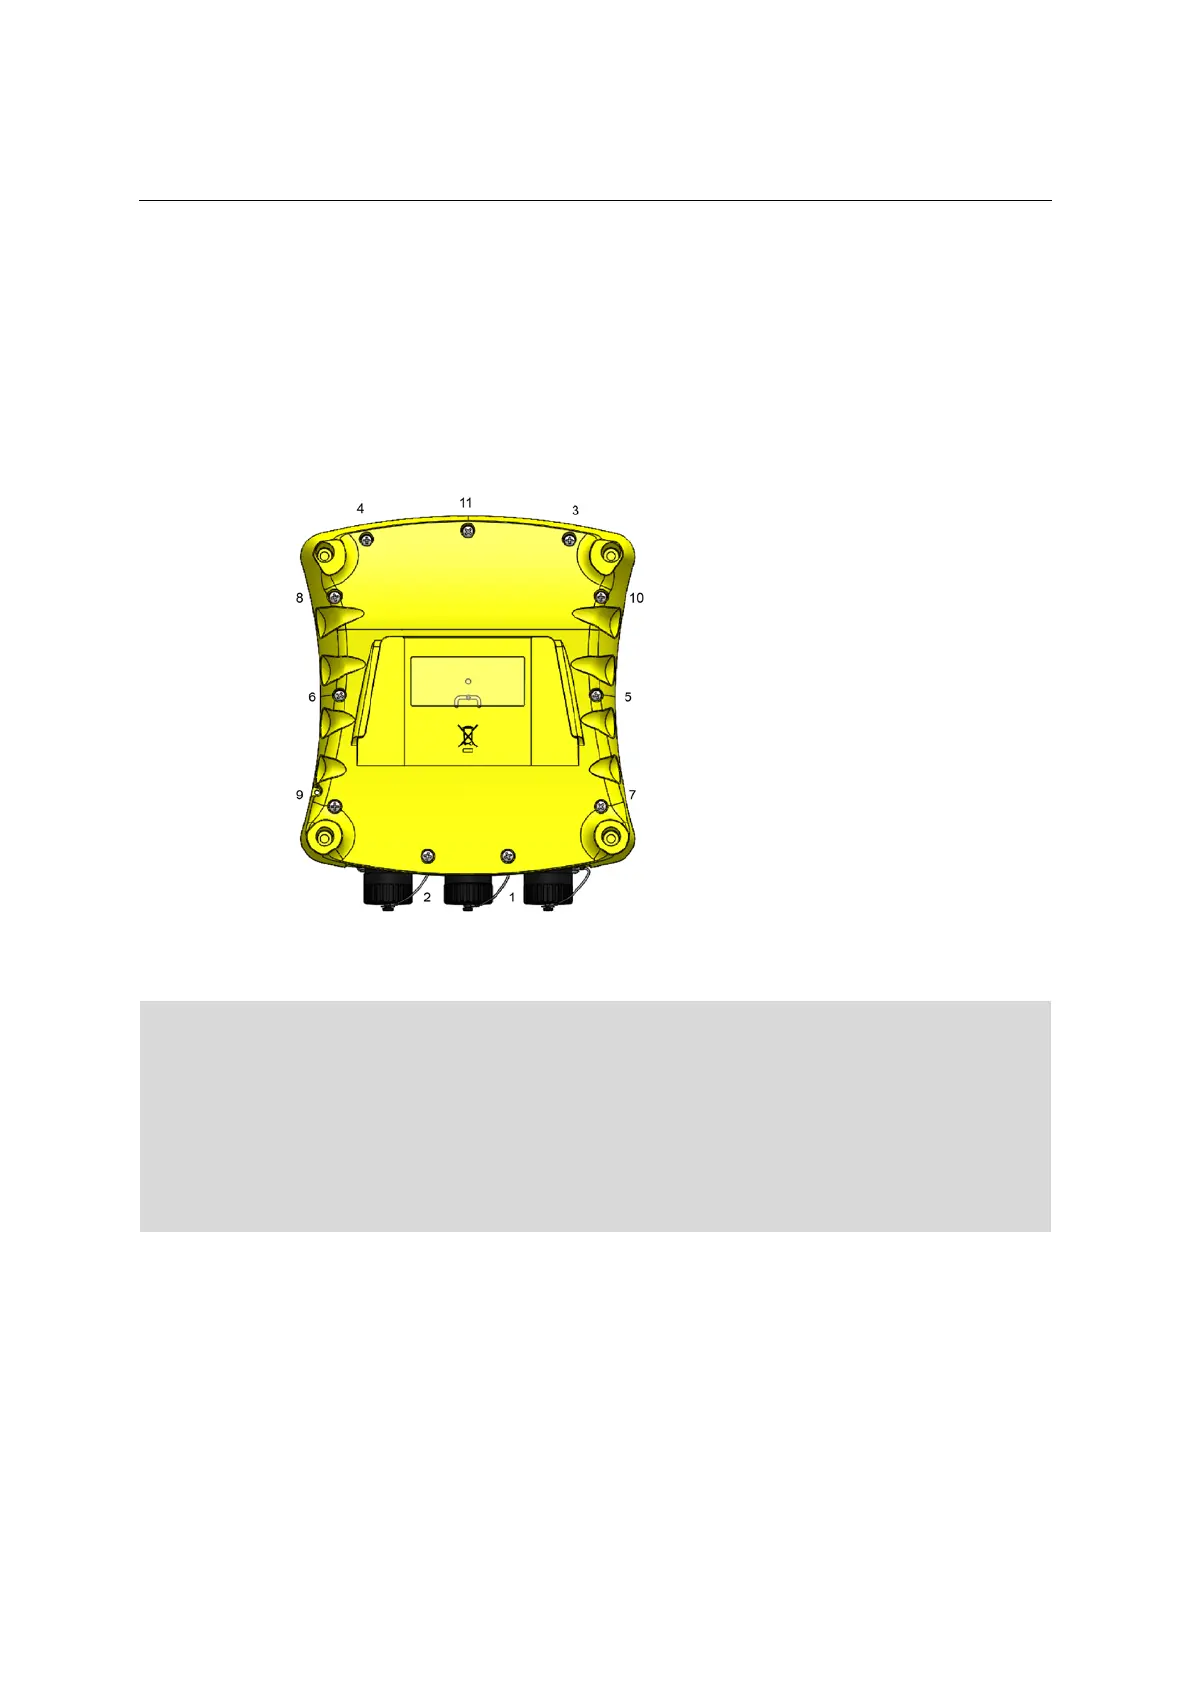
2 Manually unscrew the 11 screws securing the case back to the case front (see Figure 5 below).
Take care not to continue turning the screw once fully unscrewed as it will damage the thread in
the plastic boss.
3 Remove screws.
4 Lift off case back.
5:
screws securing the case
.
To refit the case back
These indicators are often used in very harsh environmental conditions. Correct installation of the
case back, keypad, keypad overlay, o-ring, and screws is essential to help maintain an effective
environmental seal for the case. Incorrect installation can lead to case leaks and serious
malfunctions.
Ensure that the cleaned screw fits the old thread when tightening. First turn the screw anti-
clockwise until it drops into place before tightening.
Ensure that the case seal is in place and does not get pinched between the case halves.
The case back screws are an integral part of the sealing of the case. If any of the screw threads are
stripped for any reason, the case bezel must be replaced.
1 Inspect the 11 screws and replace any that are damaged.
2 Remove any plastic swarf from the screw bosses, the screws, in the case, and around the case o-
ring.
3 Inspect the lip on the case front that the o-ring seals against for damage. Even minor damage to
this surface can reduce case sealing properties.
 Loading...