B1 User Manual
© 2022 All rights reserved, Unitree Robotics 22
Remote Control Handle Rocker Calibration
Hold the remote control without touching the rocker, press the upper buttons F1 and F3 on the remote control and
release them at the same time. At this time, the remote control will emit a continuous "beep~beep~" sound (1 time/sec)
to indicate that it has entered the calibration mode. After entering the calibration mode, the users need to turn the left and
right rockers to full rudder and rotate several times until the sound of "beep~beep~" stops, and the calibration is ready.
Press F3 once to make the calibration take effect and complete the calibration.
Attention! When calibrating the remote rod, please do not touch the rocker before calibration. The rocker can only be
moved after entering the calibration mode.
Remote Control Turnon/Turnoff
Turn on the remote control: Shortly press the power button once, then long press the power button for more
than 2 seconds, and hear a "beep”, which means the remote control is turned on.
Turn off the remote control: Shortly press the power button once, then long press the power button for more
than 2 seconds, and hear three “beeps”, which means the remote control is turned off.
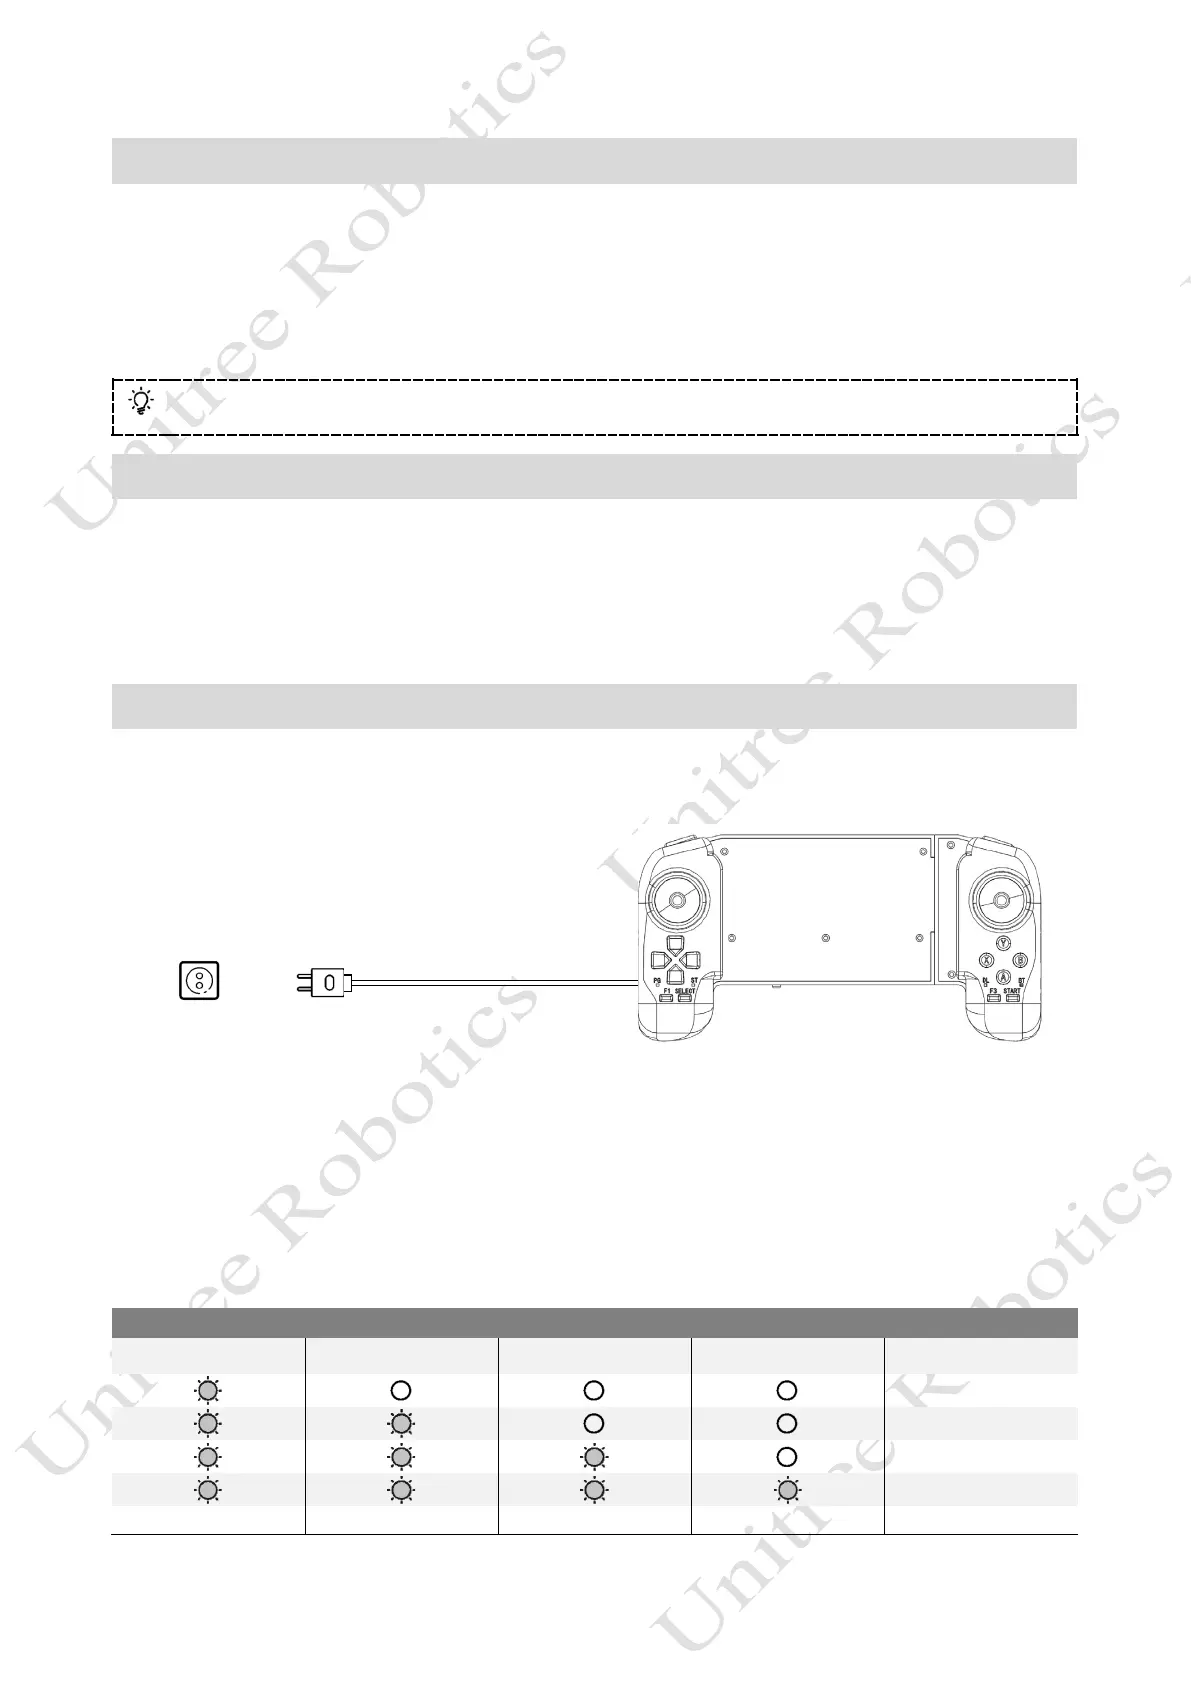
Remote Control Charging
When the handle battery indicator shows low power (same state as the low battery indicator), the handle should be
connected to the charger, as shown in the figure below:
AC Power
100-240V
USB
Charger
USB-TYPE C Cable
1) Please use an official USB charger. If you do not use an official charger, it is recommended to use a 5V/2A USB
charger that meets the FCC/CE standard.
2) Make sure the remote control is turned off before charging the remote control.
3) In the charging state, the battery indicator will flash at a frequency of 1Hz (1 second/time) and indicate the current
battery.
4) When the battery indicator lights are all off, it means that the battery pack is fully charged, please remove the
charger to complete the charging.
LED1 LED2 LED3 LED4 Current Battery
0%-25%
25%-50%
50%-75%
75%-100%