Assemble:
After replacing a joint do as follows to assemble the robot arm.
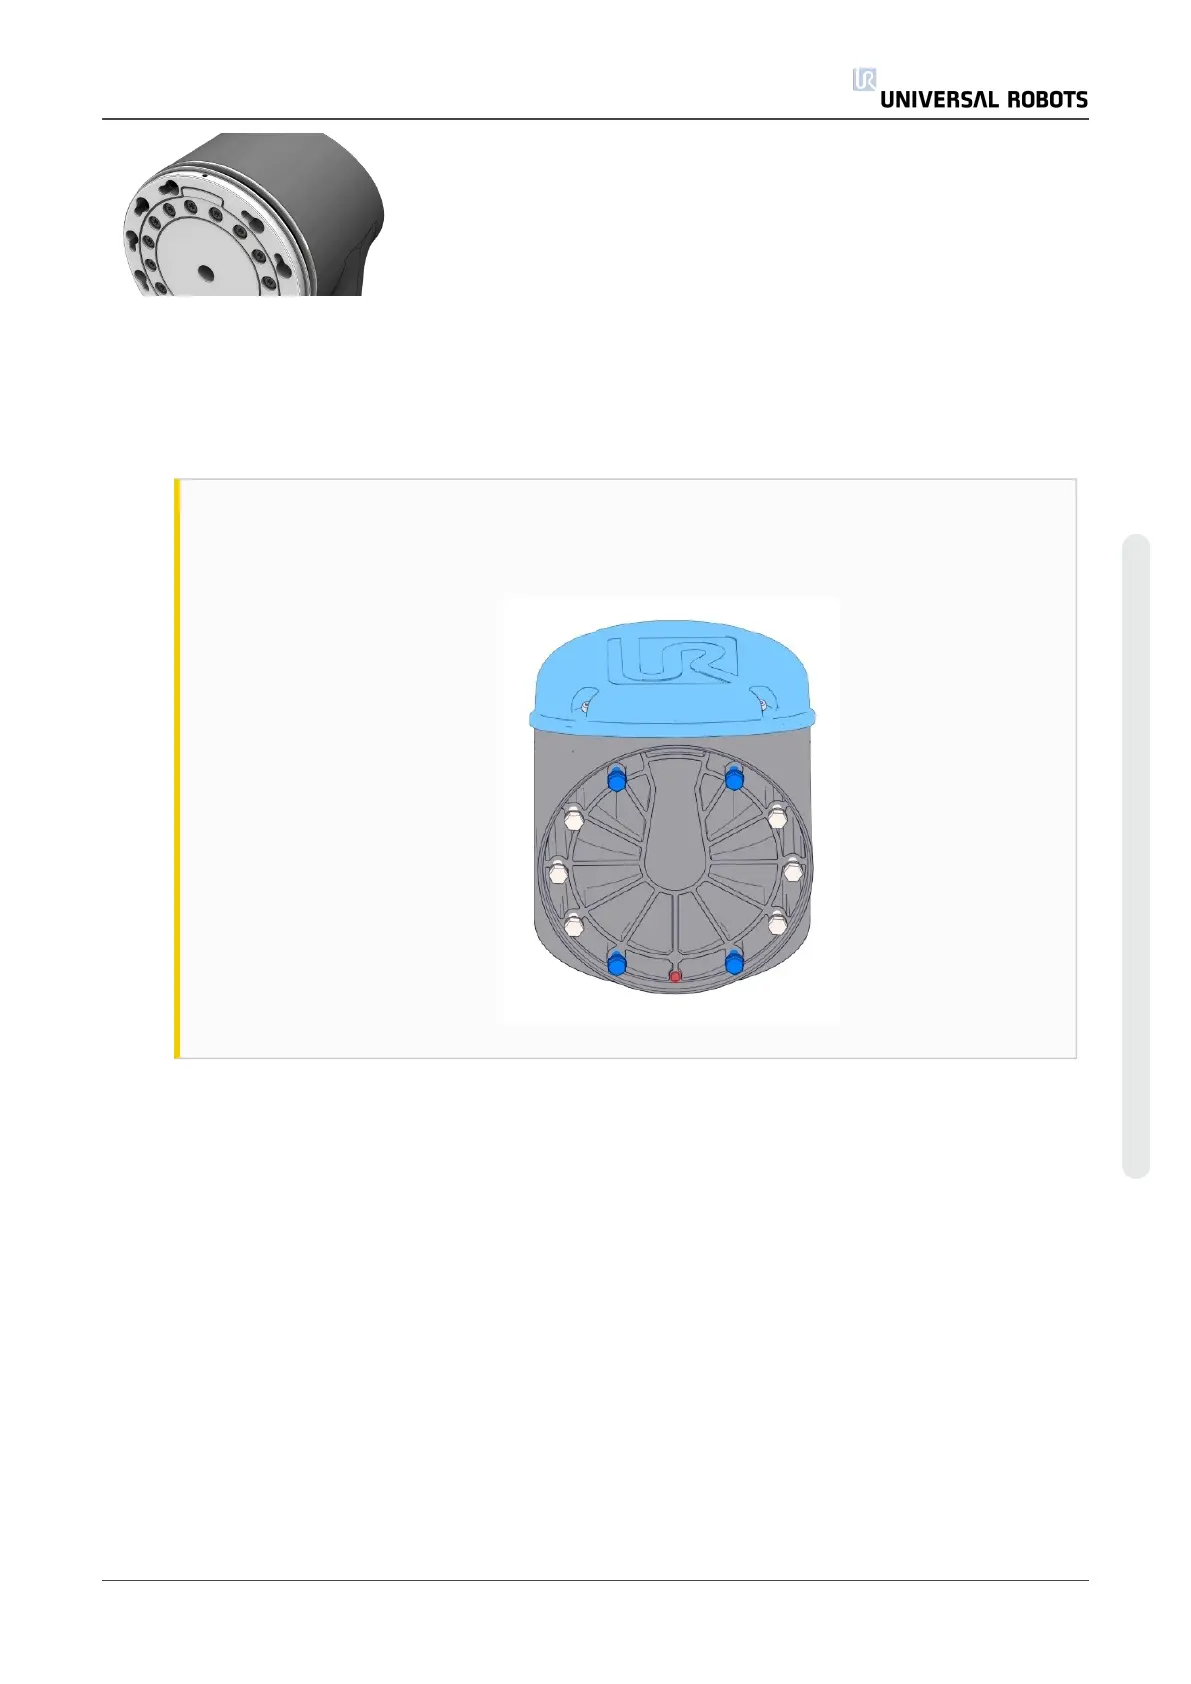
1. Gently insert a screw with washer into each of the ten threaded holes in the joint housing
(the joint will most likely have these already inserted).
CAUTION
It’s important that the correct screws are placed in the correct hole.
The blue marked screws are shorter than the rest.
Service Manual 21 UR5
5.Service and Replacement of parts
Copyright © 2009–2021 by UniversalRobotsA/S. All rights reserved.