LD-16 Door Operator - Modernization Electronic Setup & Adjustment
October 2021 - 88420 v.1.0
65
Speed Pattern Adjustment with the Wittur Programming Tool (WPT)
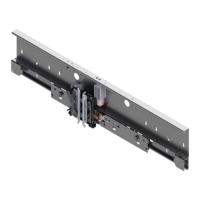
The LD-16 Door Operator is shipped with standard speed pattern default settings for
the open and close movement profiles (doors come pre-adjusted, but nudging and
closing force must always be adjusted per car). However, these default speed pattern
settings may not provide the operation desired. Operate the elevator on Automatic
Operation to observe the default door operation and, if modifications are desired,
perform the Speed Pattern Adjustment process below.
Use with: Programming Tool WPT manual (located in the WPT Kit, see page 85).
The port for the WPT on the door card is only active when the CAN Interface Card
communications are removed (uncoupling door operator from the control system).
When this link is removed, automatic cycling of doors from the control system is not
possible.
Automatic Door Cycling During Adjustment Procedure
See Figure 57 on page 66 for all steps in this procedure.
1. Place the car on Inspection Operation, then power down and remove the X5 plug
from the CAN Interface Card (located on top of the door card). Power back up, and
the Wittur tool communications and the X1 discrete door movement inputs are now
enabled.
2. Construct a reusable harness long enough to use the WPT and also reach the door
operator so that when the car is placed below floor level, or if working from the car
top, the use of the X1 wires can initiate door movement.
3. Use plug 292PG6 as the male portion of X1 and install wires in the plug to corre-
spond with the inputs in Figure 57.
4. To activate the input, connect the COM wire to any one of the other five wires.
• inputs are active low = goes to ground to activate.
• When the X1 inputs are used and the input is activated, the corresponding card
LED will light up. See Table 3 on page 67.
5. Once all door adjustments have been performed and saved, power down and
remove the reusable harness.
6. Reinstall the X5 plug onto the CAN Interface Card (located on top of the door card).
7. Power up, test, and verify door operation.