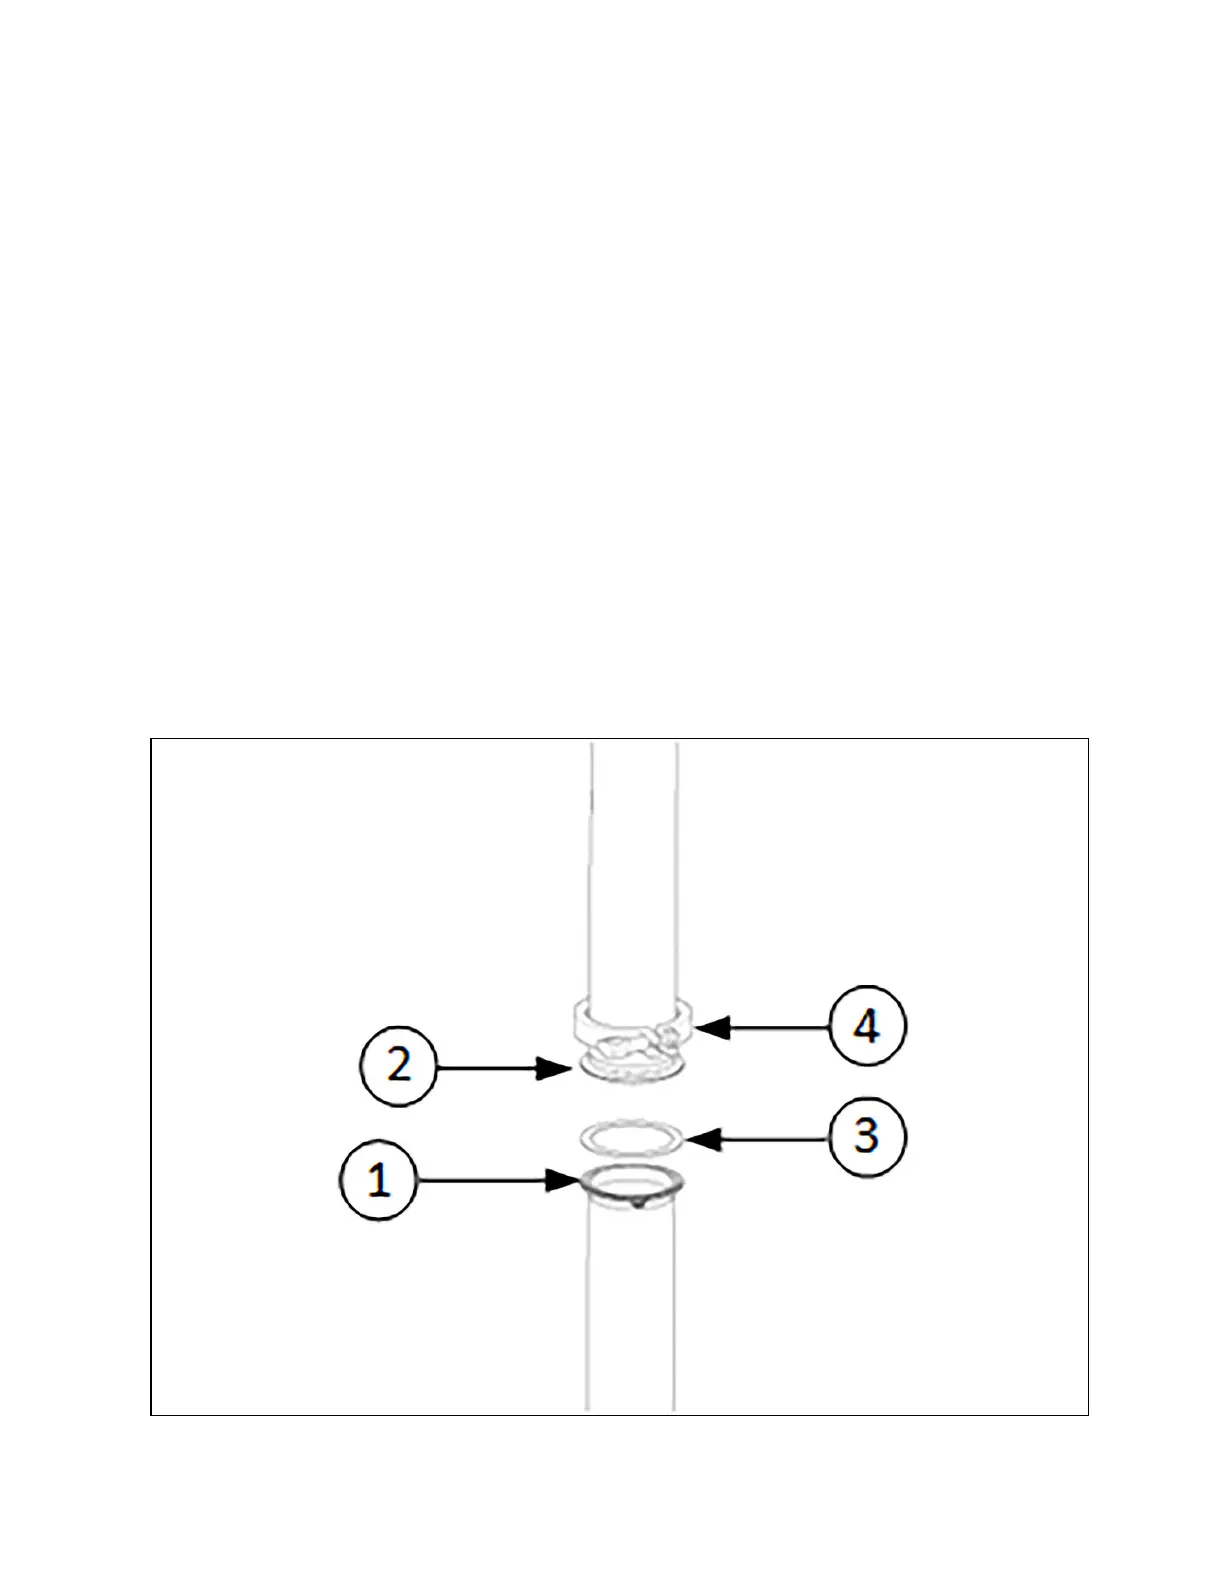
Gasket Check
1. Do not use sealing compound, grease, or other paste or adhesive on the gasket or flange faces.
2. Do not force the gasket into the seat between the mating flange faces during insertion.
a. Once the gasket is seated, bring the mating flanges together carefully without shaking the gasket off the
seat.
3. Visually examine gaskets before installation to ensure that they are free from defects.
4. Clean the gasket seat.
5. Make sure the material is as specified. Look for any possible defects or damage in the gasket such as folds or
creases.
Gasket Installation
1. Position the gasket between the ferrule flanges.
2. Align the gasket head with the grooves of both ferrule flange faces.
3. Mate the faces together, applying the clamp.
4. Tighten Wingnut to 25 in. lb.
5. Review joint due to thermal cycling testing of pipes and their hygienic clamp connections, then a re-torque may
be needed.
Figure 7.1 Hygienic Sanitary Flange Assembly
64 Proprietary and Confidential ©2024 Vertiv Group Corp.
7 Secondary Fluid Circuit
Requirements
Vertiv™ CoolPhase CDU Installer/User Guide