12
Liebert
®
PDX, EconoPhase Version - UM - 265133 - 29.08.2019
2.7 - Moving to the Installation Location with Piano
Jacks
Make sure the oor can support the unit when being moved
with piano jacks. Adequate support (e.g. metal plates) should
be used to cover the oor to distribute the weight on the oor.
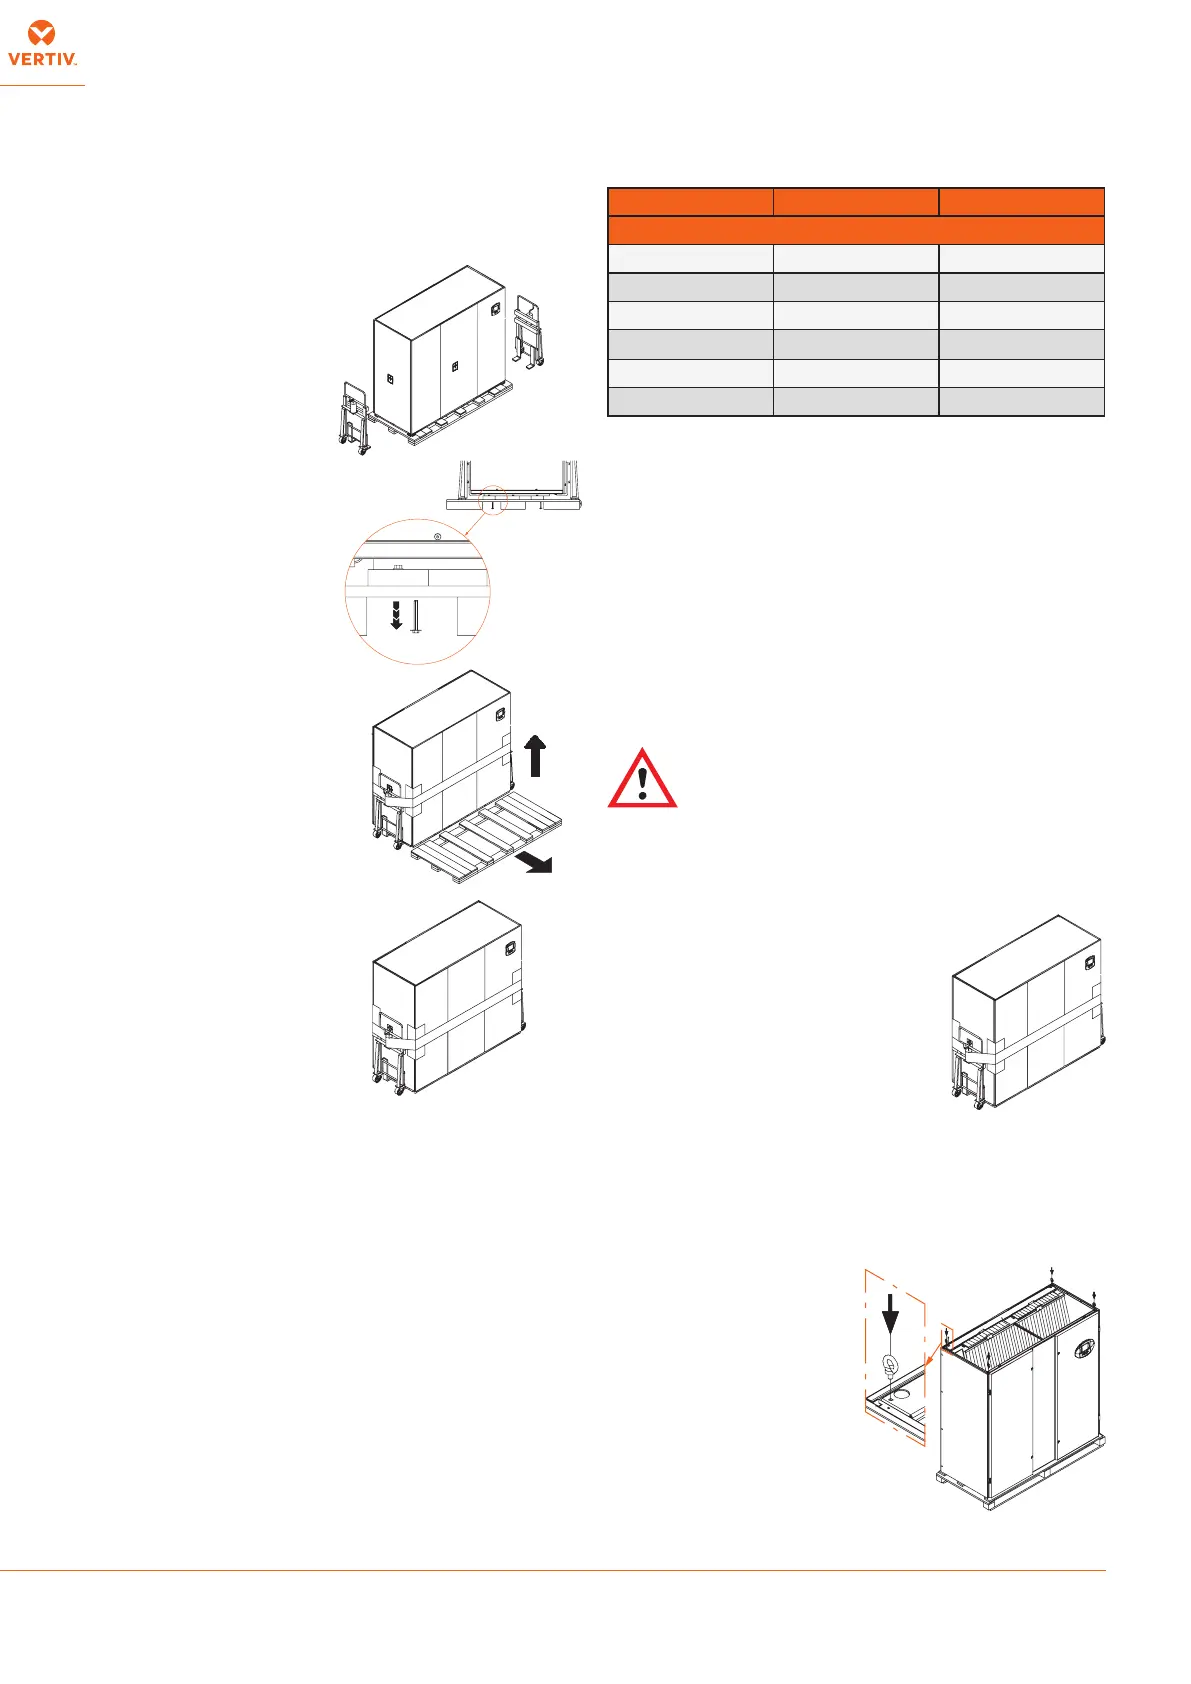
1. Acquire piano jacks and
place them into a position
so one is at each end of
the unit.
2. Remove 4 bolts from the
pallet, two on each side.
Bolts can be removed by
using a socket wrench,
openend wrench or pliers.
3. Place a protective material
between the unit and the
piano jacks and straps.
4. Using the piano jacks,
the unit can be moved
to the site for installation
(min. two technicians are
required).
5. Piano Jacks Removal
• Place the unit as low as the piano jacks will allow
• Undo all the strapping holding the piano jacks to the unit
• Use a pry bar or a similar device to lift the unit high enough
allowing the removal of the piano jacks on each side
• Remove all material used to protect the unit from the piano
jacks and strapping
To move the Fan and the Coil Module of the Extended Height
unit use the above instructions (point 1 to 5).
2.8 - Unit Weight
Tab. 4 - Unit Weight
3 - Positioning
Depending on the unit air discharge conguration there are dierent
kinds of positioning.
• Before proceeding with the installation of all units see overall
dimensions and service area drawings in Enclosure C -
Installation Drawings
• Make sure the oor can support the unit weight (see point 2.8
Unit weights)
• If required, accessories are available to support the unit
in the nal position, to help with water connection and the
maintenance operation.
See Enclosures E - Accessories
NOTICE: Ensure isolation between the air conditioner
and the oor to avoid vibration transmission.
3.1 - Positioning: Downow Up.
• The units have to be installed on the oor
• Downow Up version - a raised oor with an opening below
the unit is required to ensure the correct airow under the oor.
See Enclosure C.
1. To move the unit use the piano
jacks. Make sure the oor can
support the unit when being
moved with piano jacks.
2. Place protective material between
the unit and the piano jacks and
straps.
3. With the unit secured to the piano jacks it can be moved to the
site for installation (min. two technicians are required).
3.2 - Positioning: Downow Down.
A raised oor is required for this installation. The fan section is
installed completely under the oor allowing the correct airow
below the oor. See
Enclosure C
1. Attach 4 shackles M12
to the coil module (not
supplied). Use appropri-
ate shackles to lift the to-
tal assembled unit load.
Models A [kg] Packaging [kg]
Standard Weight Unit
PX082 931 42
PX094 929 42
PX104 931 42
PX120 954 42
PX150 1080 58
PX165 1080 58