Local Mass configuration
In addition to being able to configure a receptacle from its Settings window, an administrator can also configure one or
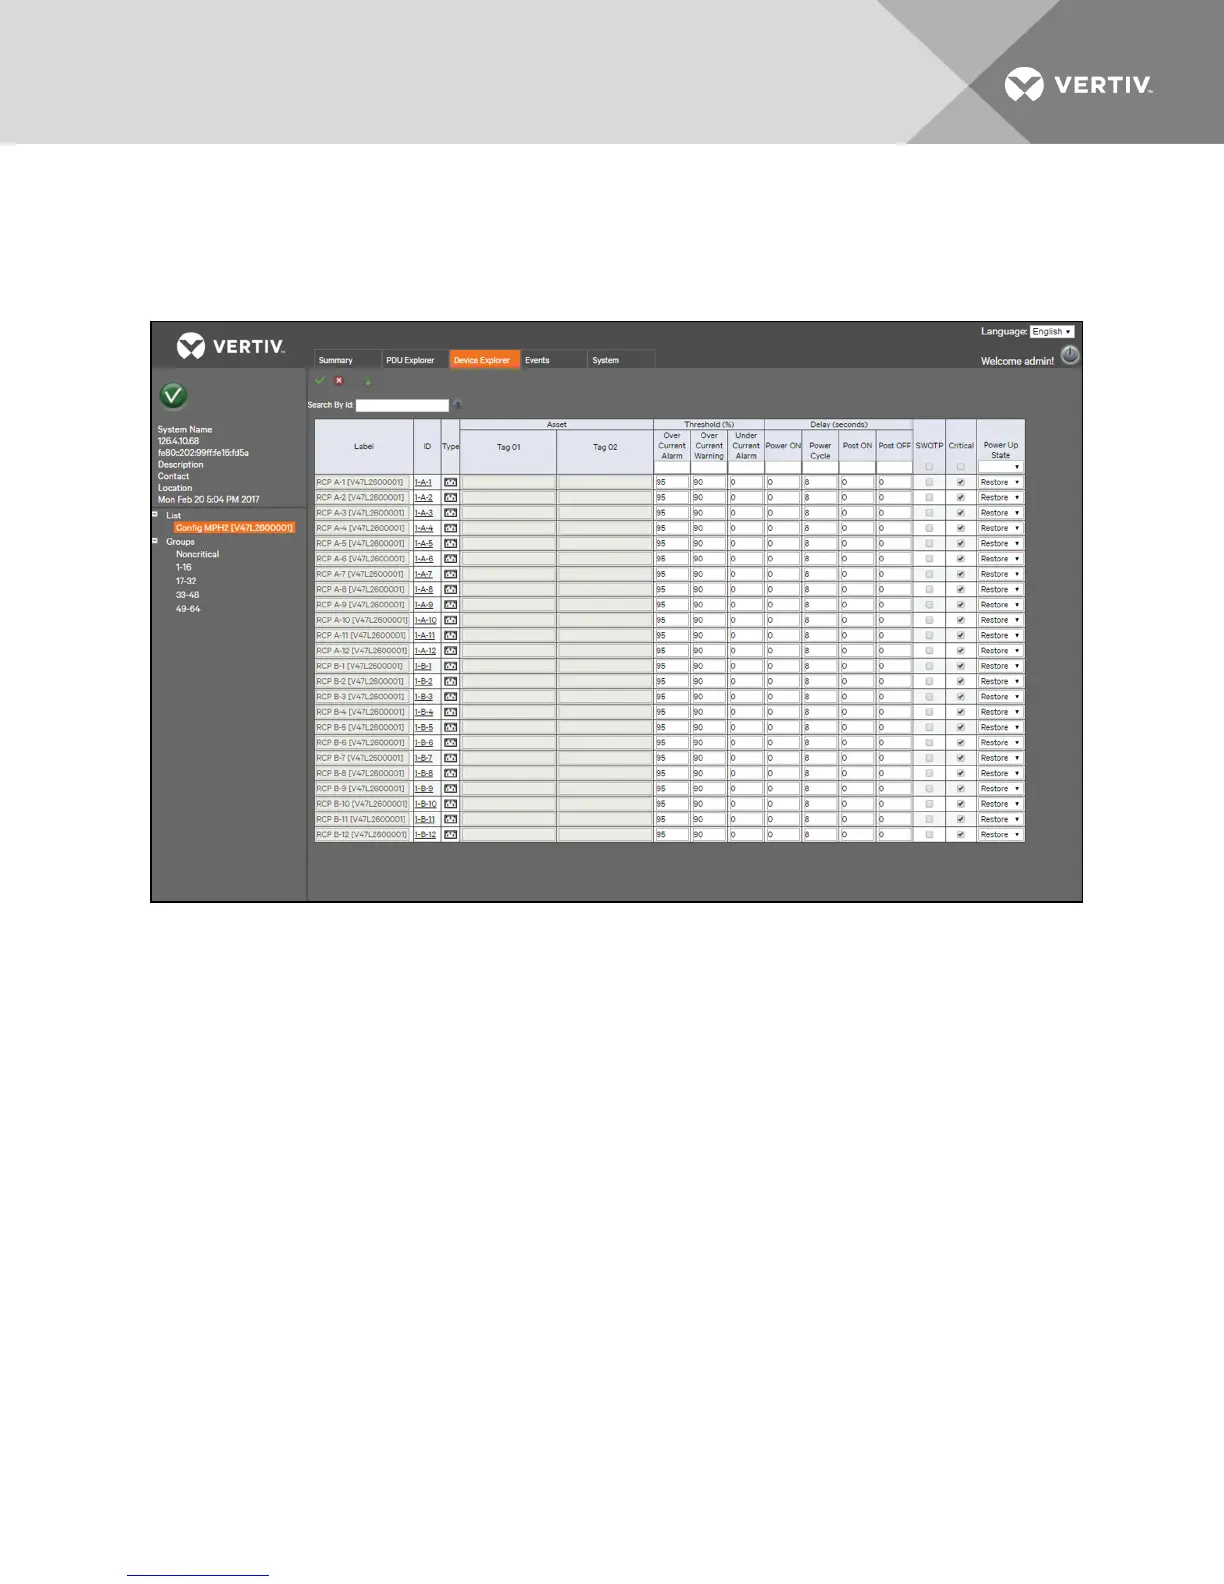
multiple receptacles from the Device Explorer tab window.
Figure 3.5 Mass Configuration Screen
To configure multiple receptacles:
1. From the side navigation tree of the Device Explorer tab window, click Config next to the rack PDUyou want to
configure.
2. Enter the desired settings for the receptacles you want to configure. You can configure threshold percentage,
delay, power up state and enable or disable SWOTP or Receptacle Criticality.
-or-
To configure multiple receptacles with the same settings, enter the desired setting at the top of each column
and click the Fill Down icon.
3. Click Save.
3.4.6 Sensors
Information for the primary sensor is displayed on the Summary tab window. Clicking a displayed sensor opens the sensor
window under the PDUExplorer tab. From this window, you can set and configure the primary sensor. Sensors are
automatically discovered when the RPC2 module reboots or when the first sensor is connected. After the initial sensor string
is discovered, you must manually re-discover a change in the sensor configuration by clicking the Discover icon under the
PDU
Explorer - Sensor configuration window.
To set the primary sensor:
1. From the Summary tab, click the primary sensor to open the Sensor window in the PDUExplorer tab.
2. Click the radio button next to the sensor you want to be the primary sensor.
3. Click the Set Primary Sensor icon in the upper-left of the window.
Vertiv | RPC2™ Communications Module Installer/User Guide | 16