18 19
REV. 2.1 22-06-2020REV. 2.1 22-06-2020
3,2mm
6,4mm
Adjusting screw to open the
inside guide based on the
fabric thickness
Adjusting spring screw to
increase the force on the front
movable guide
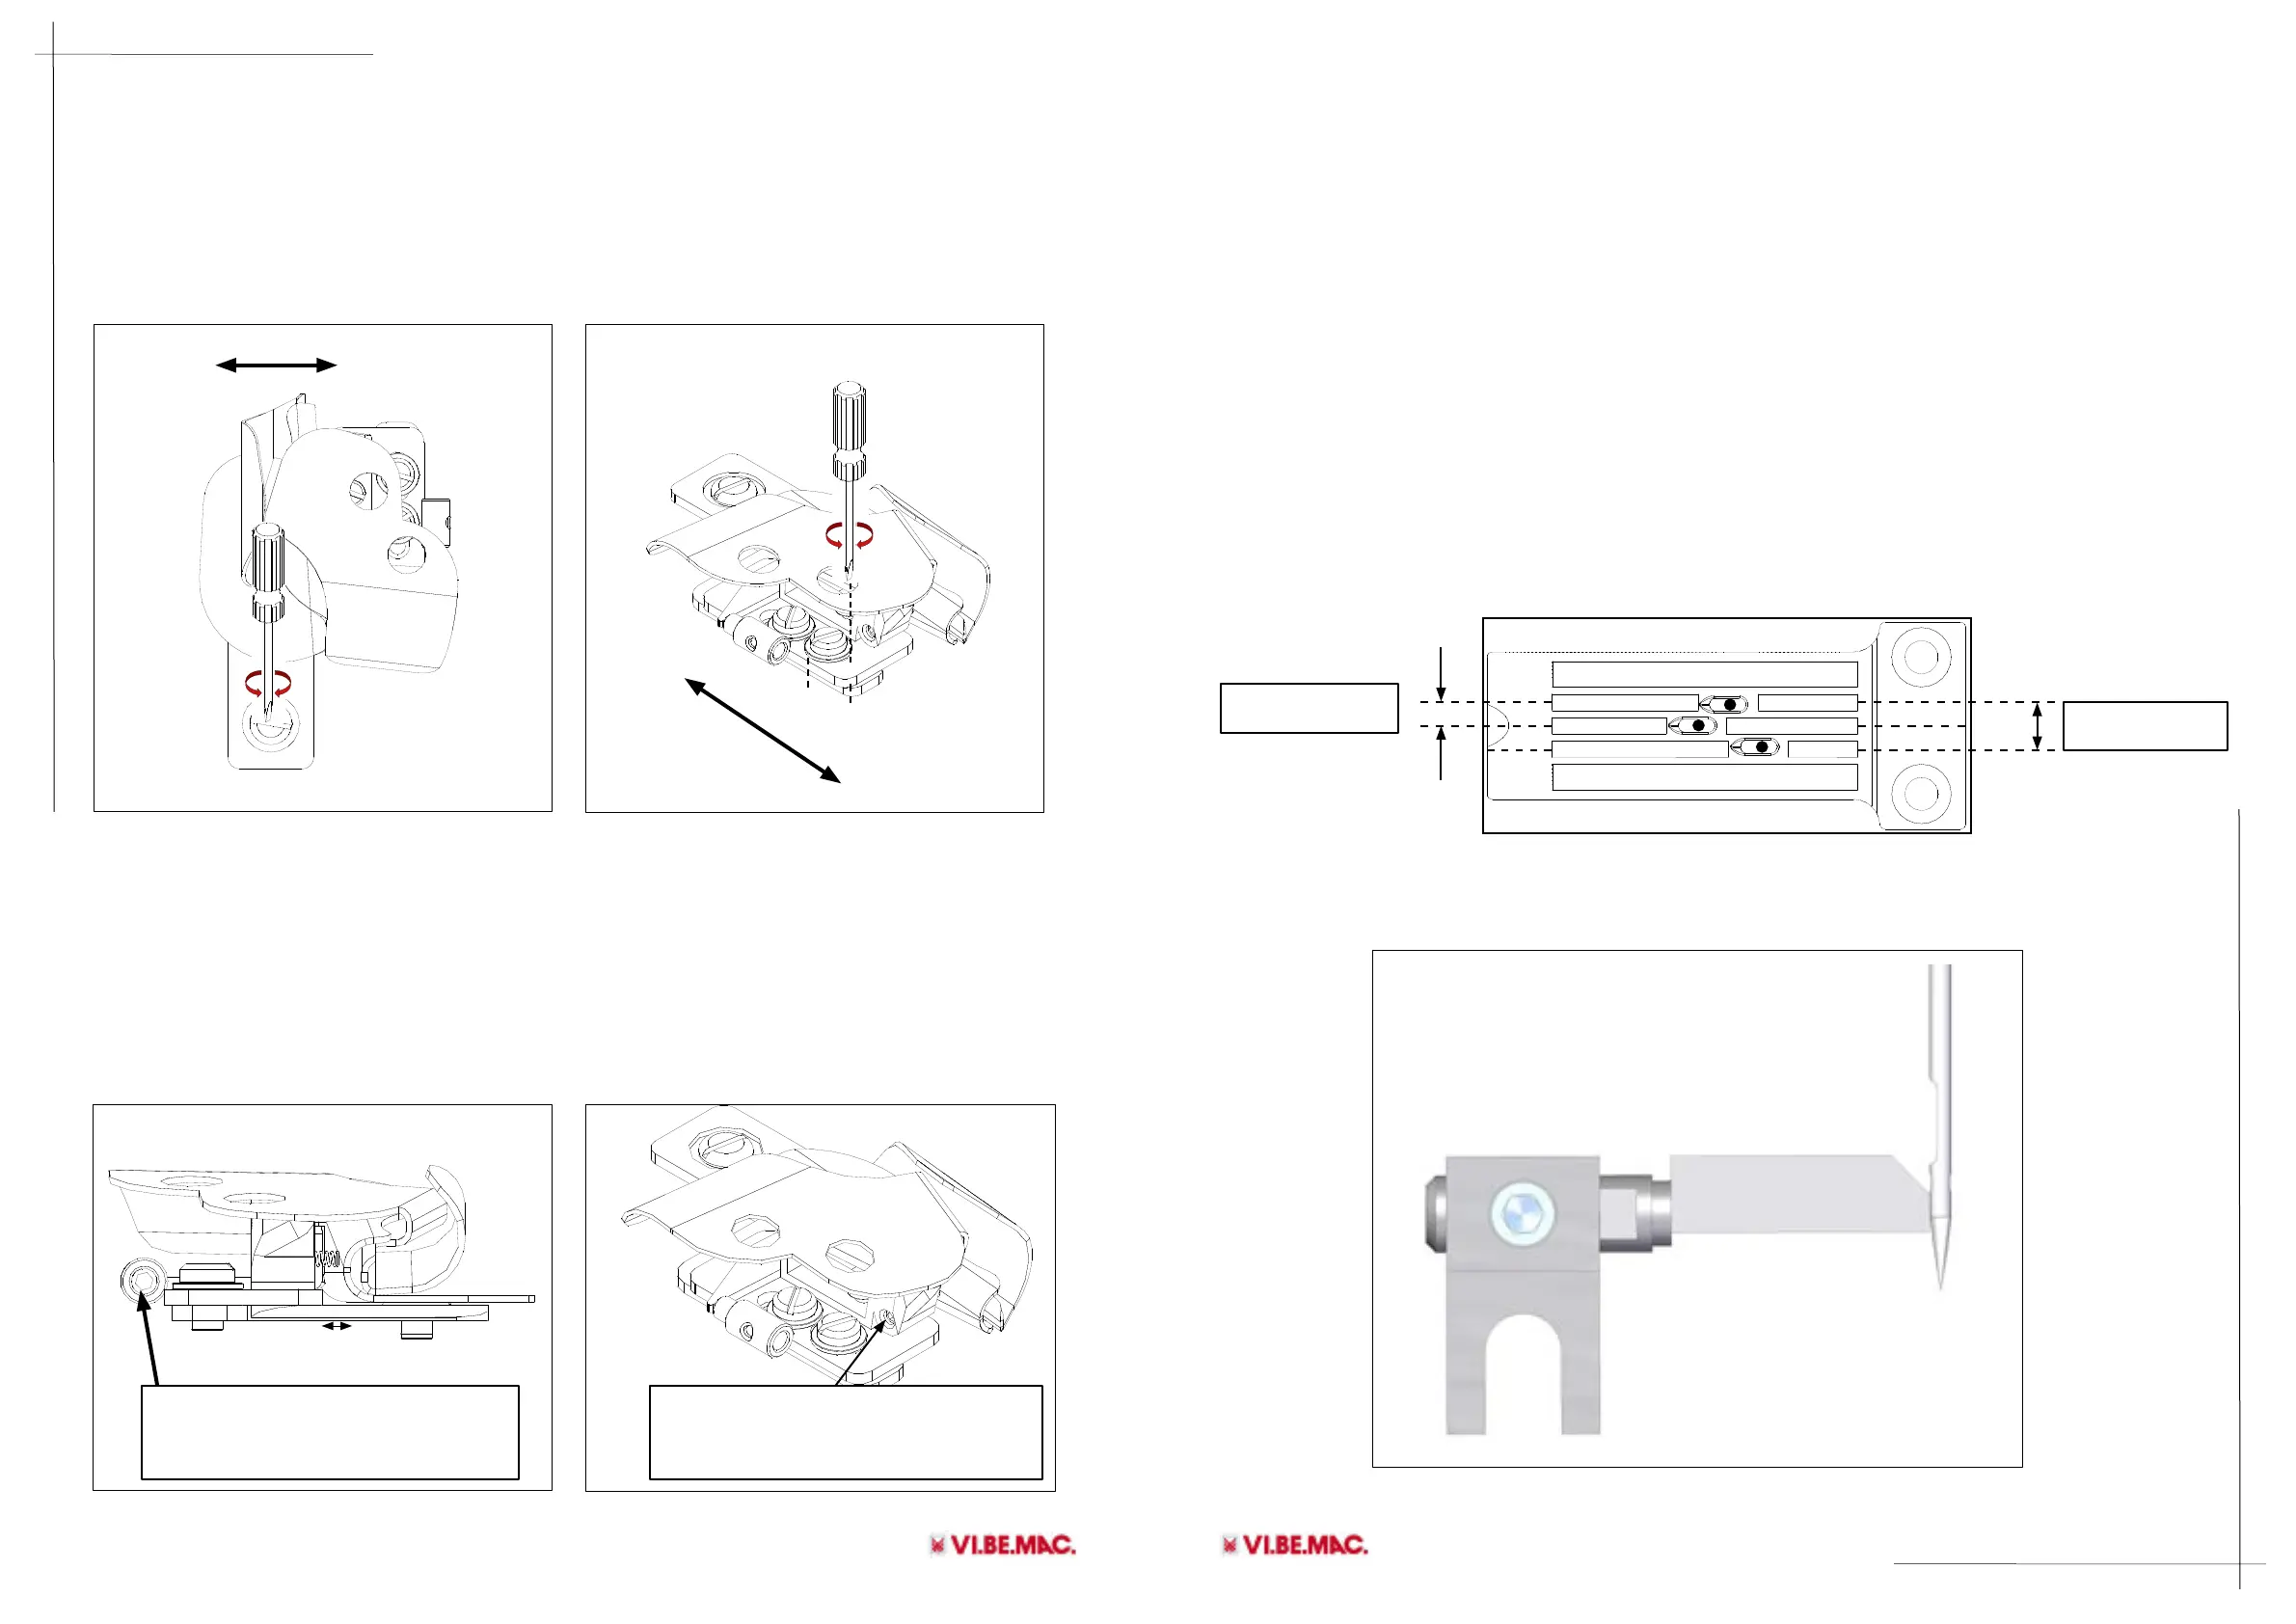
10.1- Feller position
• performed and control that both edges are centerd with the sewing
• the Feller doesn’t touch the presser foot
• the left side of the Feller is aligned with the wisecrack inside on the left of the presser foot
10.2- Adjustable lower side
For the feller to work correctly the fabric have to pass between the two parts of the feller
without getting jammed. Usually the distance among the two guides is as tight as possible
making sure that the material can pass easily even on the fabric joint. Adjust the strength
of the mobile guide, as strong as possible always making sure that the fabric joint can pass
without getting jammed.
11. V261 MECHANICAL ADJUSTMENTS
The V261 unit uses a new sewing head expressly realized for this type of seam by VI.BE.MAC. S.p.A.
before accessing any sewing unit.
Below is a list of the most common adjustments to be made to the machine in the event of
repairing the machine.
For any problem that can’t be immediately solved or to require further information please
After having centered the needles check that all 3 needles are toutching in the way on the
needle guard
11.1- Needle bar position
Check that the needles enter perfectly in the center of the needle plate holes. In case of
adjustment remove the front cover from the sewing head and loosen the needle bar clamp
screw. Centre the needles in comparison to the present holes in the plate needle. Tighten the
screw in the Needle bar clamp.