31
EN
16657715_en 05/2006
5.1.2 Machine box
The machine box is located under the hood at the front
of the machine on the right-hand side. The box houses
the electronic control for twine and net tying.
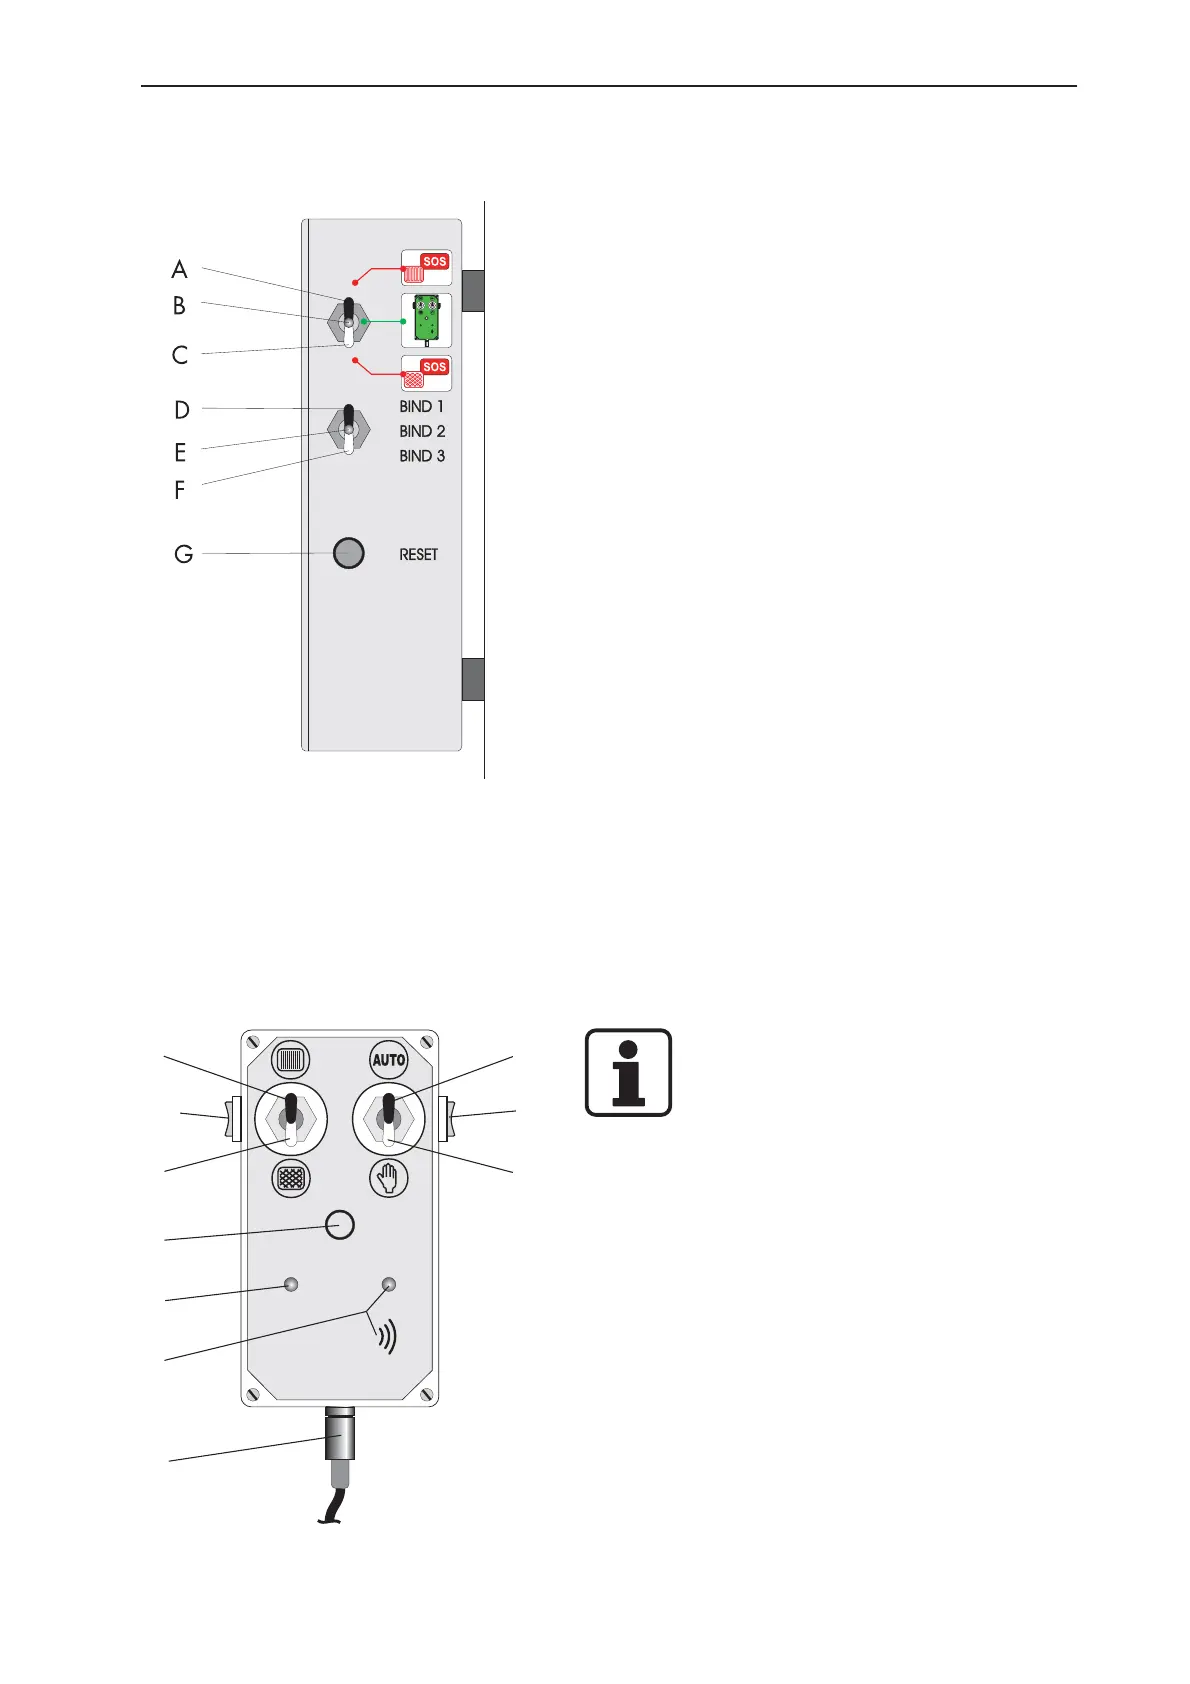
Description of the functions:
A Activation of emergency mode for twine tying
B normal operating condition, system activated
electrically.
C Activation of emergency mode for net tying
D Setting the number of wraps for twine or netting -
Stage 1
E Ditto - Stage 2
F Ditto - Stage 3
G RESET
5.1.3 Setting the tying system
Setting the number of twine/netting wraps:
The number of twine or netting wraps is adjusted with
the toggle switches (positions D/E/F) on the machine
box.
- Twine: BIND 1 = 18 wraps,
BIND 2 = 22 wrap,
BIND 3 = 26 wraps
- Netting: BIND 1 = 2 wraps
BIND 2 = 3 wraps
BIND 3 = 4 wraps
Note:
The given number of wraps for ‘BIND 1’,
‘BIND 2’ and ‘BIND 3’ refers to the
nominal speed of 540 rpm. At a lower
speed, the number of wraps drops
correspondingly.
5.1.4 Automatic / manual tying start
Automatic or manual start of tying is selected with the
toggle switches (positions 8/9) on the control box. In
automatic mode, tying is automatically started when a
preadjusted compressing density is reached. Start of
binding is indicated by a horn sounding and a signal
light coming on at the control box three times at fixed
intervals.In manual operation, a sustained horn signal
indicates that the pressing density has been reached.
After that, binding can be started manually by pressing
the button (4), and this will also switch off the horn
signal.
1
8
2
10
3
9
4
5
6
7
 Loading...