TABLE OF CONTENTS
1 Getting to know your machine 1:5
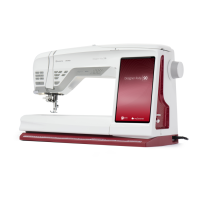
MACHINE OVERVIEW 1:6
Rear Side ...........................................................................1:6
Needle Area ......................................................................1:6
Accessory Tray .................................................................1:7
Parts of the Embroidery Unit .......................................1:7
ACCESSORIES 1:7
Included Accessories ......................................................1:7
Hoops Included ...............................................................1:7
Accessories Included - Not in the Picture ..................1:8
Presser Feet ......................................................................1:8
STITCHES 1:10
2 Set Up 2:1
UNPACKING 2:2
Connect the Power Cord and Foot Control ...............2:2
Pack Away after Sewing .................................................2:2
FREE ARM 2:3
SPOOL PINS 2:3
Horizontal Position .........................................................2:3
Vertical Position ...............................................................2:3
Auxiliary Spool Pin .........................................................2:3
THREADING THE UPPER THREAD 2:4
Needle Threader ..............................................................2:4
Threading for Twin Needle ...........................................2:5
THREAD CUTTER 2:5
THREAD SENSOR 2:5
BOBBIN WINDING 2:6
Bobbin Winding Through the Needle .........................2:6
Bobbin Winding while Embroidering or Sewing .......2:7
INSERTING THE BOBBIN 2:7
CHANGING THE PRESSER FOOT 2:7
CHANGING THE NEEDLE 2:8
NEEDLES 2:8
THREADS 2:9
STABILIZERS 2:9
PICTOGRAM™ PEN 2:9
USB PORTS 2:10
USB embroidery stick ...................................................2:10
Connect to and Remove from the USB Port ............2:10
CONNECTING THE MACHINE TO YOUR COMPUTER 2:11
5D™ Embroidery Software ........................................2:11
Installing your Software ...............................................2:11
Install Hardware Drivers and
Connect the Embroidery Machine ...........................2:11
How to Launch the Programs .....................................2:12
Embroidery Machine Communication module ........2:12
How to Update your Machine .....................................2:12
3 Settings & Functions 3:1
INTERACTIVE COLOR TOUCH SCREEN 3:2
COMMON ICONS/FUNCTIONS 3:2
OK .....................................................................................3:2
Cancel ................................................................................3:2
Touch & Hold ..................................................................3:2
TOOLBAR 3:2
START MENU 3:2
SEWING/EMBROIDERY MODE 3:2
QUICK HELP 3:3
EXTENDED TOOLBAR 3:3
STITCH MENU 3:3
How to Select a Stitch ....................................................3:3
FONT MENU 3:3
Selecting a Font ...............................................................3:3
DESIGN MENU 3:4
Selecting a Design ...........................................................3:4
EMBROIDERY ADVISOR™ 3:4
FILE MANAGER 3:4
SET MENU 3:5
Stitch Settings .................................................................3:5
Sewing Settings ................................................................3:6
Machine Settings..............................................................3:8
Sound Settings .................................................................3:9
Screen Settings .................................................................3:9
INFORMATION MENU 3:10
FUNCTION BUTTONS 3:11
Speed + and - .................................................................3:11
STOP (Monochrome) ..................................................3:11
FIX (Baste) .....................................................................3:11
Reverse ............................................................................3:11
Selective Thread Cutter ................................................3:12
Needle Stop Up/Down (Trim Position) ...................3:12
Start/Stop ....................................................................... 3:12
EXCLUSIVE SENSOR SYSTEM™ 3:12
Sensor Foot Up and Extra Lift ...................................3:12
Sensor Foot Down and Pivot ......................................3:12
4 Sewing 4:1
SEWING MODE - OVERVIEW OF ICONS 4:2
EXCLUSIVE SEWING ADVISOR™ 4:3
Fabric Selection ...............................................................4:3
Sewing Techniques ..........................................................4:4
Extended SEWING ADVISOR™ ..............................4:4
SELECT A STITCH 4:4
STITCH SETTINGS 4:5
Stitch Settings in SET Menu ..........................................4:6
FREE-MOTION TECHNIQUE 4:7
RAISE AND LOWER THE PRESSER FOOT 4:7
SEWING TECHNIQUES 4:8
Seam ..................................................................................4:8
Overcast ............................................................................ 4:9
Seam and Overcast ........................................................4:10
Seam/Overcast for Ribbing ........................................4:10
Baste ...............................................................................4:11
Blind Hem ......................................................................4:11
Hem ................................................................................. 4:12
Perfectly Balanced Sensor One-Step Buttonhole .....4:13
Manual Buttonhole .......................................................4:14
Embroidered buttonhole .............................................4:14
Programmable Button Sew On ...................................4:14
Bartacks...........................................................................4:15
Manual Bartack ..............................................................4:15
4-way Stitches - Menu S ...............................................4:16
8-Way Stitches – Menu T .............................................4:17
Special Sewing Techniques ..........................................4:18
Taper Satin Stitch ..........................................................4:18
Decorative Tapering Stitches .......................................4:18
SEWING POP-UP MESSAGES 4:19