APPENDIX A. PowerMaster 360 Configurator
D-305735 PowerMaster 360 Installer's Guide 59
6. Click the Connect tab, which includes Broadband network settings. Enter the following settings:
o IP Address 1/2: First and second IP address of the PowerManage server with which the PowerMaster 360
communicates.
o APN: Enter the name of the Access Point used for the internet settings of the GSM.
o Sim Pin Code: Enter the PIN code of the SIM card installed in the GSM module.
o Panel Sim No: Enter the PowerMaster 360 SIM card telephone number.
o Wakeup Caller ID: Enter the "Caller ID" (i.e. telephone number) from which the Monitoring Station calls the
control panel for initiating the Up/Download process.
o GPRS Password / User Name: Enter the Password and Username of the APN used for GPRS communications
o Local Network Setting DHCP: Select this option to obtain the PowerMaster 360’s IP address automatically. To
assign the PowerMaster 360 a specific and permanent IP address, deselect this option and type its IP Address,
Subnet Mask and Gateway.
o Current PowerLink. Read only fields that display the current PowerLink IP addresses of the PowerMaster 360.
7. Click Save All in the top right corner of the screen.
Note: Save All saves all changes made on all of the Configurator tabs.
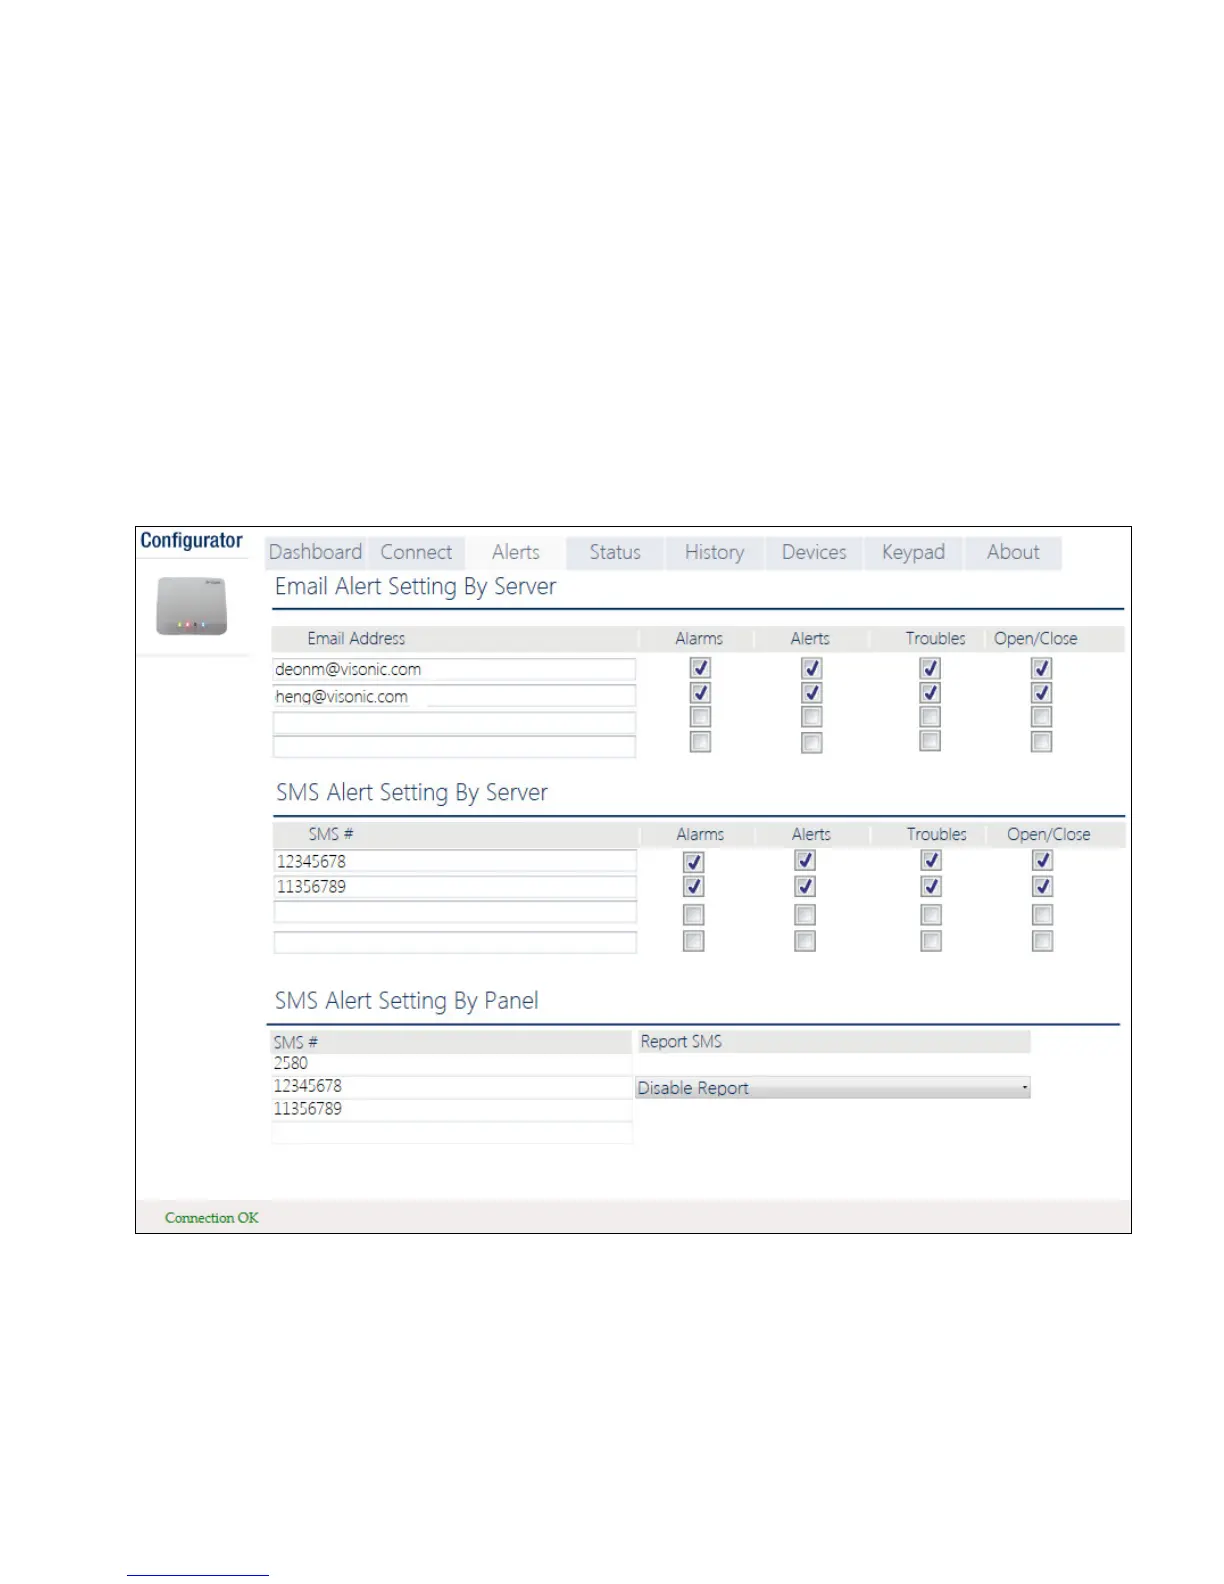
8. Click the Alerts tab. Here, define up to 4 email addresses and 4 mobile devices to receive forwarded events by e-
mail and SMS from the PowerManage server. Additionally, select the types of event messages which each user is
allowed to receive (Alarms, Alerts, Troubles, Open/Close events).
Notes for installers:
o Verify that the PowerManage server is configured to send emails and SMSs.
o Verify that the Panel event reporting to CMS is defined as ALL.
o Any of these notifications can be sent to the property owner in addition to the Central Monitoring Station. For
detailed instructions, see the PowerMaster 360 Installer and Quick Guide.

 Loading...


