3-58 Troubleshooting, Testing, and Maintenance
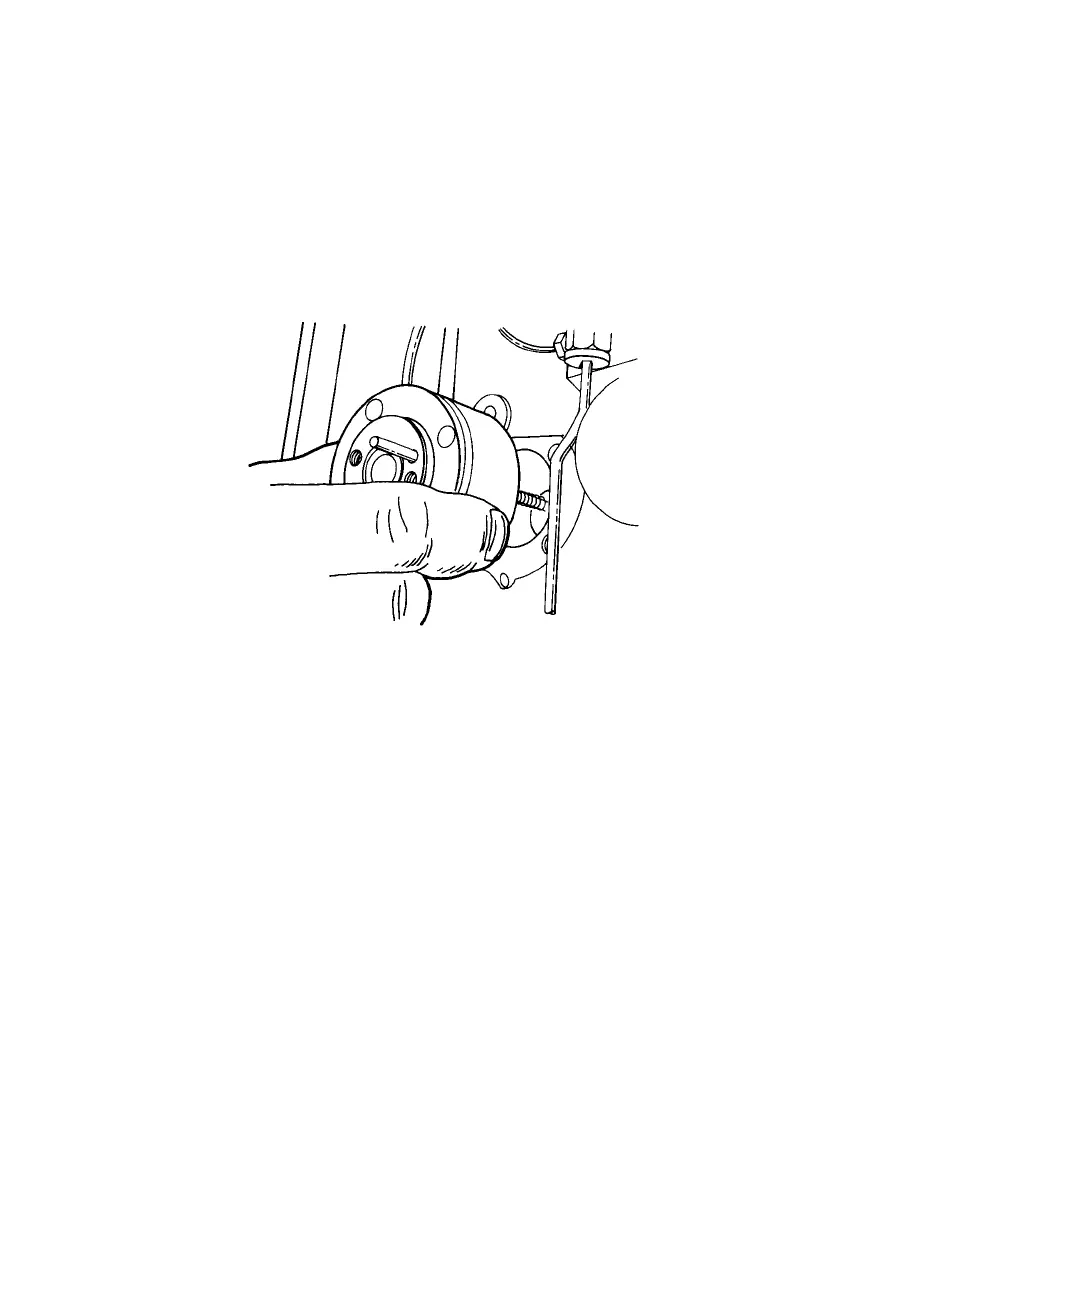
To remove the head support assembly:
1. Remove the four plunger support screws with a 9/64-inch hex-head
wrench.
2. Slide the head support assembly and indicator rod off the plunger.
Removing the head support assembly
Tip: Continue with “Replacing the pump plunger” on page 3-61 or “Replacing
the plunger wash seal” on page 3-65.
Replacing the pump seal
During routine maintenance, replace the seal in both pump heads at the same
time.
Tip: The seal insertion tool that this procedure refers to consists of the tool
itself and the large guide (Startup Kit). The tool presses the pump seal in
position for correct alignment in the pump head. The guide ensures the seal is
properly aligned during installation.
To replace the pump seal:
1. Remove the pump head
2. Remove the three plunger bearings from the back of the pump head to
expose the pump seal.