Install WAZER Pro
Estimated Time: 120 minutes
Requires two people.
• Check Pump Section
• Establish two water connections
• Install On/Off Valve
• Establish - Power cable connections
• Anchor WAZER to the wall
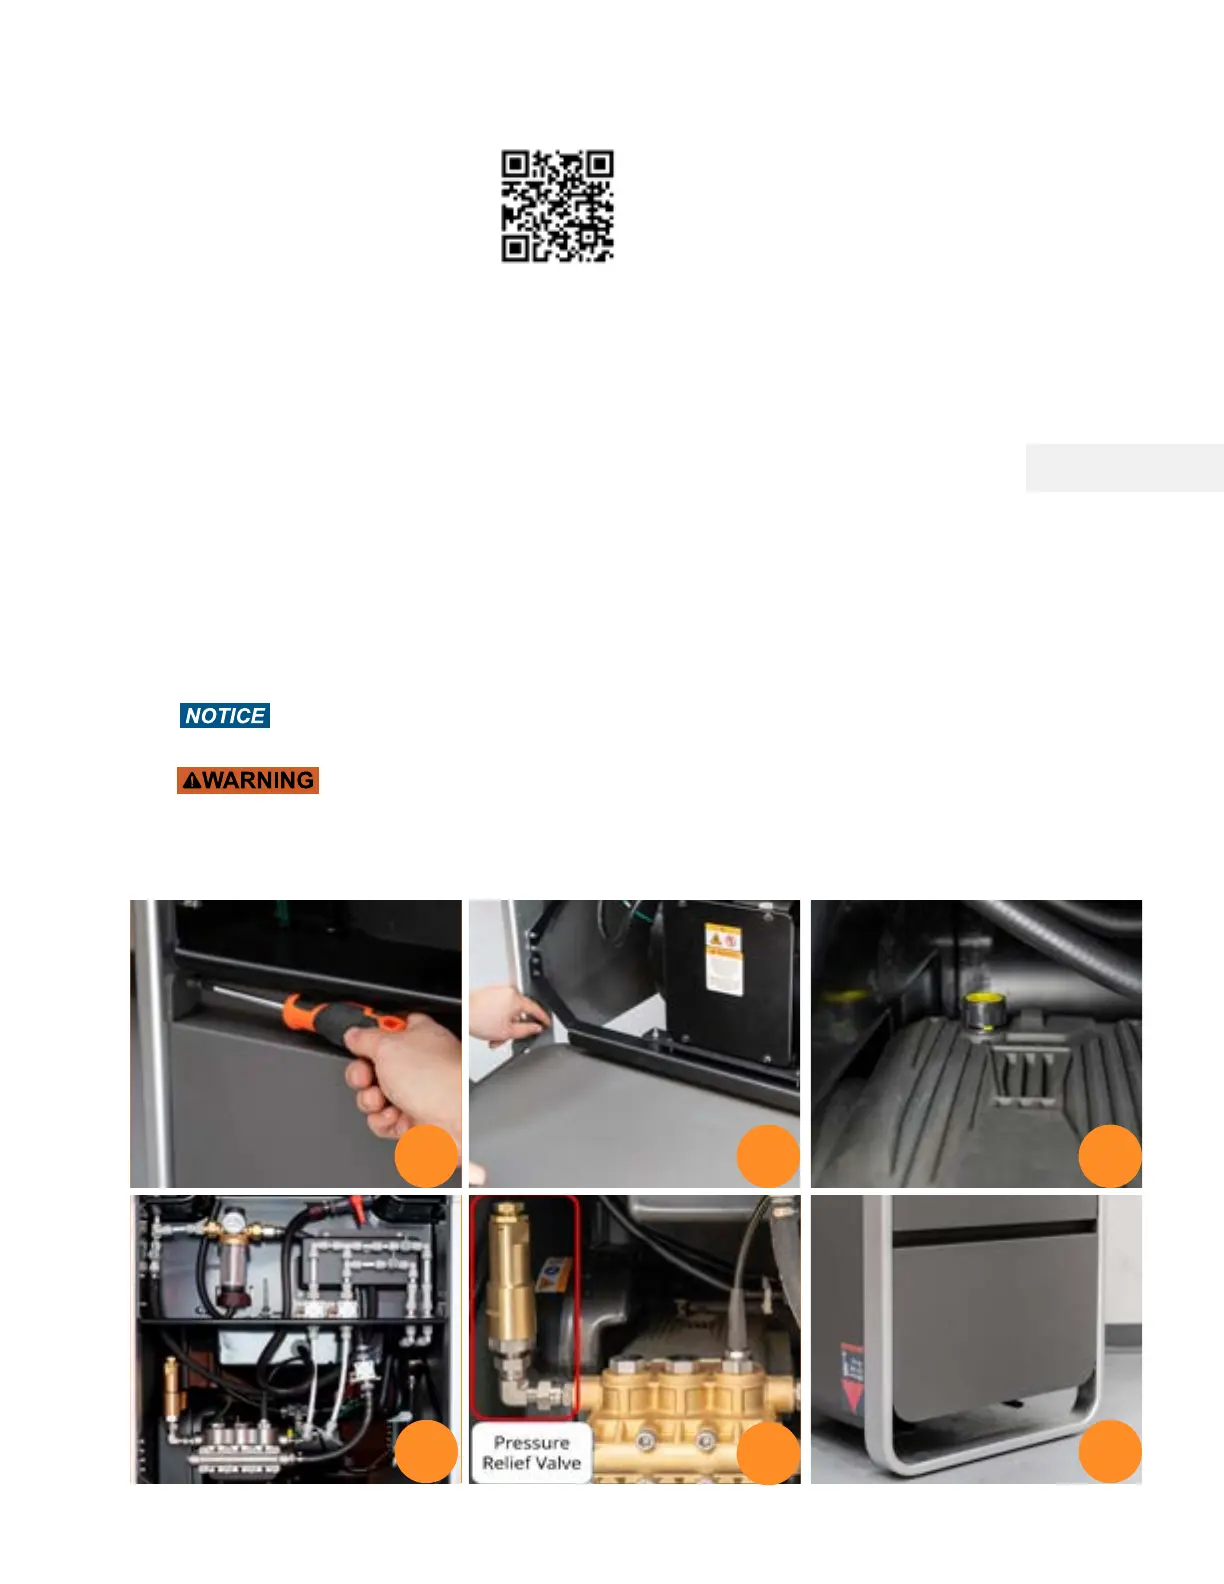
Check Pump Section
1. Remove the top two captive screws using included Philips Screw Driver.
2. Lay flat the Bottom Machine Panel
3. Check if there is a yellow Oil Vent Cap on the water pump.
4. Check if all High Pressure and Low Pressure Hoses are firmly attached to their fittings
5. Check the temper proof seals on Pressure Relief Valve.
6. Put the Bottom Machine Panel back.
Running the unit with the red Oil Cap or with little oil will damage the Pump, and
this damage WILL NOT be covered under warranty.
NEVER remove the panels and work on the machine while the WAZER Pro is connected
to power, during operation or possesses residual pressure. Ensure the power plug is not
connected during this step.
If the High-Pressure Hose outer layer has been damaged down to the outer wire layer,
the High-Pressure Hose shall be withdrawn from use. Contact WAZER Support
1 2 3
4 6
Note 4 Pg.17
5
32