Preparation
Refer to System Dissection in Section 3 to familiarize yourself with all the components of WAZER
Pro. We will be referencing these parts by name throughout the remainder of this section.
Checklist: Before You Cut
Fill the Tank and Check for Leaks
Do NOT run WAZER Pro with a low water level in the Tank.
The water in the Tank is critical to protect tank Bottom from
the Jet. Ensure the Tank is filled to the top level of the Cut Bed.
It takes approximately 40 gallons (160L) of water to reach this
level. Inspect the area around WAZER Pro and hoses for leaks.
If there is a leak, please turn everything off, wipe it clean and
LET IT DRY completely before checking for damages.
Level the Cut Bed
You may notice that the Cut Bed and water level are not
parallel. This may occur if the machine is not level on the
surface it is placed OR if the Cut Bed is not level. If your
machine is not level you may have water management
errors in the future. If your cut bed is not level, make sure
it is levelled across the cut piece on the cut bed.
Secure the Water Drain Hose
Ensure the Water Drain Hose is correctly positioned,
secured and free of obstruction.
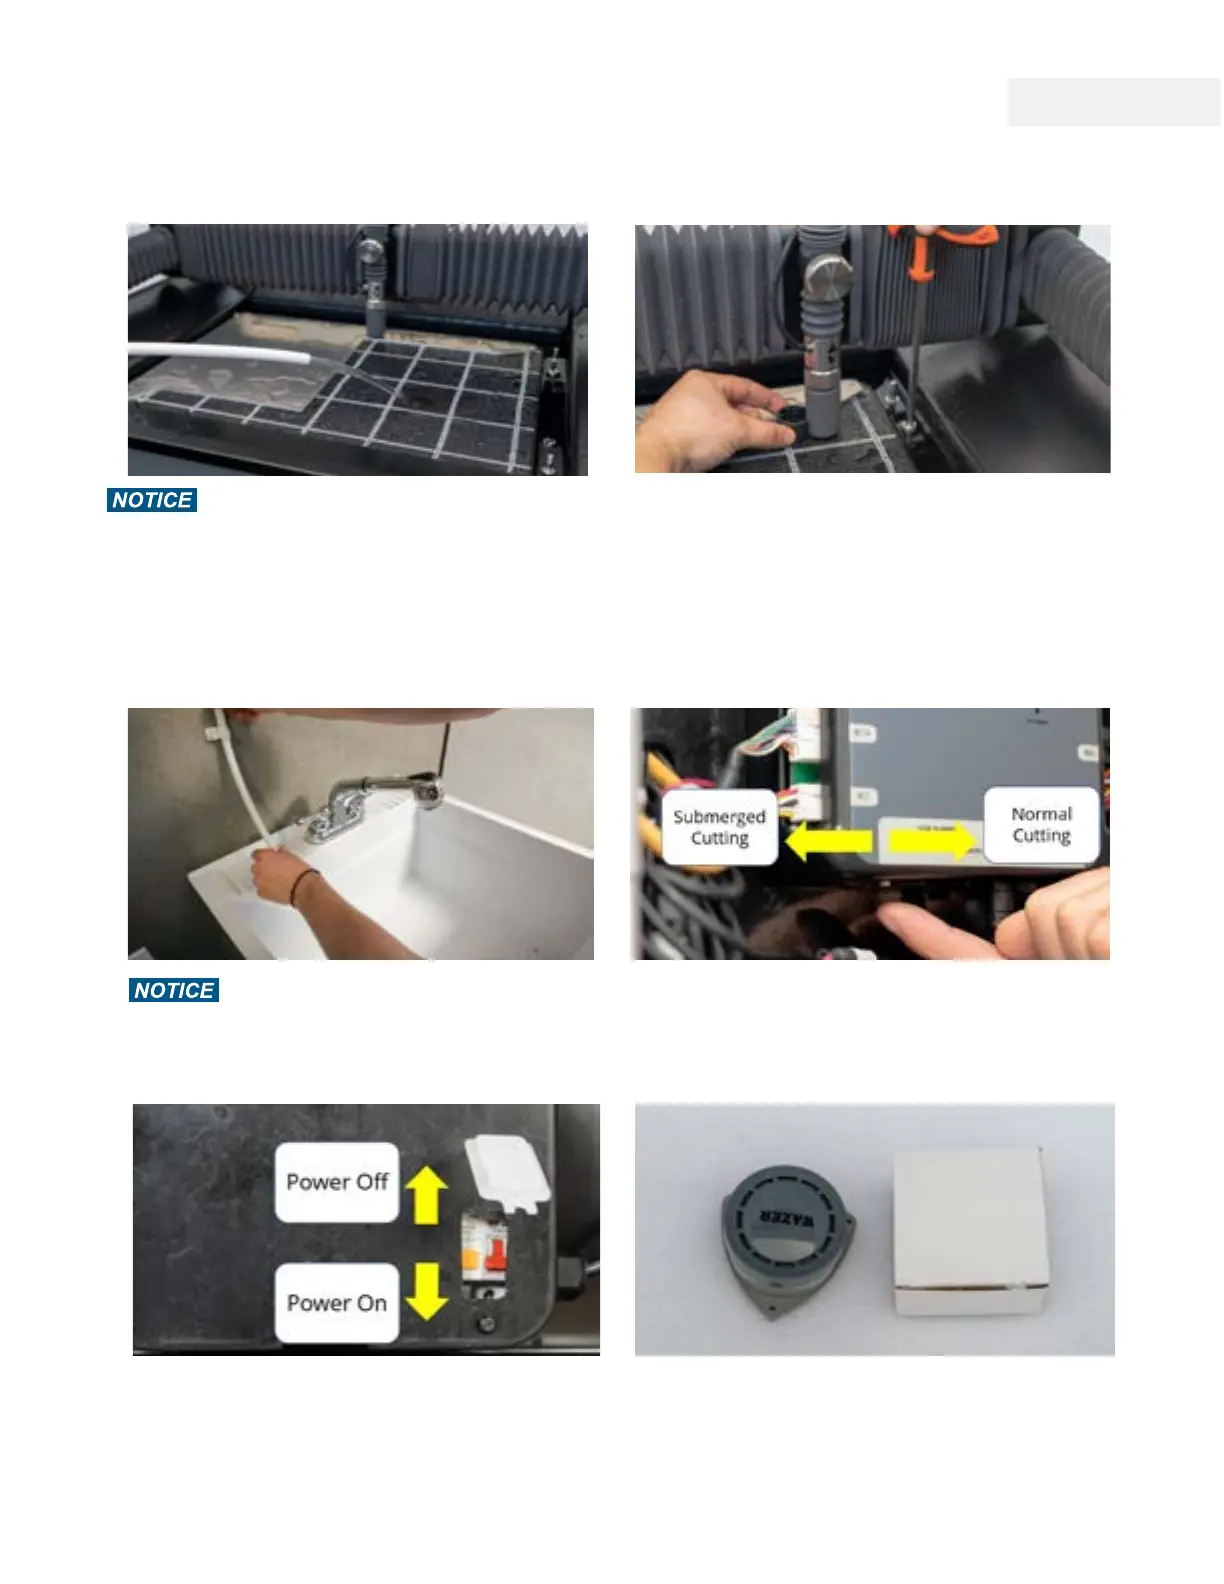
Set Cut Water Level Mode
Under the controller, you will find a small swtich. This is the
Submerge Cut Switch. Setting it to the front will bring water
level higher than cut bed during cut; moving it to the rear
will lower water level to cut bed during cut.
Confirm all Electrical Connections
Ensure the Power Cable is plugged into the appropriate
receptacle. Make sure that RCBO lever is on. Press the
“test“ button to check the RCBO function.
Install 9V Batteries and Water Sensor Alarms
Take the two Water Sensor Alarms from the Accessory Kit
and install two 9V batteries (not included) into them. Place
them on the ground blow WAZER Pro. The Water Sensor
Alarms are NOT connected to WAZER and will NOT pause
its operation. Check their function every 6 months.
Note 4 Pg.18
44