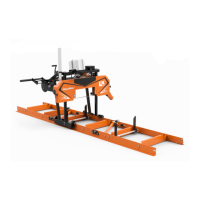
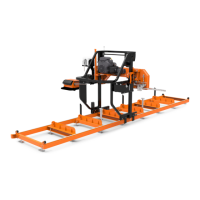
Sawmill Assembly
Assemble the log bed
Sawmill Assembly WMdoc041521 3-9
3
3. Lay the first and second bed sections end-to-end so the track alignment pins of each sec-
tion align with the section in front of it.
4. Slide the sections together as shown in Figure 3-6.
See Figure 3-6.
5. Use a rubber hammer to force the alignment pins into bed rails, if necessary.
6. Secure the bed sections together as shown in Figure 3-6, drawing the top surface
together smoothly.
NOTE: The top surface (round rails) touch before the square support
tubes, leaving a small (1/8” +/-) gap. This is normal. Do not attempt to
draw the square support tubes together.
NOTE: Make sure the top surfaces (round rails) of the bed sections are
smoothly aligned. It may be necessary to adjust one bed section up or
down until the surfaces are aligned, then tighten the bolts.
7. Recheck that the rail joints are tight and smooth.
8. Level the bed and readjust legs as necessary.
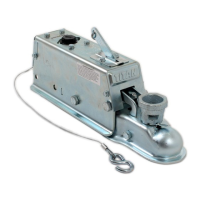
FIG. 3-6
Alignment pin
F81056-1, M12
washer
F81034-2, M12 nut
F81004-4, M12 bolt
 Loading...