BOILER INSTALLATION
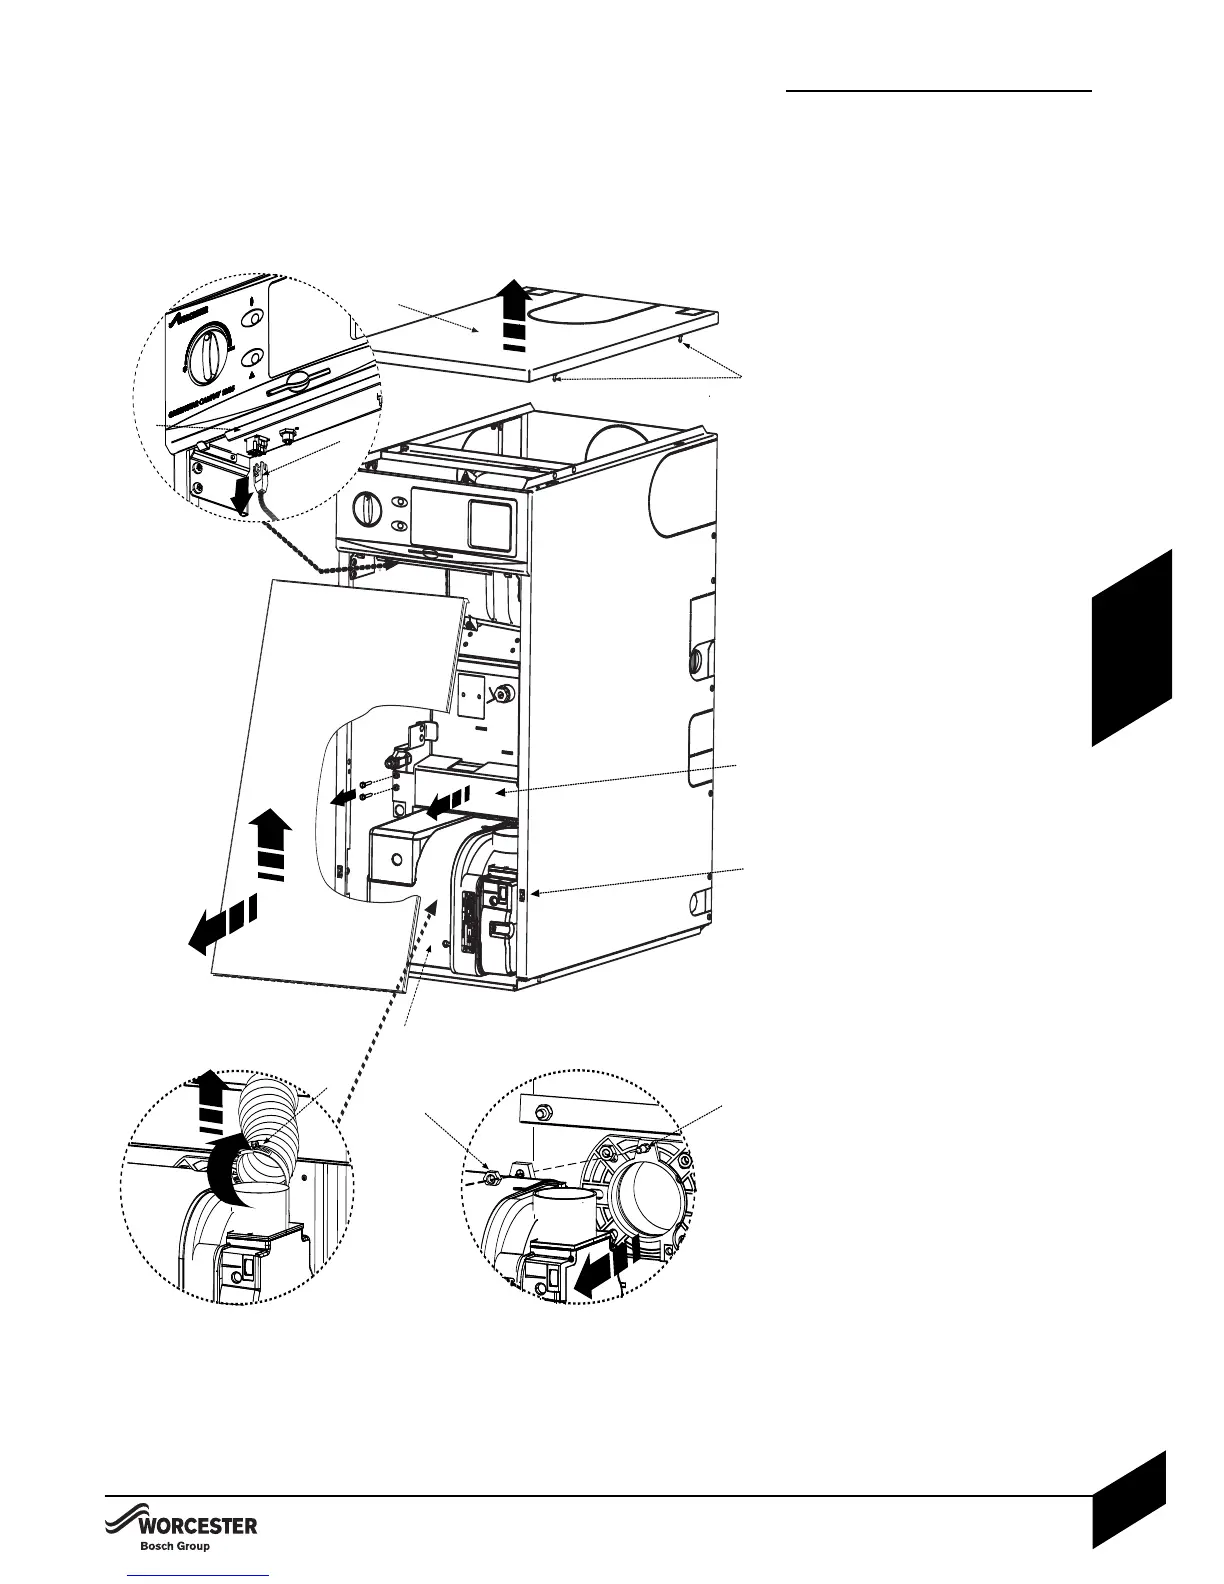
14 Lift the top panel (A) upwards to
disengage the ball stud connections (B)
and remove. Pull front panel (C) forward
from the bottom disengaging the ball
studs from their connections ( D) and lift
off the ledge (
E) that runs along the
bottom of the fascia to remove.
2
4 Depress locking ears to unplug burner
lead (F) from control box.
3 4 Unscrew to loosen the retaining ring
(G) that secures the flexible air supply
tube to the burner and pull the flexible
air supply tube free from the burner.
44 Undo the two screws securing the
deflector plate (H) and remove the plate.
4 Undo and remove the retaining nut ( I )
on top of the burner ( J ). The burner can
now be eased foward off the lug (K) on
the burner collar to remove it from the
heat exchanger. Store the burner and
retaining nut safely away from the boiler.
54 Carefully move the boiler into position
observing at all times the correct
method for handling heavy objects.
B
O
ILER INSTALLATION
I
NSTALLATION & SERVICING INSTRUCTIONS FOR WORCESTER GREENSTAR CAMRAY KITCHEN 12/18-18/25-25/32
8 716 113 000a (01/07)
20
INSTALLATION
1
4
3
A
B
F
G
I
J
C
E
D
K
4
1 / 2
H