6 720 610 597 GB (03.02)
16
Installation
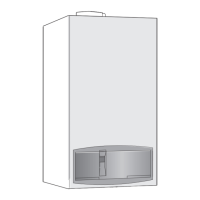
B Lift off the top fixing lugs and slide case forwards and
remove (3.).
Fig. 13
Fixing the appliance
B Fit the washers onto the gas and water connections.
B Lift the boiler onto the wall-mounting frame. The lugs
pass through the rectangular holes in the boiler back
panel.
B Take care not to disturb the washers on the connec-
tions.
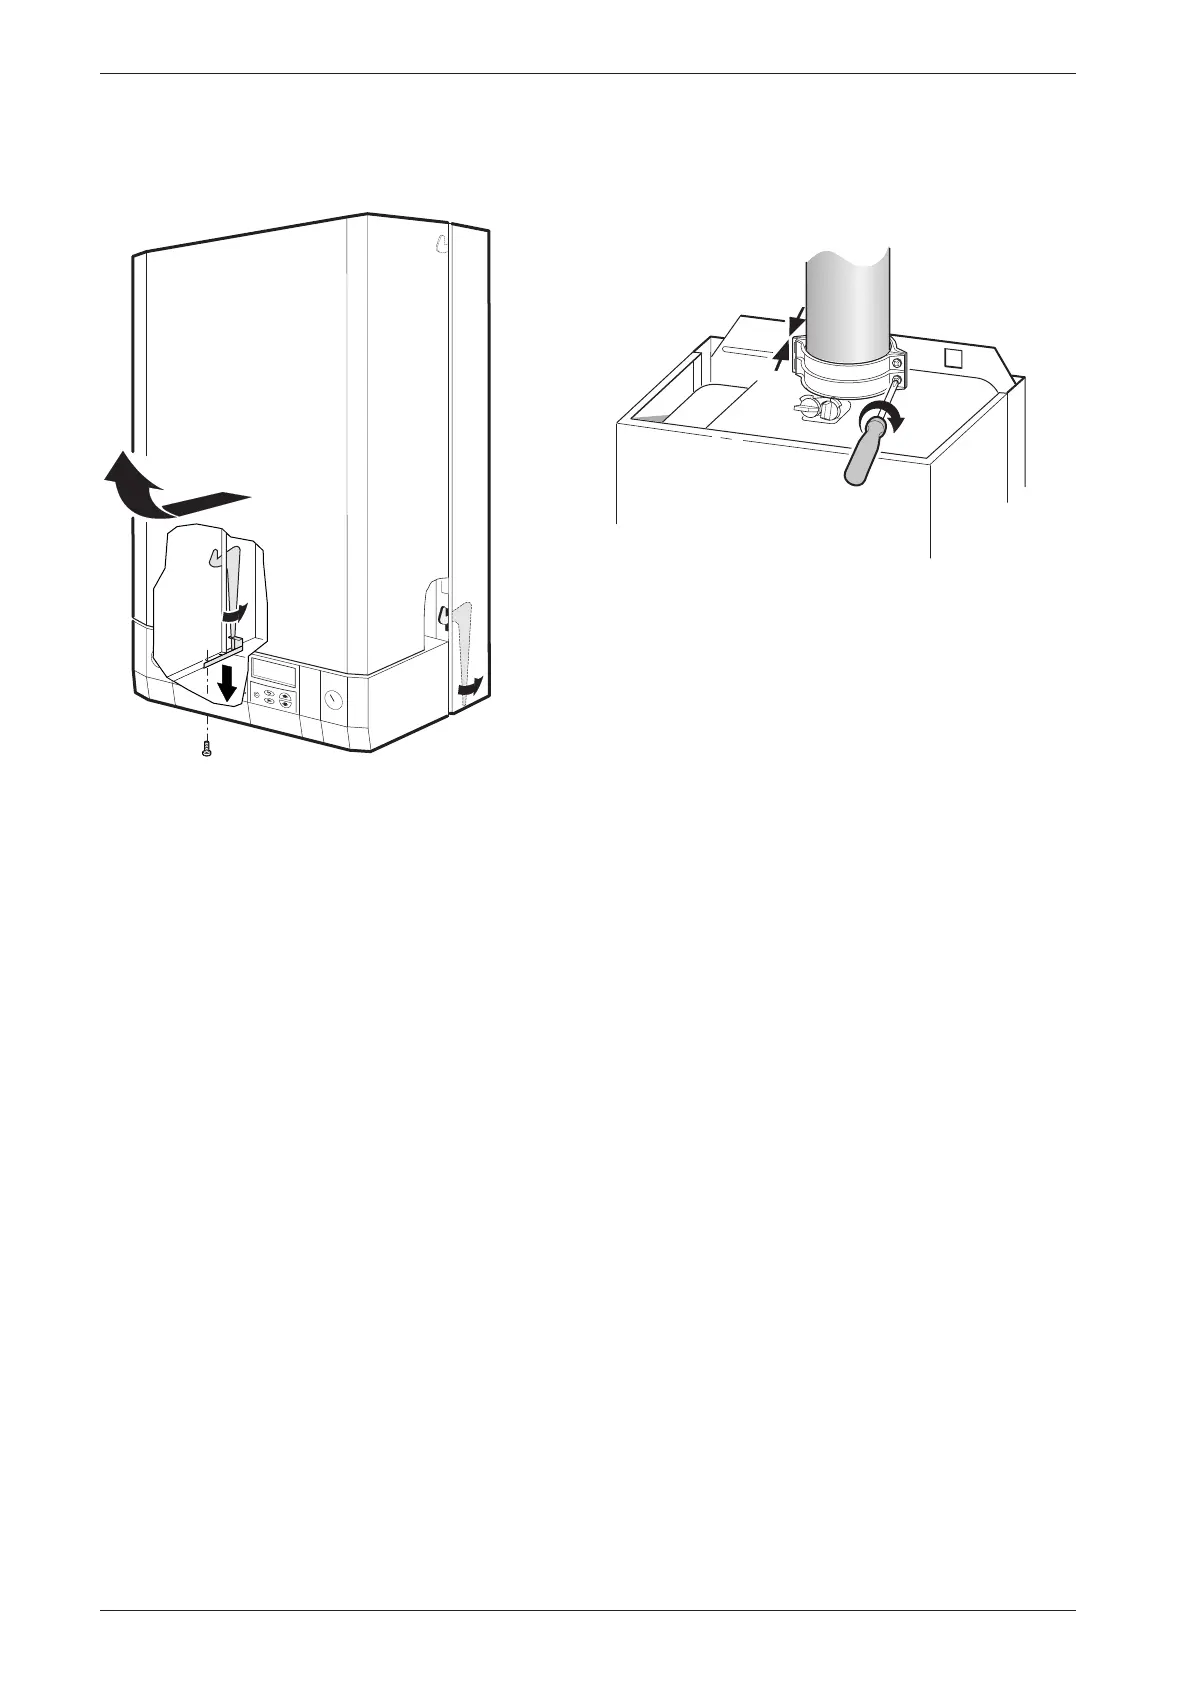
Connecting the flue duct
B Fit flue duct connector onto appliance flue spigot.
B Secure with the two screws supplied.
Fig. 14
B For remaining installation of flue assembly, refer to
the relevant installation instructions.
3.8 Checking the connections
Water connections
B Check that the O-rings or seals are in place before
tightening the connection.
B Turn on the service valves for central heating flow
and return and fill the heating system through a
WRAS approved filling loop.
B Check all seals and unions for leaks (testing pres-
sure max. 3.0 bar as indicated by pressure gauge).
B Turn on cold water service cock and fill hot water
system (testing pressure max. 10 bar).
B Check all connections for leaks.
Gas supply pipe
B Check that the seal is in place before tightening the
connection.
B Turn off gas cock to protect gas valve against dam-
age from excessive pressure.
B Check gas supply pipe.
B Release the pressure on the gas supply pipe.
1
.
2
6 720 610 597 -09.1O
.
2.
3.
6 7 2 0 6 1 0 3 3 2 - 0 9 . 2 R
3
2
4
1 .
2 .

 Loading...