16 2 Setting the Printer Environment
Setting Subnet Mask/Gateway
Address
Note
• When “Ready to print” is displayed, follow steps 1 to 4 in
the previous section before proceeding to the next
procedure.
1. When [IP Address] is displayed, press the
< > or < > button to display [Subnet
Mask], then press the < > or <Eject/Set>
button.
2. Press the < > < > < > < > buttons to
enter the subnet mask, then press the
<Eject/Set> button.
3. Press the < > button to return to [Subnet
Mask].
4. Press the < > or < > button until [Gateway
Address] is displayed, then press the < >
button.
5. Press the < > < > < > < > buttons to
enter the gateway address, then press the
<Eject/Set> button.
6. Press the <Menu> button. The printer
reboots.
Setting Printer
Configurations via
CentreWare Internet
Services
CentreWare Internet Services are services that
allow the user to make use of a web browser in a
TCP/IP-enabled environment to display the printer
or job printing status and to change the settings.
Among the printer settings that are made on the
control panel, settings for the system and network
ports can be configured under [Properties] of
CentreWare Internet Services.
Note
• CentreWare Internet Services is not available when the
printer is used as a local printer.
• Refer to the User Guide
6.3 Checking / Managing the
Printer Status on a web browser when the CentreWare
Internet Services screen does not appear after following
the procedures below.
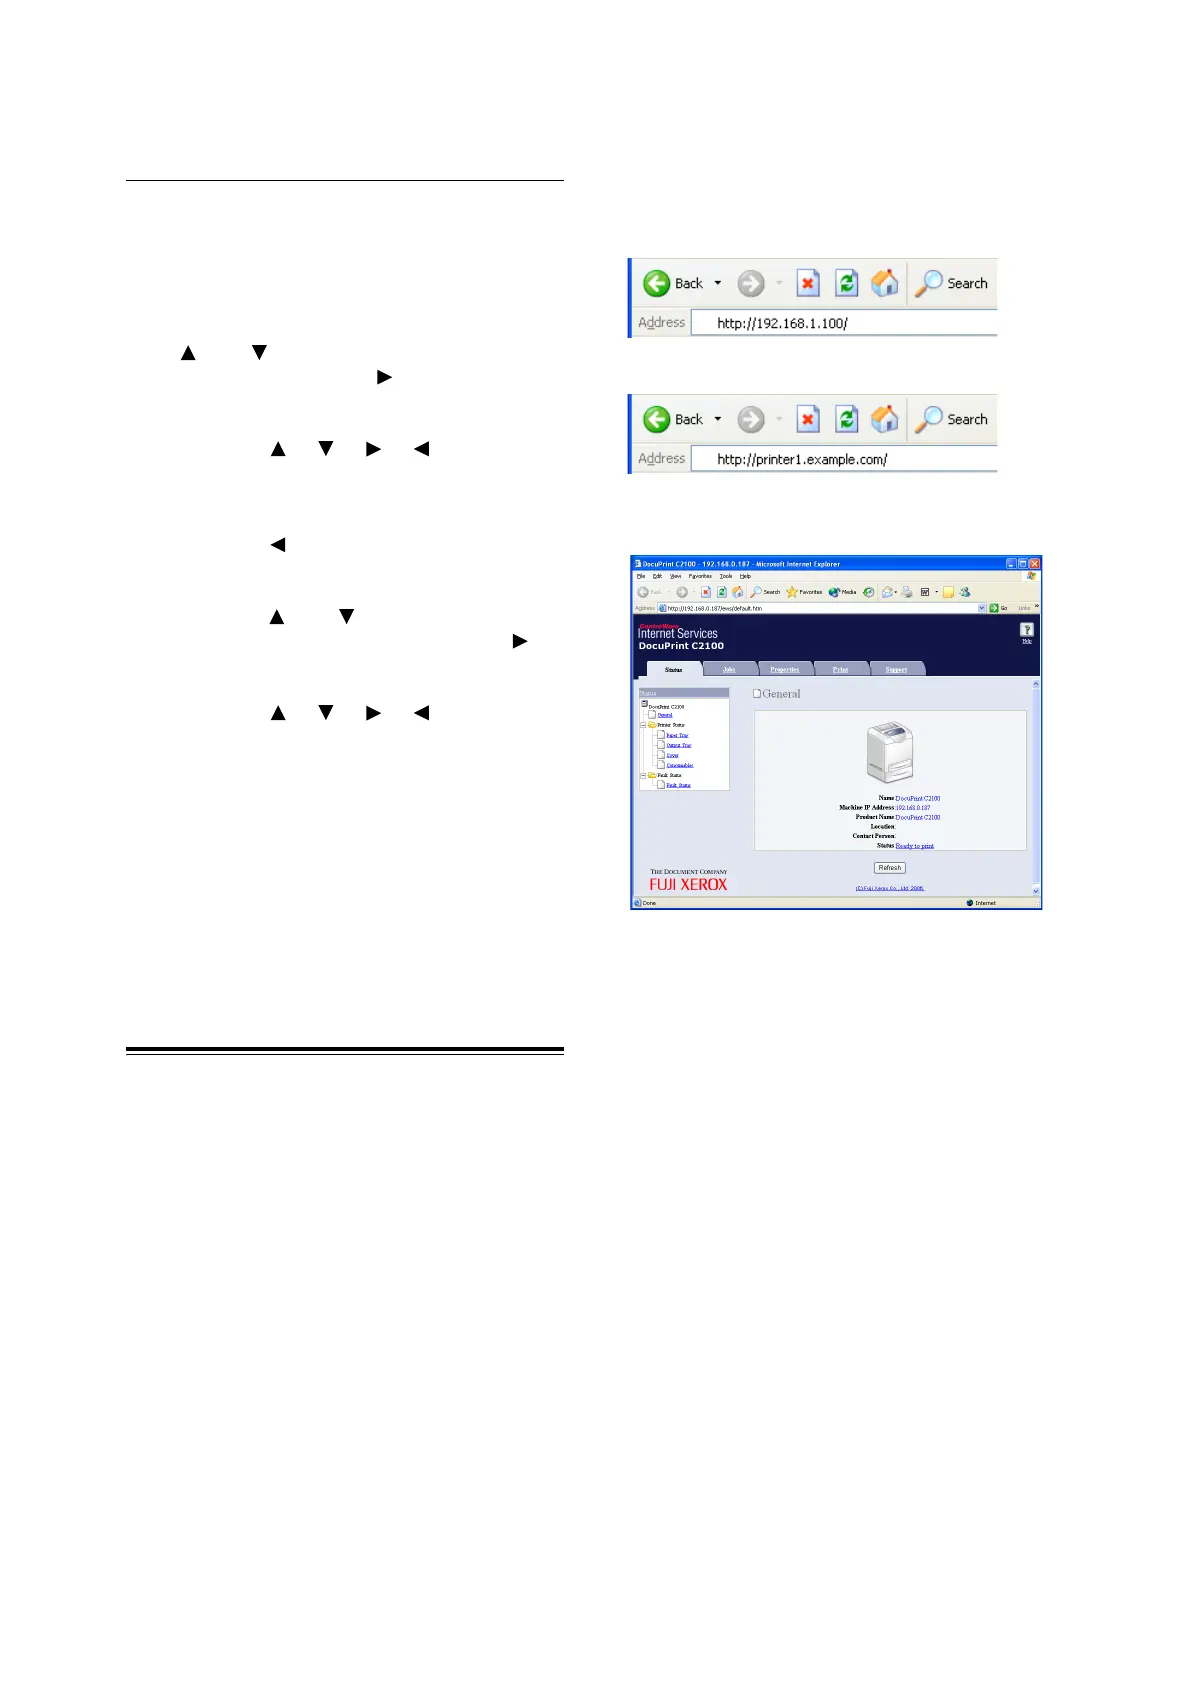
1. Boot up the computer, and start the web
browser.
2. Enter the printer’s IP address or URL in the
address input column of the web browser
and press the <Enter> key.
• Entering URL
The CentreWare Internet Services screen
appears.
• Entering IP address

 Loading...


