Hole Punch Module
2/3 Hole Paper Punch or a 2/4 Hole Paper Punch
Replacing Staples in the Finishers
Depending on your system's finisher configuration, refer to the appropriate sections.
Systems with Basic Finishing Modules (BFM)
See Replacing Staples in the BFM for information on staple replacement.
Systems with Multifunction Finisher (MFF)
There are two stapler mechanisms in the Multifunction Finisher (MFF):
• Main Tray Stapler
• Booklet Tray Stapler
When the Xerox Nuvera has used all of the staples in either of the staplers, an alert will appear in the
system messages portion of the UI.
Note
The Main Stapler cartridge must be completely empty before you can remove the old container.
To replace staples
Double-click the system alert to see details on the action needed, as well as the location of the stapler
needing attention.
See Contacting Xerox to get the correct part number for this CRU.
Main Tray Stapler
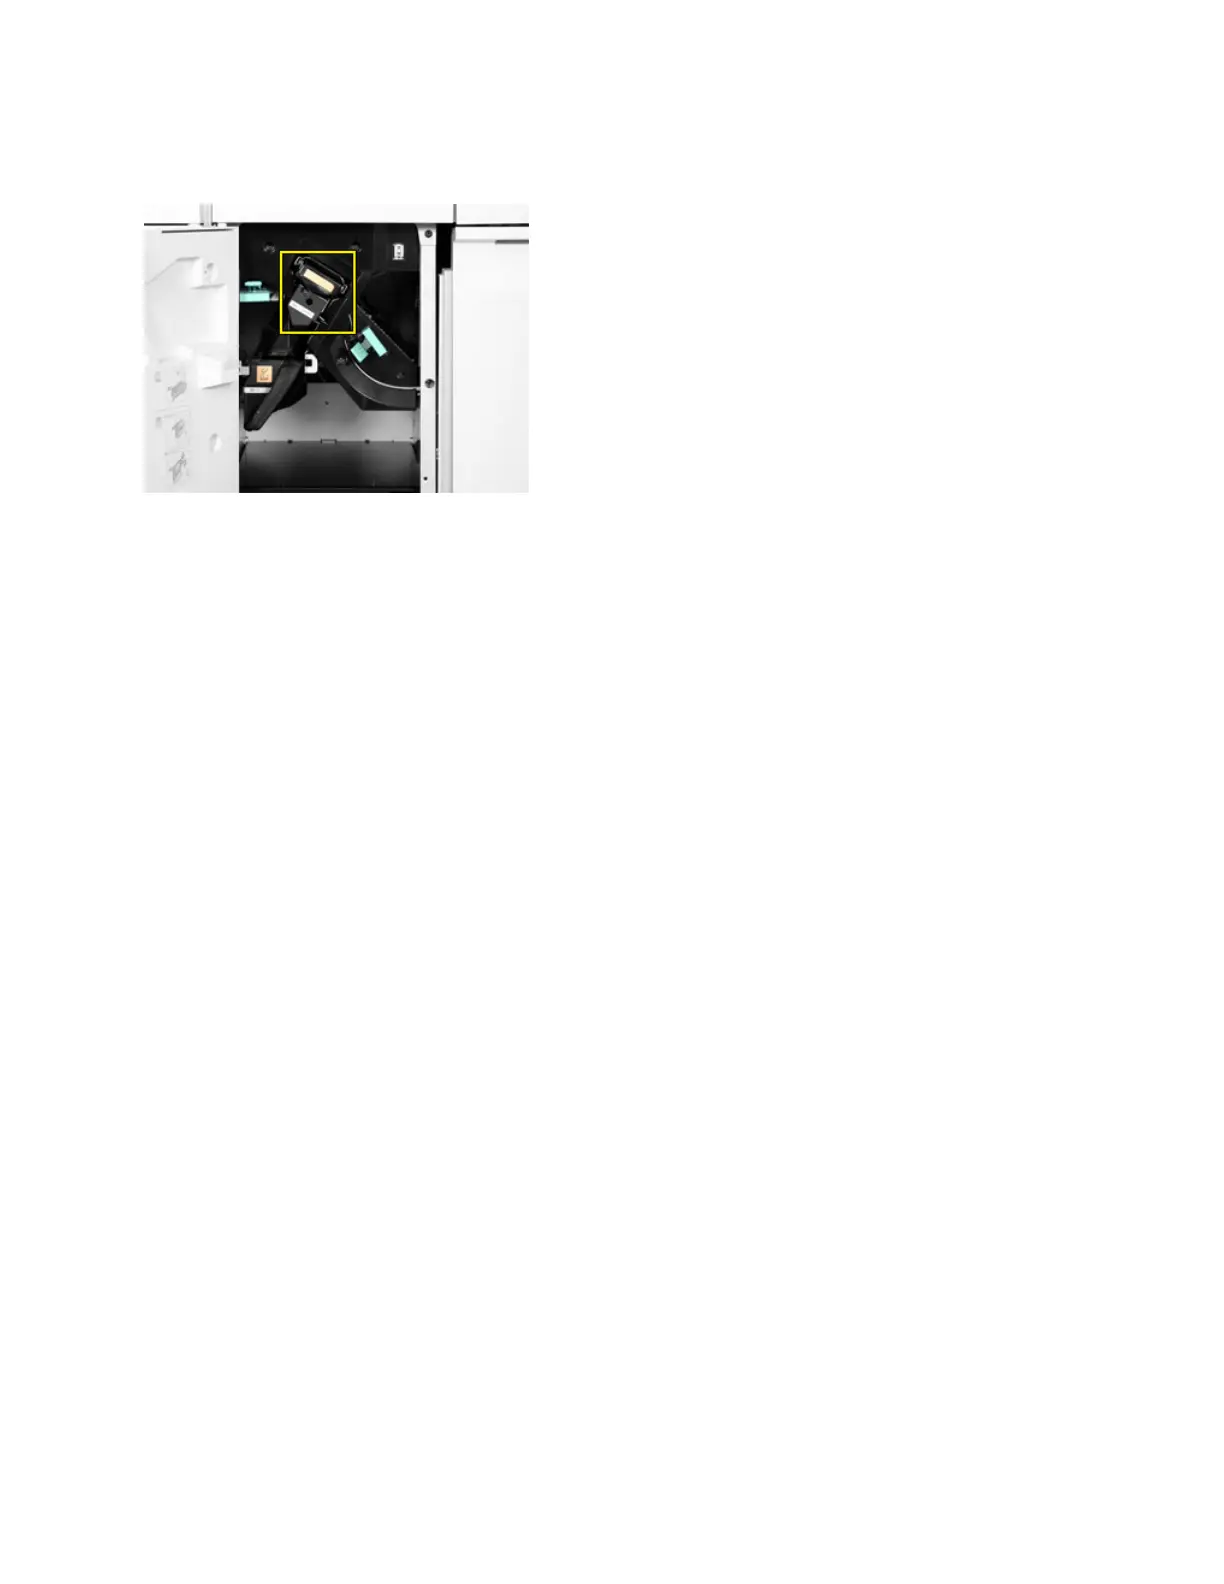
1. Once you have identified the location of the stapler, open the access panel and locate the stapler
housing. It is identified with a pictorial representation of a staple.
2. Grasp the stapler housing drawer handle and pull out towards you.
3. Grasp the stapler cartridge handle. To remove, move it upwards, then pull out the entire cartridge.
15-5Xerox
®
Nuvera
®
User Guide and Training Aid (UGTA)
Replacing Consumables
 Loading...


