3 Loading Paper
42
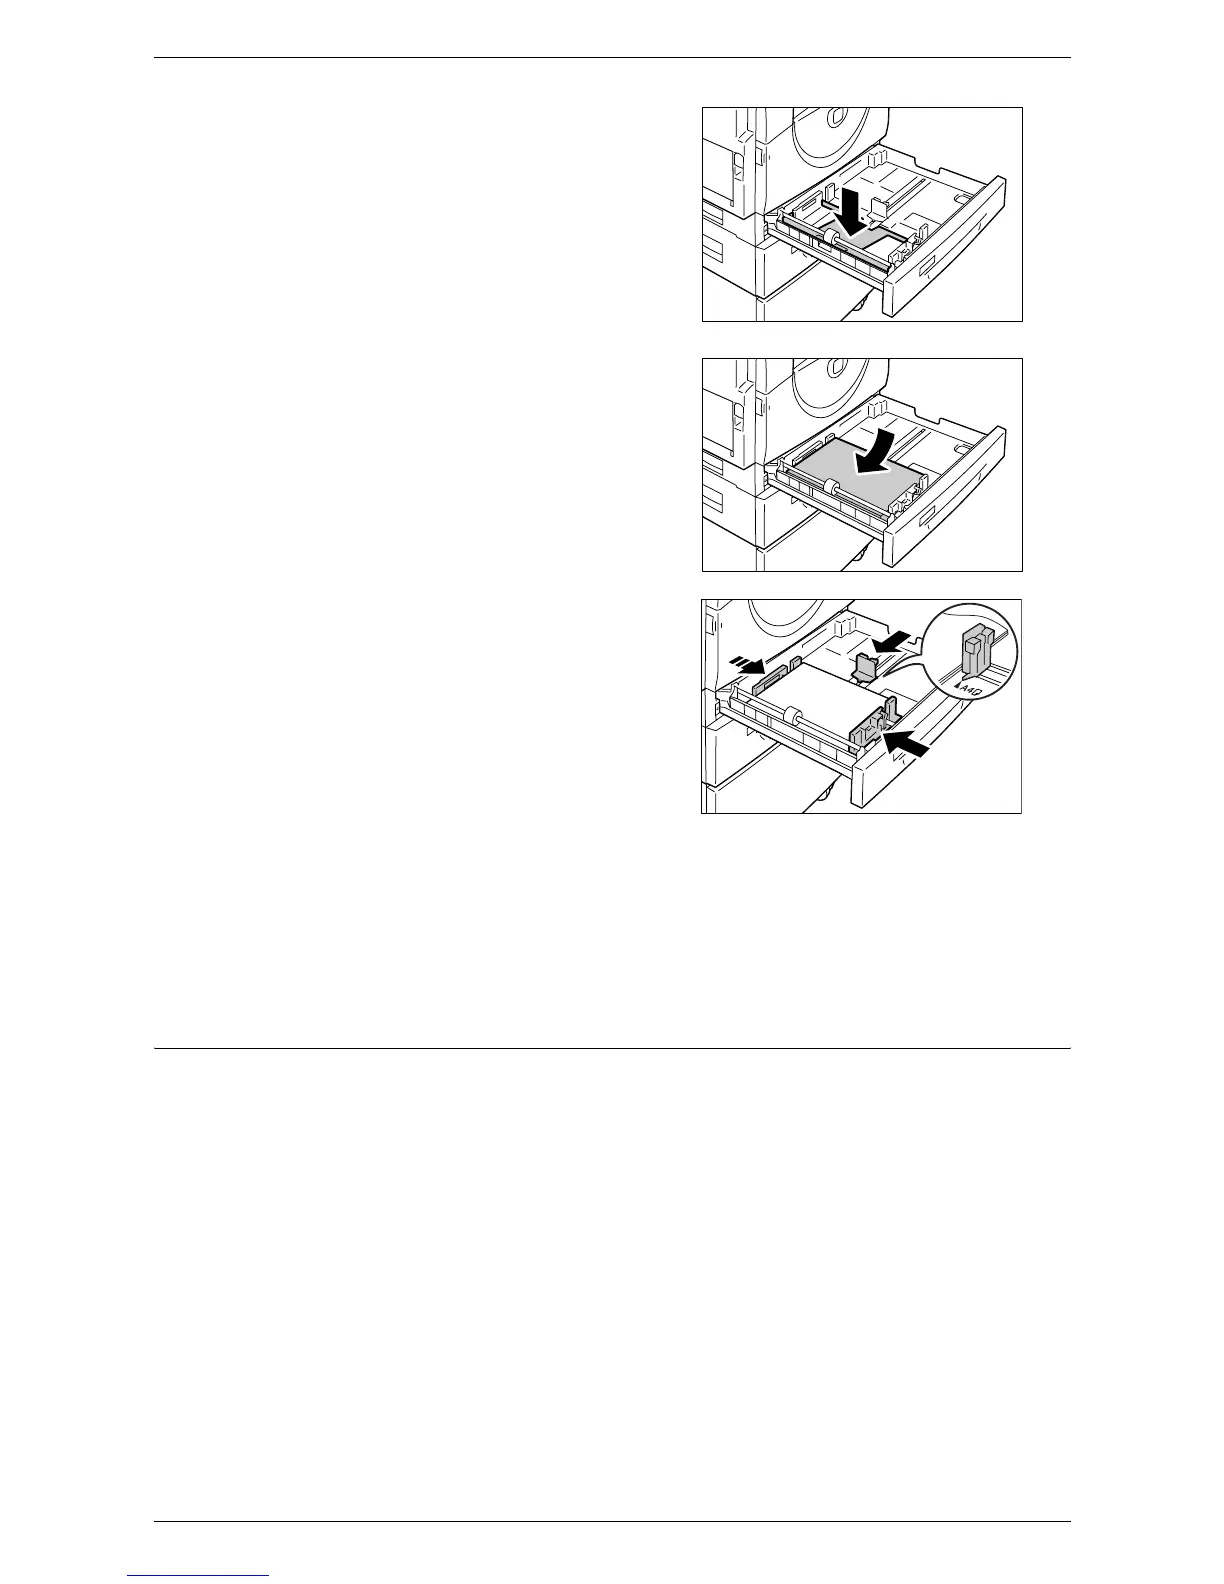
2.
Push down the metal plate to the
bottom of the tray.
NOTE: Do not add a new stack of paper on
top of the remaining paper in the tray.
Remove the remaining paper in the tray, put
it on top of the new stack of paper, align the
edges neatly, then load the stack of paper
in the tray. This reduces the possibility of a
paper jam.
3.
Load paper neatly and tightly against
the left corner of the tray, with the side
to be printed facing up.
NOTE: Do not load paper above the
maximum fill line as it may cause a paper
jam or a machine malfunction.
4.
Adjust the three paper guides to just
touch the edges of the paper, and align
the arrow on the right paper guide with
the appropriate paper size marking on
the label.
NOTE: If you do not adjust the paper
guides correctly, it may result in a paper
jam.
NOTE: If loading a relatively thin stack of
paper in the tray, when tightly adjusting the
right paper guide up against the edge of the paper, the stack of paper can become
warped. This will not result in a paper jam as long as the paper guide arrow is correctly
aligned with the appropriate paper size marking on the label.
5.
Push Tray 1 gently back into position.
Loading Paper in Tray 2
If the machine runs out of paper in Tray 2 during copying or printing, the Tray 2 indicator
on the Machine Diagram (mimic) flashes, and the error code appears in the Display.
Copying or printing automatically resumes when a sufficient amount of paper is loaded
in Tray 2.
The following procedure describes how to load paper in Tray 2.
NOTE: Paper Tray 2 is an optional accessory.
NOTE: Before loading paper in the tray, fan the edges. This separates any sheets of
paper that are stuck together, and reduces the possibility of paper jams.