INSTALL
1. Place the hood onto the lift truck frame.
2. Install the hood hinge mount screws and nuts, lo-
cated in the rear of the hood, and tighten to
38 N•m (28 lbf ft). See Figure 9.
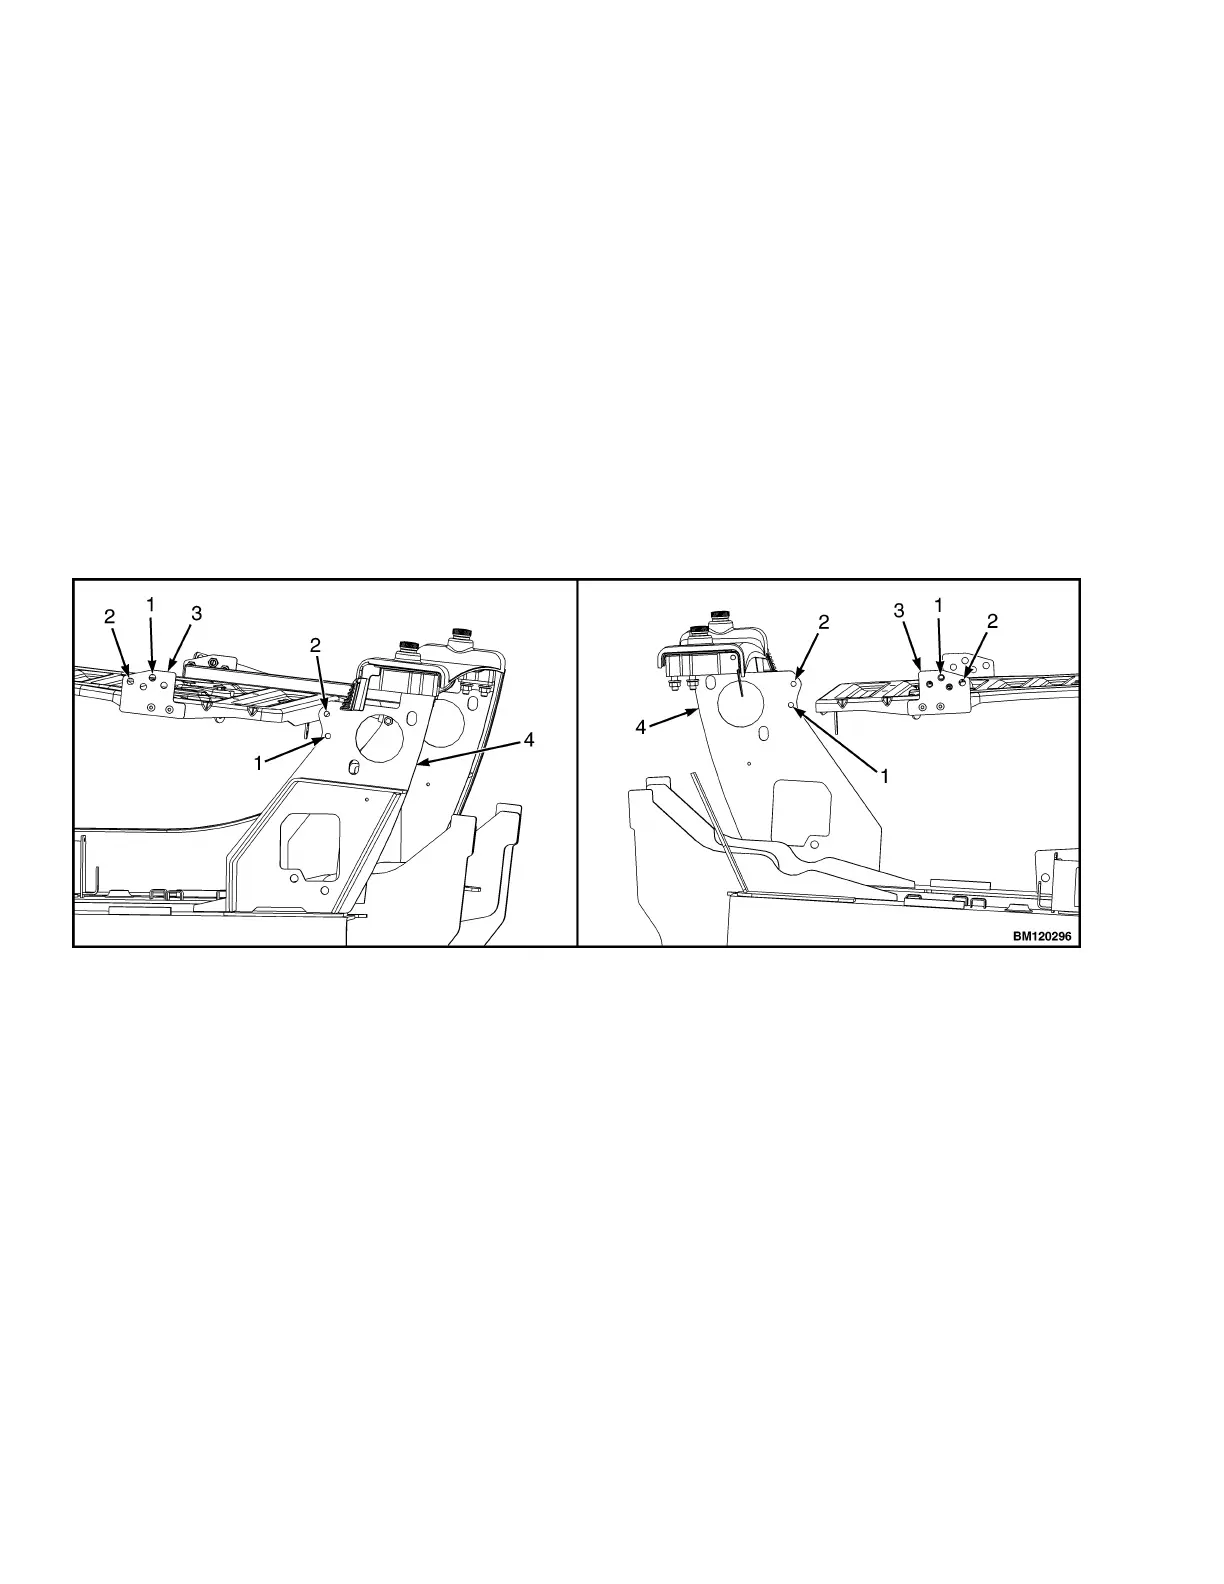
3. Align the ball studs in the gas springs with holes
in the gas spring mounting bracket and hood
mount. See Figure 10 for holes to use depending
on type of seat being installed. Install nuts on ball
studs to attach gas springs to the hood. Tighten
nuts to 19.2 N•m (170 lbf in).
4. Install latch striker in highest slot position. Check
that latch striker is in center of jaws of hood latch
when hood closes. Open and close the hood to
ensure that the center pin strikes the hood latch
properly and that the stop screw contacts the
frame. A properly closed hood MUST click twice
on the hood latch. If the hood latch does not close
properly, loosen the capscrews on the back of the
center pin and adjust the center pin up or down as
required for correct alignment. See Figure 11.
5. Push down until hood just touches rubber
bumper. Make sure latch striker is still in center of
hood latch. Open hood and tighten capscrews for
latch.
6. Check operation of hood latch. Have an operator
sit in the seat. Make sure hood is fully closed (two
clicks). Also check that hood touches rubber
bumper. If necessary, repeat Step 4 and Step 5.
A. LEFT SIDE B. RIGHT SIDE
1. FULL SUSPENSION SEAT
2. NON-SUSPENSION SEAT
3. GAS SPRING MOUNTING BRACKET
4. HOOD MOUNT
Figure 10. Gas Spring and Seat Hole Alignment
Hood, Seat, and Side Covers Replacement 0100 YRM 1766
10
 Loading...