Overhead Guard Replacement
REMOVE
WARNING
DO NOT operate the lift truck without the over-
head guard correctly fastened to the lift truck.
WARNING
DO NOT weld mounts for lights or accessories to
legs of the overhead guard. Changes that are
made by welding, or by drilling holes that are too
big or in the wrong location, can reduce the
strength of the overhead guard.
See your dealer for Yale lift trucks BEFORE per-
forming any changes to the overhead guard.
NOTE: The lifting device can be connected to any
number of positions on the overhead guard depend-
ing upon the lifting device available. The ideal choices
are a four point sling connected to all four corners on
the top of the overhead guard, or a two point sling
connected to two opposite corners of the overhead
guard. If a single point hoist is used, make sure that
the lift point is as close to the center of the overhead
guard as possible. If during the initial start of the lift,
the overhead guard is off balance, lower immediately
and move the hoist to a more centered point.
No welding or drilling on legs of overhead guard is
permitted as per previous WARNING.
1. Connect a lifting device to overhead guard.
NOTE: Note routing of electrical wires prior to discon-
necting. Tag electrical connectors during removal to
aid in installation.
2. Disconnect wires between frame and overhead
guard.
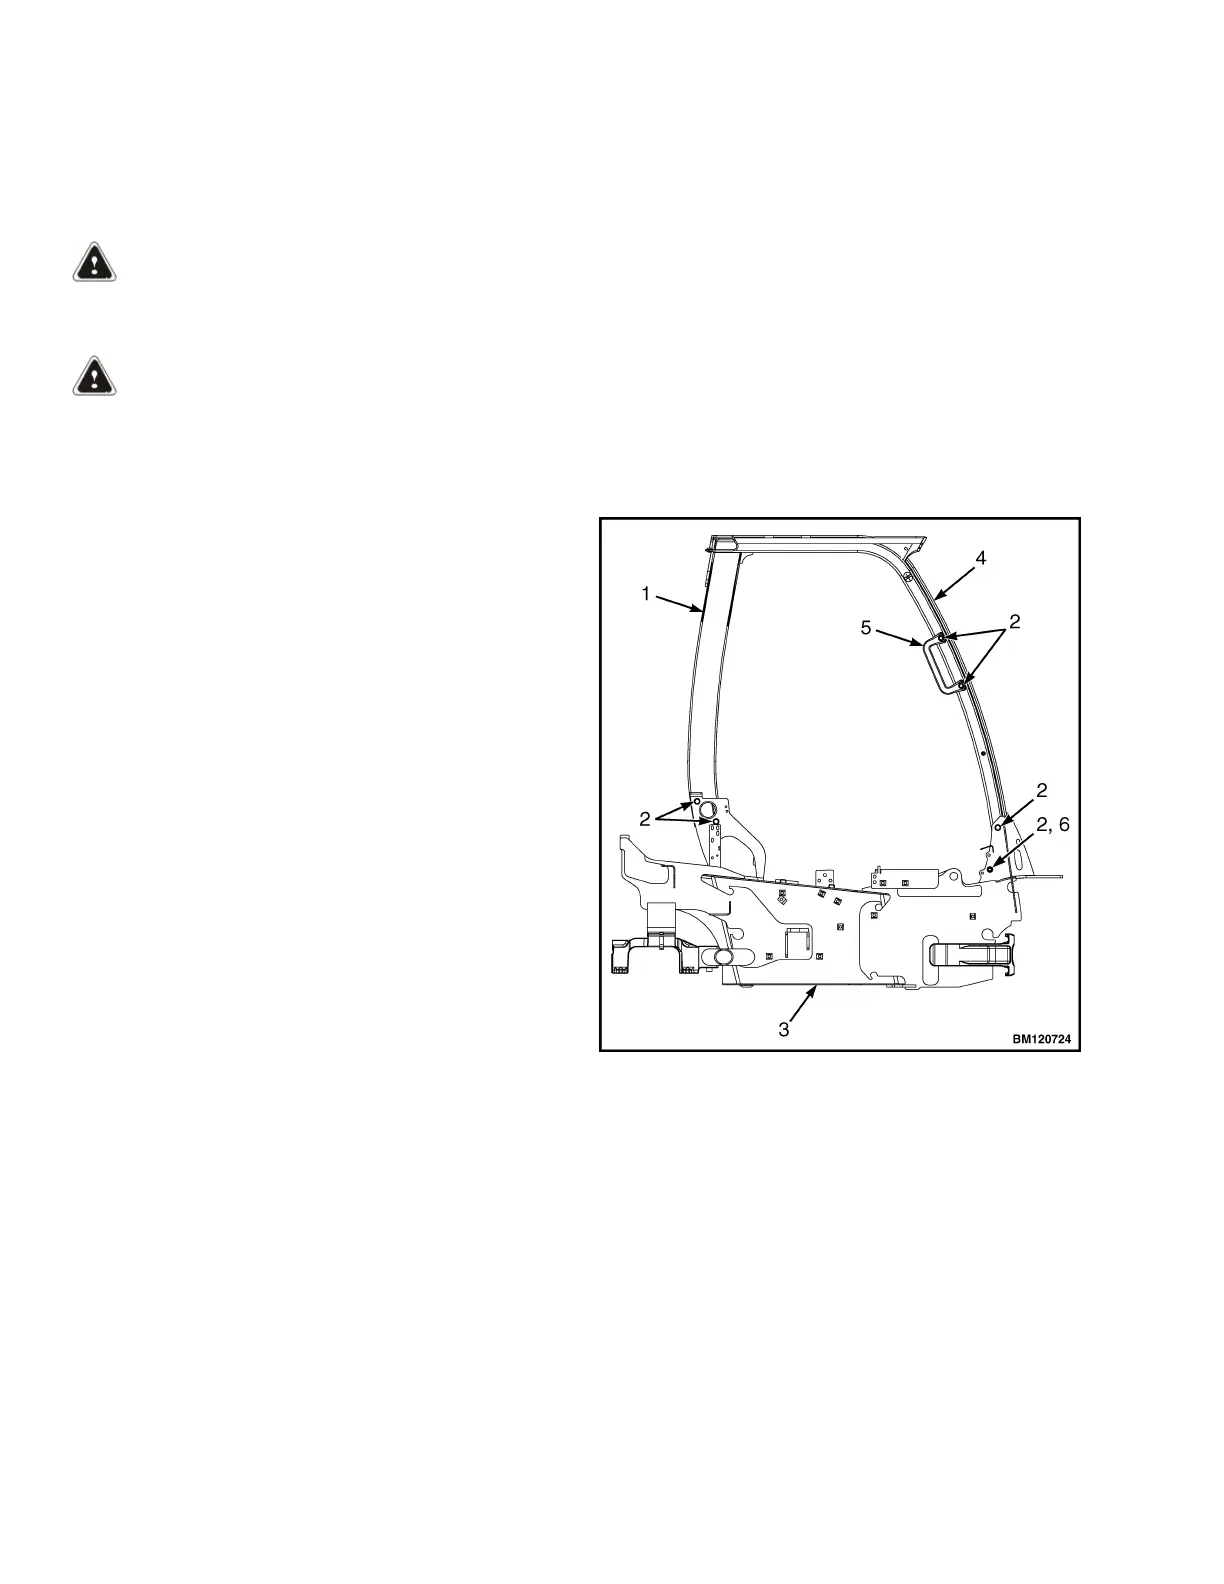
3. Remove capscrews from overhead guard rear
legs and frame. See Figure 18.
4. Remove dash and kick panel from cowl. See sec-
tion Hood, Seat, and Side Covers Replacement
for removal procedures.
5. Remove capscrews from overhead guard front
legs and frame. See Figure 18.
NOTE: When overhead guard is lifted from the
frame, make sure that any electrical wires are moved
through the holes in the frame so that they are not
damaged.
6. Using lifting device, remove overhead guard from
frame. See Figure 18.
7. Remove capscrews and handle from overhead
guard. See Figure 18.
1. OVERHEAD GUARD REAR LEG
2. CAPSCREW
3. FRAME
4. OVERHEAD GUARD FRONT LEG
5. HANDLE
6. NUT
Figure 18. Overhead Guard
Overhead Guard Replacement 0100 YRM 1766
18
 Loading...