RX-V1700/DSP-AX1700
36
RX-V1700/
DSP-AX1700
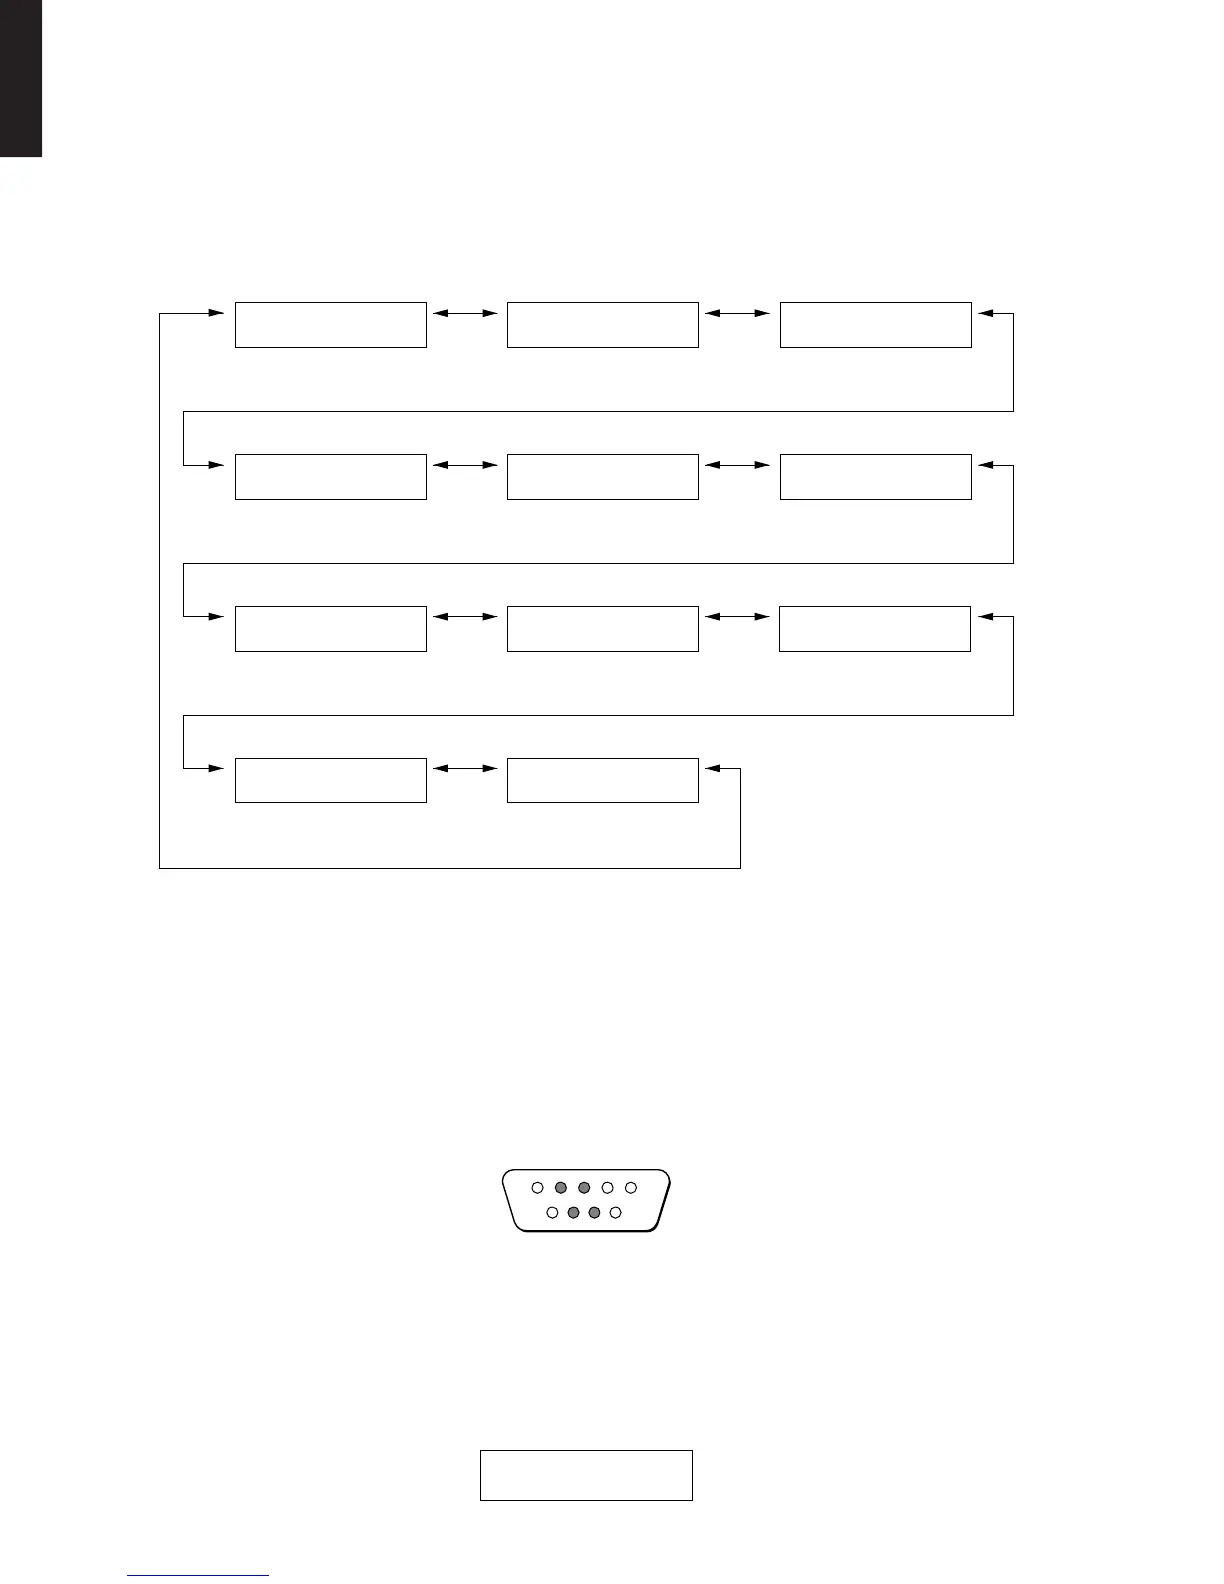
9. MANUAL TEST
The noise generator with a built-in DSP outputs the
test noise through the channels specified by the sub-
menu.
The noise frequency for LFE is 30 to 80 Hz. Other than
that, the noise frequency is 500 to 2 kHz.
TEST ALL TEST FRONT L TEST CENTER
TEST FRONT R TEST SURROUND R TEST SURROUND BACK R
TEST SURROUND BACK L
Noise is output from all channels.
全チャンネルからノイズを出力
Noise is output from the FRONT L channel.
FRONTLチャンネルからノイズを出力
Noise is output from the CENTER
channel.
CENTERチャンネルからノイズを出力
Noise is output from the FRONT R channel.
FRONTRチャンネルからノイズを出力
Noise is output from the SURROUND
BACK L channel.
SURROUNDBACKLチャンネルからノイズを出力
Noise is output from the SURROUND R
channel.
SURROUNDRチャンネルからノイズを出力
TEST SURROUND L
Noise is output from the SURROUND L
channel.
SURROUNDLチャンネルからノイズを出力
Noise is output from the SURROUND
BACK R channel.
SURROUNDBACKRチャンネルからノイズを出力
TEST LFE
Noise is output from the SUB
WOOFER channel.
SUBWOOFERチャンネルからノイズを出力
TEST PRESENCE L
Noise is output from the PRESENCE L
channel.
PRESENCELチャンネルからノイズを出力
TEST PRESENCE R
Noise is output from the PRESENCE R
channel.
PRESENCERチャンネルからノイズを出力
9.MANUAL TEST
TEST ALL
9.MANUAL TEST
TEST FRNT L
9.MANUAL TEST
TEST CENTER
9.MANUAL TEST
TEST SB R
9.MANUAL TEST
TEST SURR R
9.MANUAL TEST
TEST FRNT R
9.MANUAL TEST
TEST SB L
9.MANUAL TEST
TEST SURR L
9.MANUAL TEST
TEST PRES L
9.MANUAL TEST
TEST PRES R
9.MANUAL TEST
TEST LFE
9. MANUALTEST
DSP内蔵のノイズ発生回路によって、サブメニューで
指定したチャンネルへテストノイズを出力します。
LFE用のノイズ周波数は30〜80Hz、それ以外はノイズ
周波数500〜2kHzとなります。
10.RS-232C
This menu is used to check transmission of the data
and the flow port of the hardware.
With the power turned off, short between pins No.2
(RxD) and No.3 (TxD), and between pins No.7 (RTS)
and No.8 (CTS) of the RS-232C terminal. (Be sure to
turn off the power when shorting the pins.)
Start DIAG and select the menu.
There are two sub-menu items.
10.RS-232C
データ送受信チェック、ハードウェアフローポート
チェックを行うメニューです。
パワーオフ状態にしてから、RS-232C端子の2ピン
(RxD)と3ピン(TxD)、7ピン(RTS)と8ピン(CTS)を
ショートさせます。(ショートさせるときは必ず電源を
切ってください。)
ダイアグを起動してメニューを選択します。
サブメニューは2つあります。
10.RS-232C
TX DATA: NG
TX DATA
The sub-menu is used to check transmission of the test
data. “OK” appears when the data is transmitted properly
and “NG” when it is not.
In this mode, NULL command transmission is continued
after the test command is transmitted.
RxD
RTS CTS
TxD
123
6789
45
TXDATA
テストの送受信チェックを行います。正常に送受信完了し
た場合、OKと表示します。正常に送受信しなかった場
合はNGと表示します。
このモードでは、テストコマンド送信後、200msごとに
NULLコマンド(無効なコマンド)を送信し続けます。
 Loading...