92
11
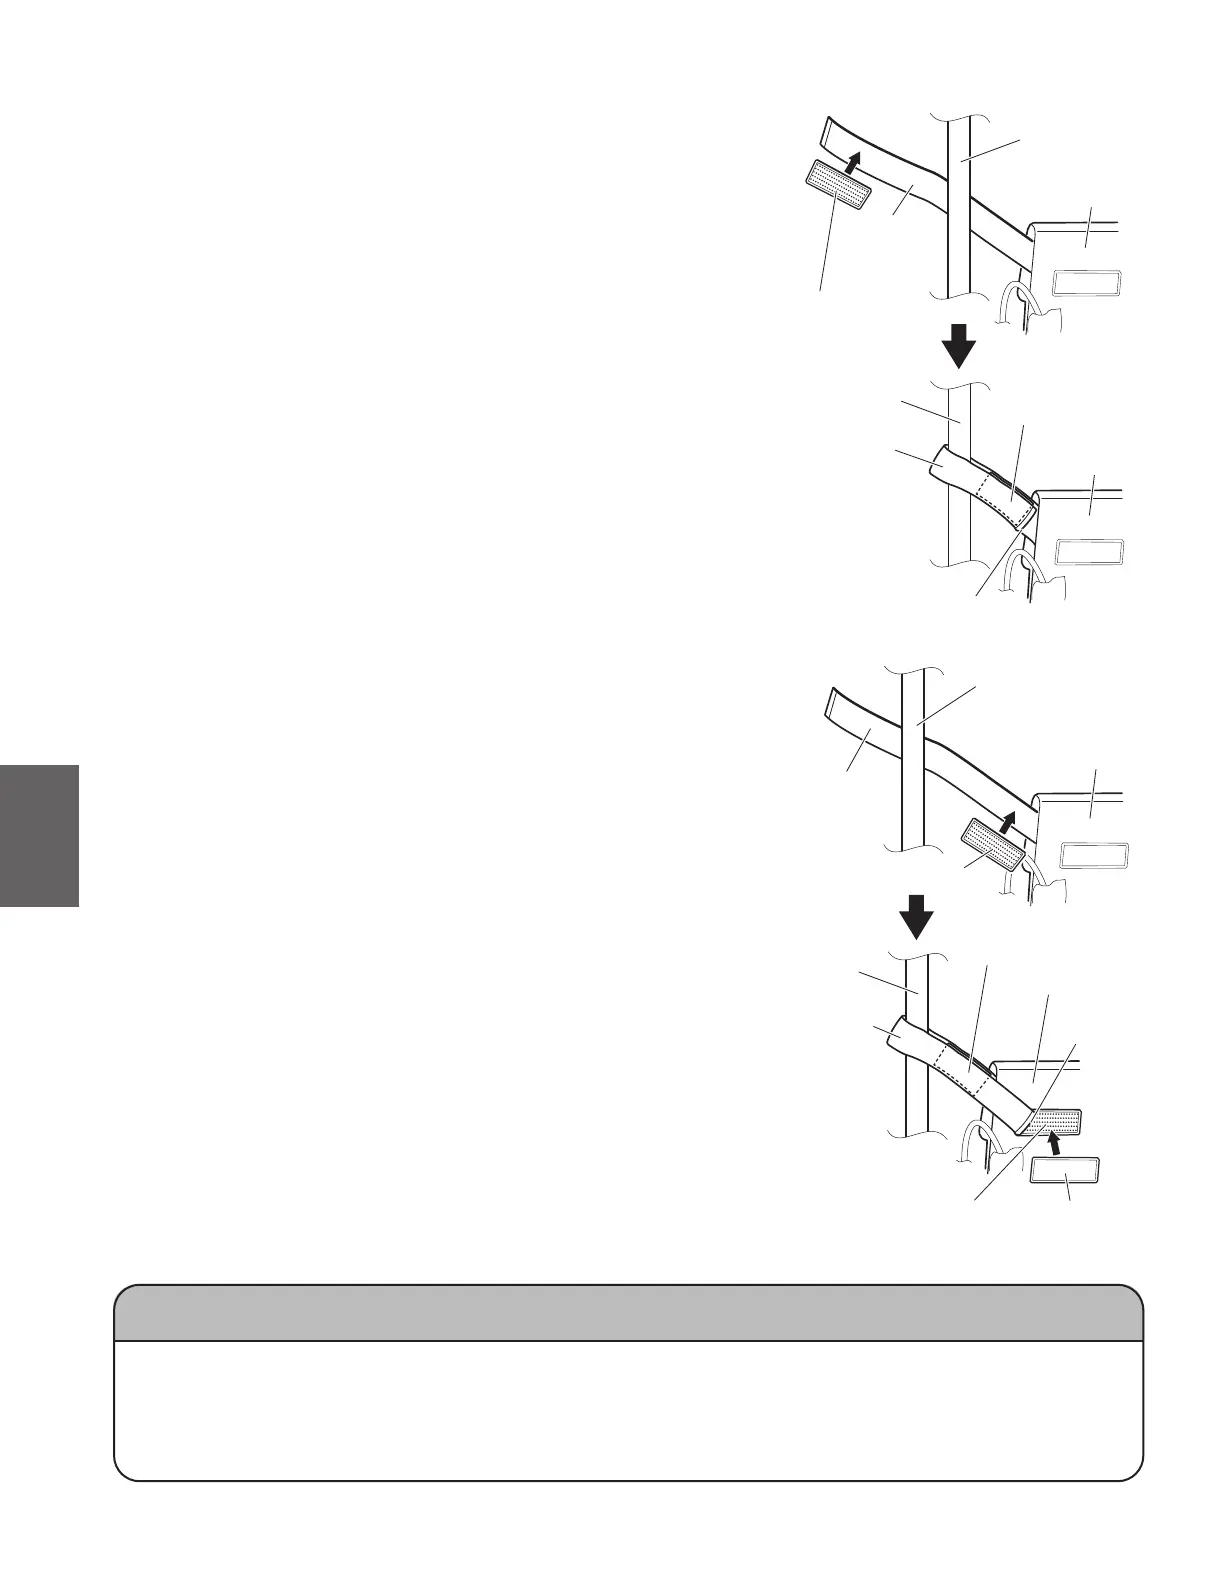
Case of Battery Bag Band Tip Part not Reaching to Battery
Bag
(9) Attach the tting tape aligned to the band part tip of bat-
tery bag.
(10) After feeding the band part of battery bag through the
frame, attach the fitting tape of band edge part to the
band.
Case of Battery Bag Band Tip Part Reaching to Battery Bag
(11) Attach the tting tape aligned to the edge part of hook-
and-loop fastener (female) at the base of battery bag
band part.
(12) After feeding the band part of battery bag through the
frame, attach the fitting tape of band edge part to the
band.
Remove the hook-and-loop fastener (female) attached
to the battery bag once, and attach the surplus band
part tip to the hook-and-loop fastener (male) of battery
bag.
After attached the band, attach the hook-and-loop
fastener (female) to the original position.
Battery Bag
Band Part of
Battery Bag
Band Part of
Battery Bag
Fitting Tape
Frame
Frame
Hook-and-Loop Fastener
(male) of Battery Bag
Hook-and-Loop
Battery Bag
Battery Bag
Band Part of
Battery Bag
Fitting Tape
Fitting Tape
Frame
Frame
NOTICE
● Attachentiresurfaceofttingtapetothebandpartofbatterybag.Otherwise,theremaybe
theriskofbatterybagcomingo.
● Makesurethebandpartofthebatterybagistaut.Aslackorloosebandcouldallowthe
batterybagtocomeoorthebandcouldgetcaughtinmovingparts.