Getting Started
31
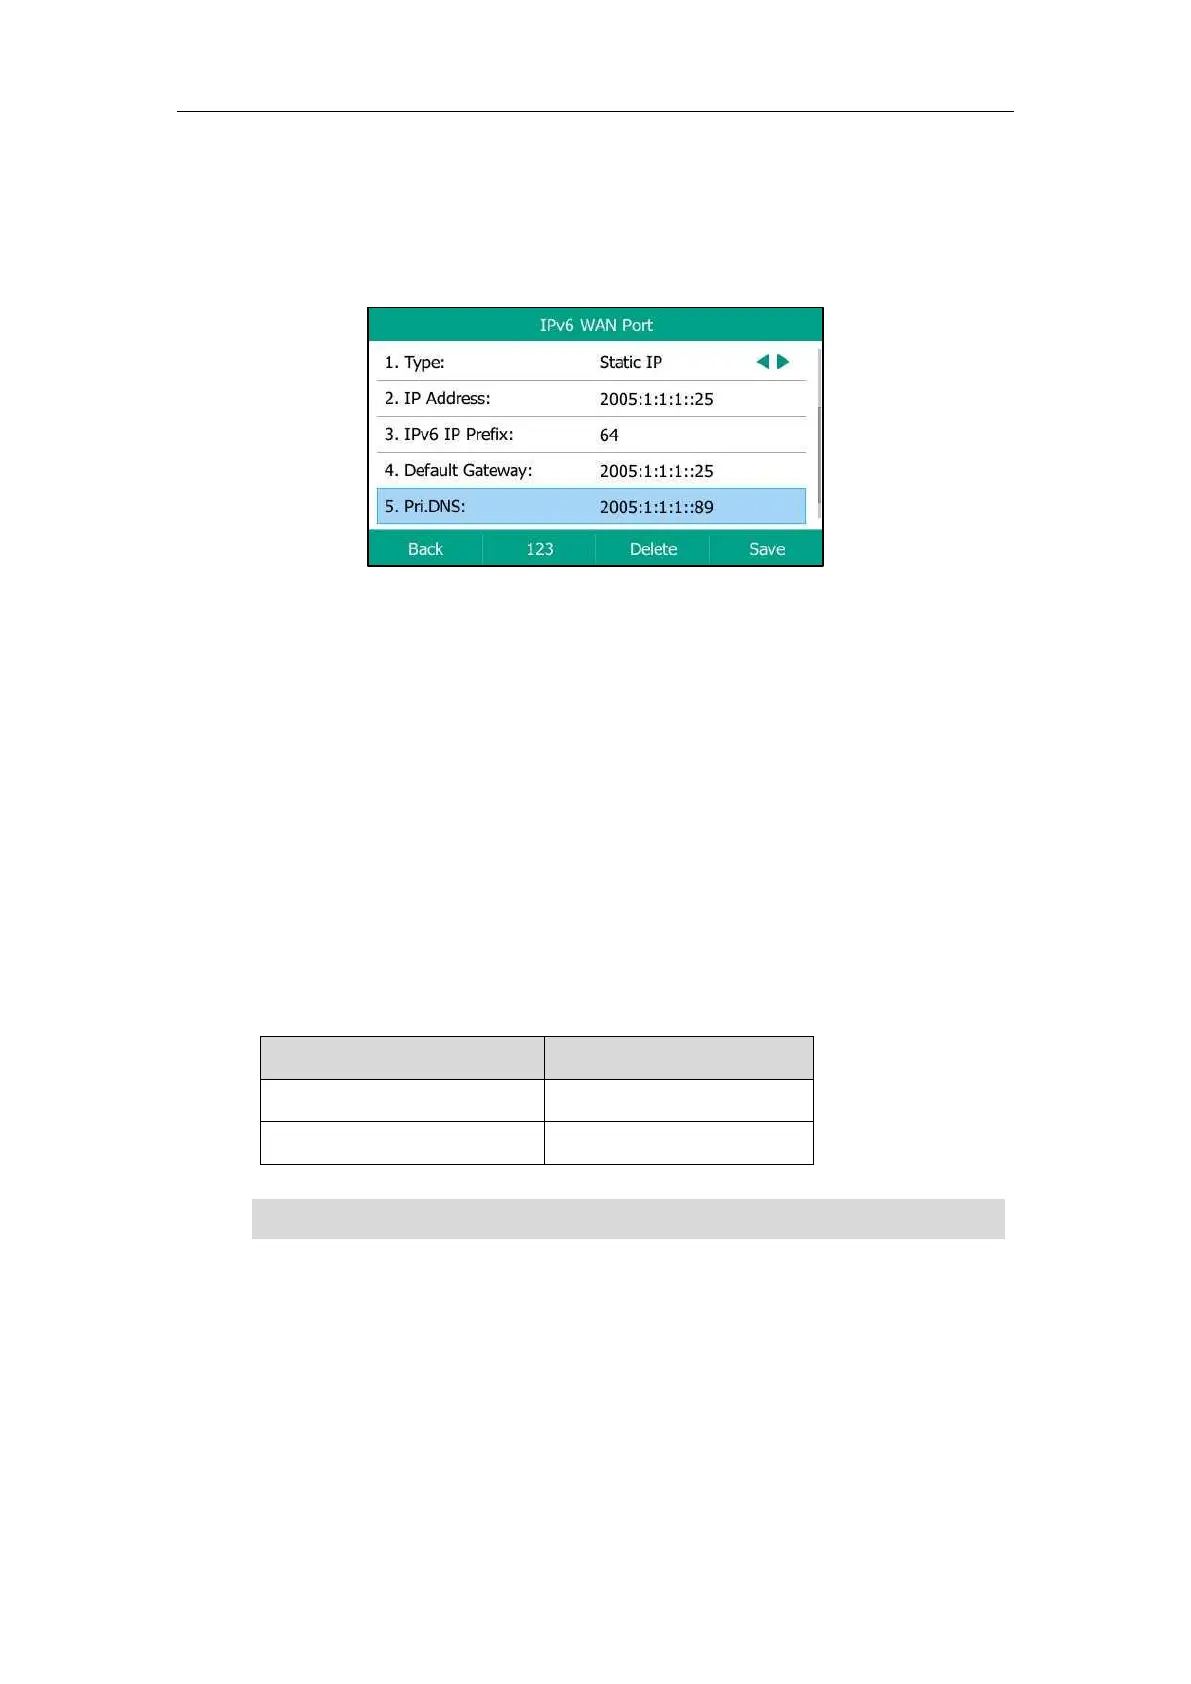
2. Select IPv6 or IPv4 & IPv6 from the IP Mode field.
3. Enter IPv6, and then select Static IP from the Type field.
4. Enter the desired value in the IP Address, IPv6 IP Prefix, Default Gateway, Pri.DNS and
Sec.DNS field respectively.
5. Press Save.
Static IPv6 address is configurable via web user interface at the path Network->Basic.
Registration
Generally, your system administrator will set the phone parameters beforehand, and performs
centralized deployment on all IP phones. In this case, after the phone starts up, it is ready to use
and the account has been registered already. But if the account is not registered, you should
register it manually. You can register one or multiple accounts on the IP phone.
You can configure one or multiple line keys to associate with an account. For more information,
refer to Configuring Multiple Line Keys per Account for more information.
The maximum registered accounts vary from different phone models:
Note
Registering an Account
Procedure:
1. Navigate to Menu->Advanced (default password: admin) ->Accounts.
2. Select a desired account.
3. Select Enabled from the Activation field.
4. Enter the desired value in the Label, Display Name, Register Name, User Name,
Contact your system administrator for the account information.

 Loading...